

A useful Ontario benchmark is C$5,044 for the average repairable auto-insurance claim in the first half of 2023, and that figure could approach C$5,500 in the following year. A small dent can still become a four-figure bill once calibration, refinishing, hidden damage, and replacement parts enter the estimate.
A Whitby driver usually discovers this at the worst possible time. The car has a parking-lot dent, the bumper still looks attached, and there's no warning light on the dash. You expect a quick repair. Then the shop removes a trim panel, checks the sensors, measures the damage, and produces an estimate that looks far larger than the dent itself.
That reaction is understandable, but the estimate isn't necessarily inflated. Modern vehicles turn bodywork into a combination of structural repair, paintwork, electronics, scanning, and safety-system verification. What you're paying for isn't just a repaired panel. It's a documented repair that restores the vehicle properly.
Why a Small Dent Can Come with a Big Estimate
A Whitby driver recently brings in a rear-quarter panel with a parking-lot dent. The damage looks contained, and the first thought is paintless dent repair. After inspection, the repair path changes. The panel needs conventional repair and refinishing, the adjacent panels need blending so the colour matches, and the vehicle's driver-assistance systems require checking because the impact occurred near sensor equipment.
The driver walked in expecting a modest cosmetic job and walked out looking at a four-figure estimate. The surprise came from the work that wasn't visible from the outside.
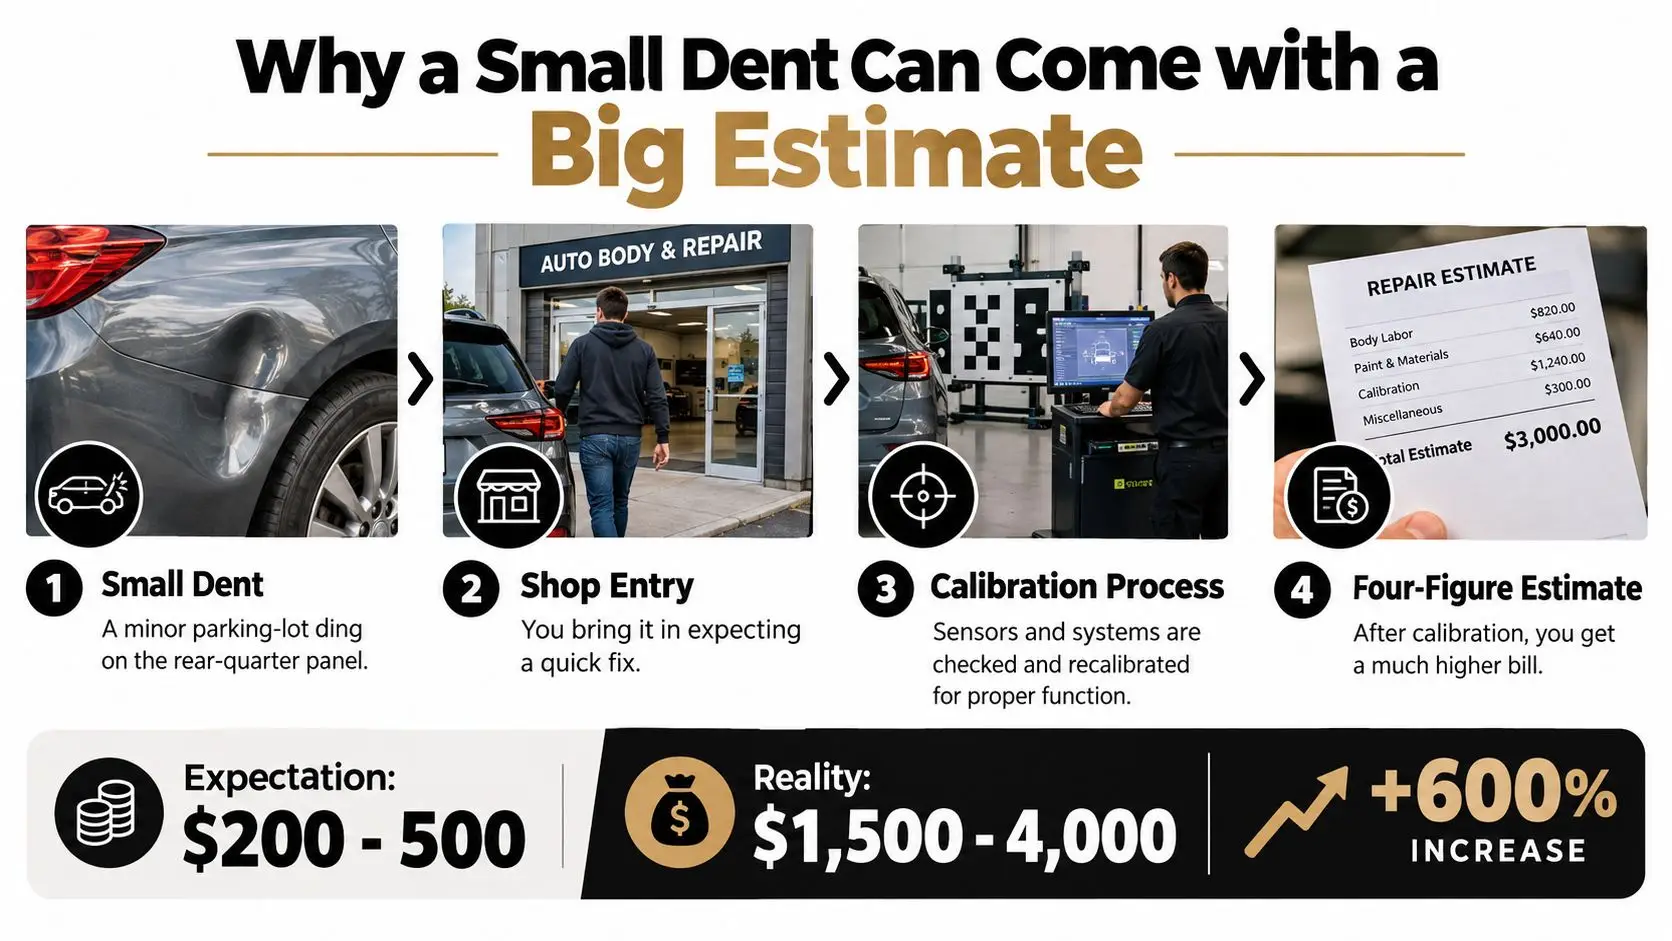
The panel is only one part of the repair
A dented bumper or quarter panel may sit beside radar units, cameras, ultrasonic sensors, wiring, brackets, or mounting points. A panel can look straight while a bracket has moved. A bumper cover can be replaced perfectly and still require a scan or calibration before the vehicle is ready.
The Insurance Institute of Canada's collision-repair analysis, citing Mitchell claims-performance data, reported an average repairable claim of C$5,044 in the first half of 2023, which was 12% higher than the previous year. The same analysis projected that the average could approach C$5,500 in 2024. That isn't a quote for your Civic, F-150, or BMW, but it shows why modern repair bills often reach several thousand dollars.
The analysis also reported that calibration was required on about 10% of repairable Canadian vehicles. For a Whitby driver, the lesson is straightforward. A quote based only on visible damage is incomplete until the shop has considered teardown, parts, paint, structural condition, scanning, and calibration.
Practical rule: Judge an estimate by the operations it includes, not by the size of the dent.
For a minor dent with no paint damage, paintless dent removal in Whitby may be appropriate. Once paint is cracked, metal is stretched, a panel edge is distorted, or safety equipment is involved, the repair belongs in a more detailed assessment.
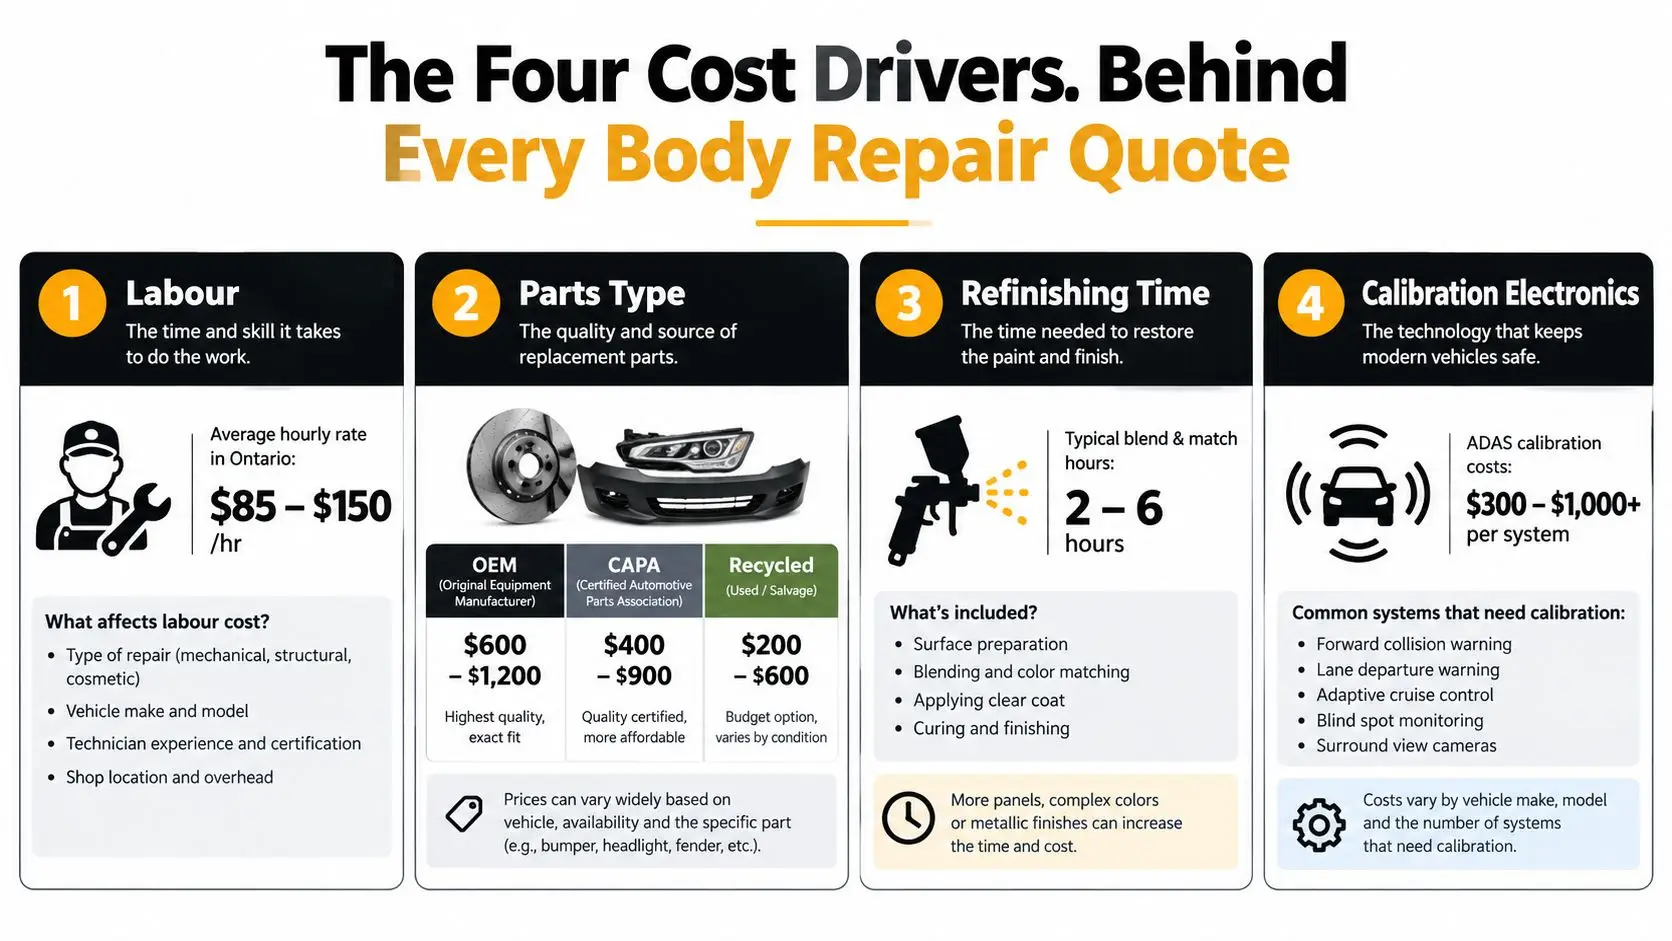
The Four Cost Drivers Behind Every Body Repair Quote
A Whitby driver can approve a bad estimate in seconds by looking only at the total. Read the operations instead. Every body repair quote is built from four cost drivers: labour, parts, refinishing, and electronics. Each line should explain what the shop will do, what it will install, and what must be tested before delivery.
Labour category and rate
Body labour includes removing trim, repairing metal, replacing panels, and reassembling the vehicle. Structural repairs require different work from cosmetic panel repairs, while refinishing has its own labour category. A clear estimate names each operation instead of hiding everything in one blended hourly charge.
The shop's rate pays for technician skill, measuring equipment, training, facility costs, administration, and insurer requirements. The Insurance Institute of Canada's collision-repair analysis reported that Ontario's national average body-work rate rose from C$72 to C$75 per hour over one year. Do not judge a quote by the rate alone. A higher rate with fewer required hours can cost less than a low-rate estimate that leaves out teardown, measuring, or reassembly.
Parts determine more than the purchase price
The estimate should identify whether each replacement is an OEM part, aftermarket part, recycled part, or certified alternative. That choice affects fit, finish, availability, sensor mounting, corrosion protection, and documentation. Ontario insurance claims can also involve different priorities for the insurer, repairer, and vehicle owner, so ask who approved the selected part.
Ask these questions before authorizing the work:
- What part was quoted? Get the manufacturer, description, and part number.
- Is it new or recycled? A recycled door or bumper may work well, but its condition and preparation still need review.
- Does the part carry the required mounting points? A bumper can look correct and still fail to support sensors properly.
- Who approves the choice? Confirm whether the insurer, shop, and vehicle owner agree.
A lower parts price is not a saving if poor fitment creates extra preparation, delays, or a calibration requirement.
Refinishing spreads beyond the damaged area
Paint work usually extends beyond the dent itself. The technician may need to prepare the repaired panel, apply colour, add clear coat, and blend into an adjacent panel. Metallic and pearl finishes demand careful matching, particularly when the vehicle's paint has faded from sun exposure.
The estimate should list the repaired panel, blend panels, refinishing operations, and paint materials separately. A fender repair may include part of the door, while a quarter-panel repair may require blending into the rear door. If those lines are missing, ask whether the colour match and blend work are included or likely to appear after teardown.
Electronics add a second repair layer
ADAS, or advanced driver-assistance systems, may include forward cameras, radar, lane-keeping equipment, blind-spot sensors, parking sensors, and surround-view cameras. Damage or replacement involving a bumper, grille, mirror, windshield, quarter panel, or tailgate can change a sensor's position or viewing angle.
A detailed breakdown of ADAS calibration cost shows that calibration may use manufacturer-specific targets on a level floor or a controlled road test for dynamic calibration. The ADAS calibration service information describes common California estimate ranges of approximately US$200 to US$800 for one repair and US$800 to US$1,500 when several systems are involved. Those are not Ontario quotes. The practical point is clear: calibration belongs on its own estimate line, with the required scan or test identified.
Common Body Repairs and What They Typically Cost
The honest answer to “what does this repair cost?” is that Ontario doesn't have one dependable price list for every vehicle and shop. A small steel dent, a damaged sensor bracket, and a quarter panel with hidden structural damage may look similar in a photograph but require completely different operations.
Use the table as a decision guide, not as a substitute for a written estimate. The only broad Ontario benchmark available here is the average repairable insurance claim cited earlier, and it isn't a guaranteed price for an individual job.
| Repair Type | Typical Ontario Price Range |
|---|---|
| Paintless dent repair | Vehicle-specific estimate required. Usually considered for accessible dents without broken paint or stretched metal. |
| Conventional dent repair and paint | Vehicle-specific estimate required. Cost rises with metal distortion, filler work, colour matching, and blending. |
| Bumper cover repair and refinishing | Vehicle-specific estimate required. Check for sensor mounts, parking sensors, hidden reinforcement damage, and calibration. |
| Bumper cover replacement and refinishing | Vehicle-specific estimate required. Confirm the part type, paint materials, hardware, scans, and calibration. |
| Full panel replacement | Vehicle-specific estimate required. Ask whether the estimate includes corrosion protection, seam sealer, blending, and reassembly. |
| Paint correction or local respray | Vehicle-specific estimate required. A polishable surface defect is a different job from damaged paint that needs preparation and refinishing. |
| Paint protection film | Vehicle-specific estimate required. Coverage area, film choice, preparation, and panel condition affect the quote. |
| Collision repair | Vehicle-specific estimate required. Teardown may reveal structural, suspension, airbag, electrical, or sensor work. |
A bumper repair cost assessment should separate cosmetic repair from replacement and should identify whether the bumper contains parking or collision-avoidance equipment. A bumper that only needs refinishing is in a different category from one that has damaged brackets, wiring, radar mounts, or impact absorption components.
The quick rule is simple. If the damage is a clean, shallow dent and the paint is intact, ask about paintless dent repair. If the paint is broken, expect refinishing. If a panel is cracked, sharply folded, or close to sensors, expect a more involved estimate. If the estimate approaches the vehicle's value, discuss insurance and total-loss implications before authorizing teardown.
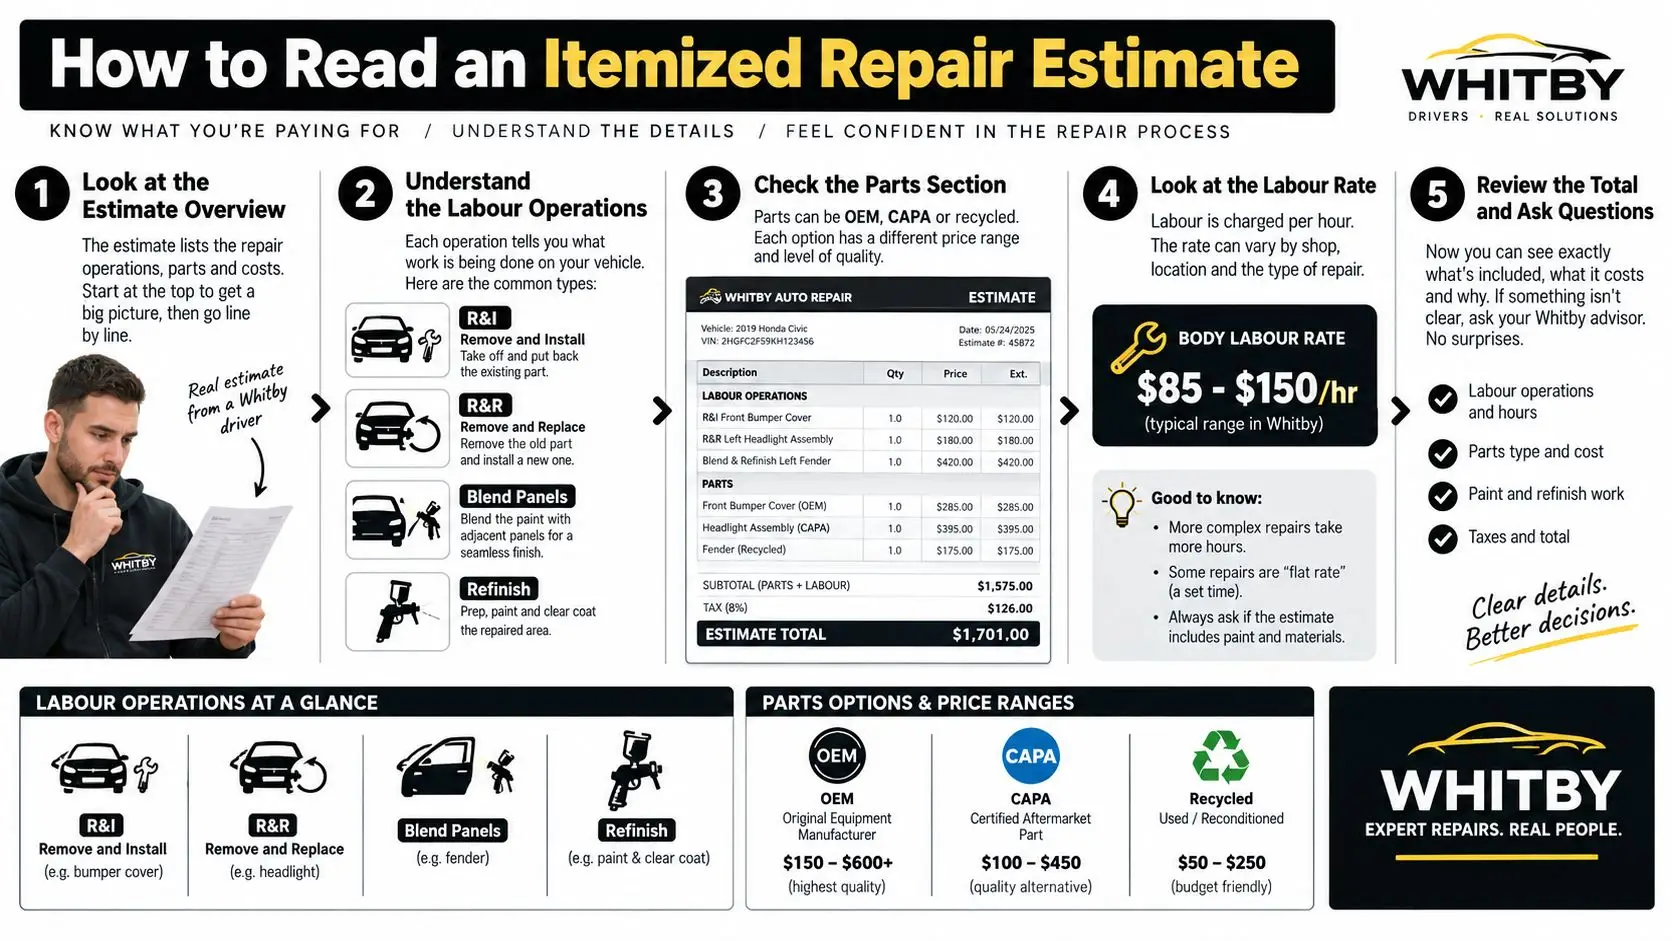
How to Read an Itemized Repair Estimate
Don't approve a body estimate because the total looks reasonable. Read the operations first.
A proper estimate for a fender and bumper repair may contain many lines because each line represents a different task. The abbreviations matter:
- R&I, or remove and install: The original part comes off and goes back on.
- R&R, or remove and replace: The damaged part is removed and a replacement is installed.
- Repair: The technician restores the original part rather than replacing it.
- Blend: Colour is feathered into an adjacent panel to create a consistent appearance.
- Refinish: The panel is prepared, painted, and clear-coated.
- Scan or calibration: The vehicle's electronic systems are checked, aimed, or verified.
A line-by-line estimate audit
Start with the damaged panel. Confirm whether the estimate says repair or replacement. If replacement is listed, check whether it identifies OEM, aftermarket, or recycled supply.
Then inspect the labour cluster. Look for body labour, structural labour if relevant, refinishing labour, and reassembly. A quote that lists one large labour amount without describing the operations is harder to assess.
Next, find parts and materials. Hardware, clips, mouldings, adhesives, seam sealer, corrosion protection, paint materials, and shop supplies may appear separately. Those lines aren't automatically improper, but the shop should explain them when asked.
Sublet work deserves attention too. Towing, glass work, alignment, scanning, calibration, and specialist structural measurement may be performed by another provider. Ask whether the estimate includes a sublet charge and whether any markup applies.
The red flags are duplication and omission. Two operations may be combined by estimating software, or a necessary operation may be missing until teardown. Don't accuse a shop of padding the estimate because it has many lines. Ask what each line accomplishes and whether it is required by the vehicle manufacturer or the repair method.
A short estimate isn't automatically efficient. It may simply leave the difficult work for a supplement.
Ontario Insurance Rules That Shape Your Out-of-Pocket Cost
The repair total and your personal cost are different figures. Your deductible is the most obvious difference, but it isn't the only one. Policy terms, the type of claim, the vehicle's value, excluded items, and the insurer's repair decision all matter.
Ontario's Financial Services Regulatory Authority states that the insurer pays the lower of the repair cost or the vehicle's actual cash value at the time of damage, less the deductible shown on the automobile insurance certificate. That means a vehicle can move from “repairable” to “total loss” when the documented repair no longer makes financial sense against its pre-loss value.
| Trigger | What It Means | Driver's Cost Impact |
|---|---|---|
| Deductible applies | The policyholder contributes the amount shown on the insurance certificate. | You pay the deductible even when the insurer authorizes the balance. |
| Estimate reaches actual cash value | The insurer may settle the vehicle as a total loss rather than approve every repair operation. | Your replacement or settlement options depend on the vehicle valuation and policy terms. |
| Driver disputes value or repair cost | The matter may be referred to appraisal under Ontario's Insurance Act. | The request must be made in writing, and the insurer must participate, according to FSRA's automobile insurance guidance. |
| Driver chooses a shop | The driver may choose the repair facility, provided the insurer approves the estimate. | A preferred-network restriction doesn't automatically remove your ability to ask another shop for an estimate. |
| Vehicle receives a severe-damage brand | The vehicle may become Salvage, Rebuilt, or Irreparable under Ontario's branding system. | Registration, inspection, future value, and financing can be affected. |
A claim after a collision on Taunton Road or the 401 should start with photographs, information exchange, and prompt insurer notification. Don't authorise extensive teardown before the claim process is clear if you expect insurance to pay.
Ontario's claims environment also helps explain why premiums and repair economics feel difficult. Statistics Canada's insurance analysis reported Ontario claims ratios of 79% in 2022 and 82% in 2023, with Ontario contributing the most to national insurance expenses and revenues. Those figures cover more than bodywork alone, but they show the financial pressure surrounding claims.
For insurance-specific planning, review car repair insurance guidance with the shop and your insurer. Ask about rental or loss-of-use coverage before you hand over the keys, because those benefits depend on the policy and claim circumstances.
Smart Questions to Ask Before You Authorize the Work
Take the estimate home or review it at the counter. A good advisor should explain the repair without becoming defensive.
Ask:
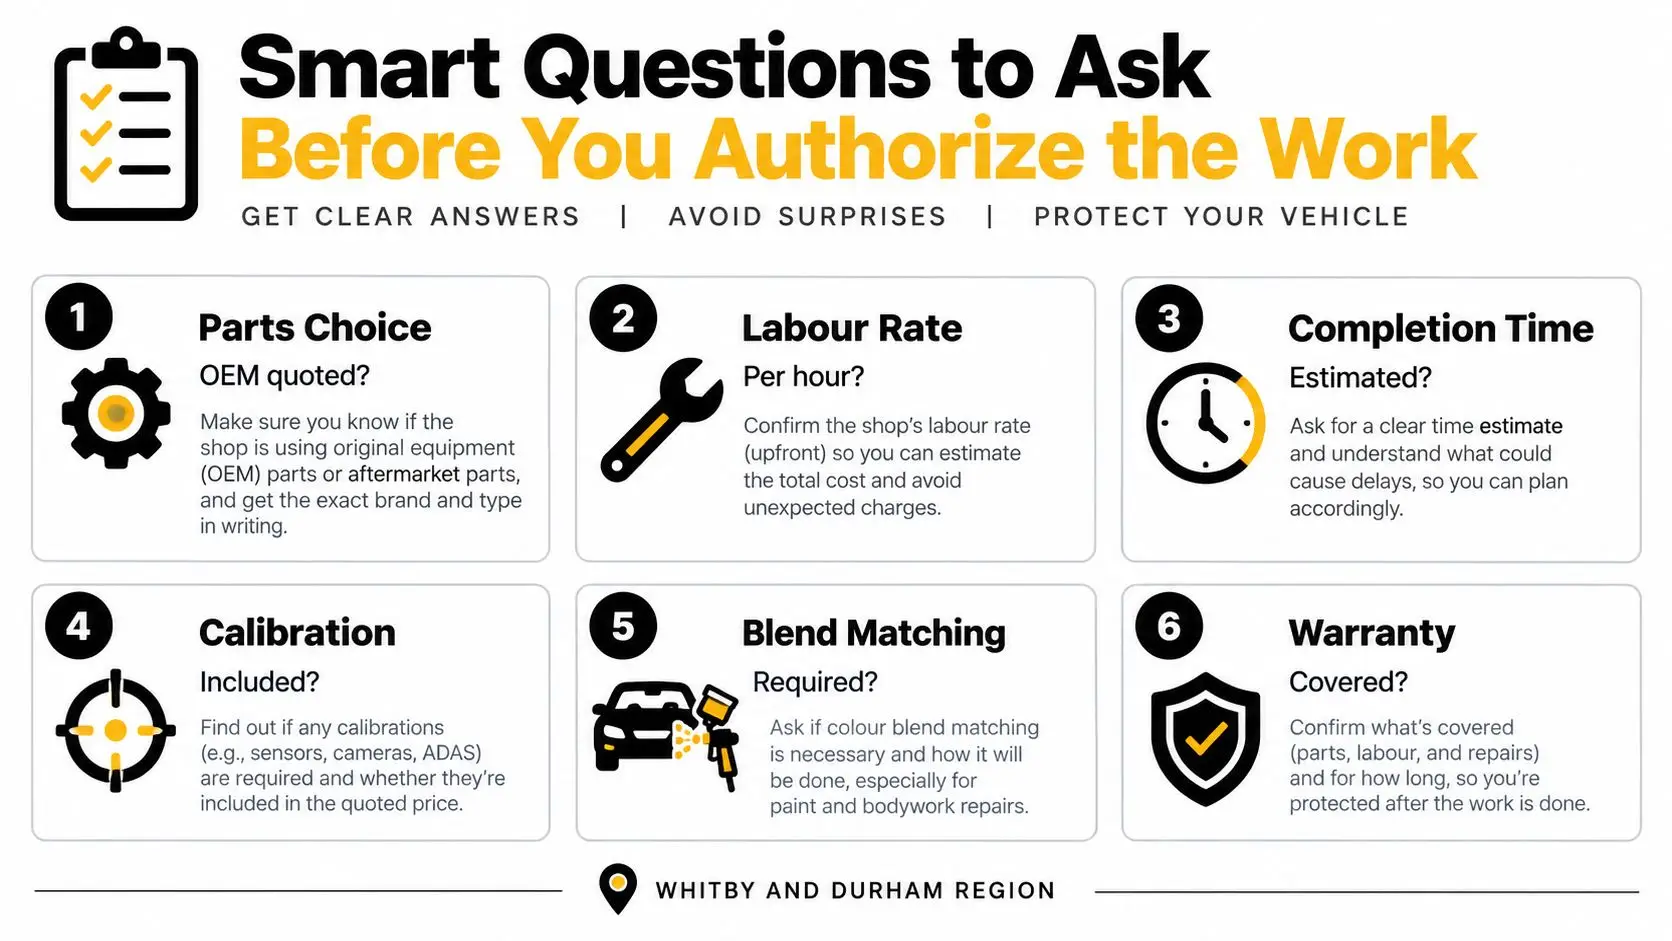
- Which parts are being used? Was OEM quoted, and if not, is the replacement aftermarket or recycled?
- What is the labour rate for each operation? Ask for body, structural, refinishing, and specialty work separately.
- How many hours are allowed? Have the shop explain the major operations rather than presenting one unexplained total.
- Is ADAS calibration included? Ask whether the specific VIN requires calibration after this repair, and whether pre-repair and post-repair scans are documented.
- Which panels need blending? A colour match may require work beyond the damaged panel.
- What happens if teardown reveals more damage? Confirm how supplements are documented and sent to the insurer.
- Are sublet charges or markups included? This is particularly important for glass, alignment, calibration, towing, and specialist structural work.
- What warranty applies? Ask what the shop covers for bodywork and refinishing, and obtain the terms in writing.
- When will the vehicle be ready? Request an estimated completion date, while recognising that parts delays and supplements can change it.
- How was the vehicle documented? Photos at intake help establish its condition before repair begins.
Certification can help you compare facilities, but it doesn't replace a clear estimate. Ask whether the technicians have relevant I-CAR training or Collision Industry Assistance credentials, and ask how the shop verifies manufacturer repair procedures.
If an estimate exceeds your deductible by only a small margin, get a second opinion before filing or authorizing the work. A collision-repair facility such as Carmedics Autowerks can review the visible damage and explain which costs may change after teardown.
Misconceptions That Cost Whitby Drivers Money
The lowest quote is the best deal. It isn't if the quote omits blending, correct hardware, corrosion protection, scanning, or calibration. Compare the operations, parts, and documentation instead of comparing totals alone.
Insurance will pay the entire bill. Your deductible remains relevant, and the insurer's responsibility is limited by the policy and the vehicle's actual cash value. A repair estimate can also change after hidden damage is found, so confirm who approves supplements before work expands.
Calibration is a money grab. It isn't a cosmetic add-on when a collision may have changed a sensor's position or viewing angle. A vehicle can drive normally while a camera or radar system is no longer aimed correctly. Ask for the manufacturer procedure and the calibration result.
A warning light would tell me if something is wrong. Warning lights are useful, but their absence doesn't prove that every sensor is accurate. Sensor alignment, mounting position, and camera view can affect system performance without producing an immediate dashboard alert.
Any shop can match dealership work. Some independent facilities perform excellent repairs, but you should still ask about training, equipment, parts, manufacturer procedures, documentation, and insurer approval. A shop's location in Durham Region doesn't tell you whether its process suits your vehicle.
A low price means the car is road-ready. Ontario branding rules matter. The Ministry of Transportation's mandatory vehicle branding programme states that an Irreparable vehicle is restricted to parts or scrap, while a Salvage vehicle must be rebuilt and pass the required structural inspection before it can be rebranded Rebuilt and considered for registration.
Quick Answers Whitby Drivers Ask After the Estimate
How long will the repair take? Minor dent work may be completed quickly when the repair method and parts are straightforward. Collision claims can take much longer when parts, supplements, structural measurement, paint blending, glass, or calibration are involved. Ask for a target completion date and what could change it.
Will insurance provide a rental vehicle? Rental or loss-of-use coverage depends on your policy and claim circumstances. Confirm eligibility and limits with the insurer before the vehicle enters the shop.
What should I do immediately after a collision? Photograph the vehicles and scene when safe, exchange information, report the collision where required, and notify your insurer. Don't begin major teardown before the claim process and estimate approval are clear.
Can I request OEM parts? Ask the shop and insurer what part type is being proposed, then request the part number and reason for the choice. The final option can depend on the policy, vehicle, availability, and repair requirements.
What happens when hidden damage appears? The shop documents the new damage and submits a supplement for approval. Ask whether the vehicle will remain disassembled while the insurer reviews it and whether the completion date changes.
Can a Salvage vehicle be repaired cheaply? No. Ontario's structural inspection regulation requires chassis control and reference points to remain within 3 millimetres of the manufacturer's specification unless the manufacturer permits a greater variance. The Ontario inspection regulation also requires access to repaired joints and inspection of structural components, so exterior appearance alone isn't enough.
Carmedics Autowerks Inc offers collision-repair assessments, itemized estimates, refinishing, dent repair, and bodywork for Whitby drivers who want the operations explained before authorizing repairs. Visit Carmedics Autowerks Inc with your estimate or vehicle details, and ask the team to identify the parts, paint, structural, scanning, and calibration items that will determine your real car body repair cost.
You're standing at a Whitby repair counter, keys in hand, and the total on the screen is higher than the number you expected. The service advisor points to a few short descriptions, the parts are already installed, and you're trying to decide whether you're looking at a fair, properly documented bill or a charge that needs questioning.
A car repair invoice is more than a payment receipt. It records what you authorized, what the shop says it completed, how labour and parts were priced, and what warranty terms apply. In Ontario, that paperwork can also become important evidence if you need a second opinion, make a complaint, or challenge the quality or cost of a repair.
What a Car Repair Invoice Really Is and Why It Matters
At pickup, many drivers look first at the total, then at the tax, and finally at the payment terminal. A better approach is to treat the invoice like a detailed receipt with a built-in warranty card. Each line should help answer three practical questions: What was approved, what was done, and what protection applies afterward?
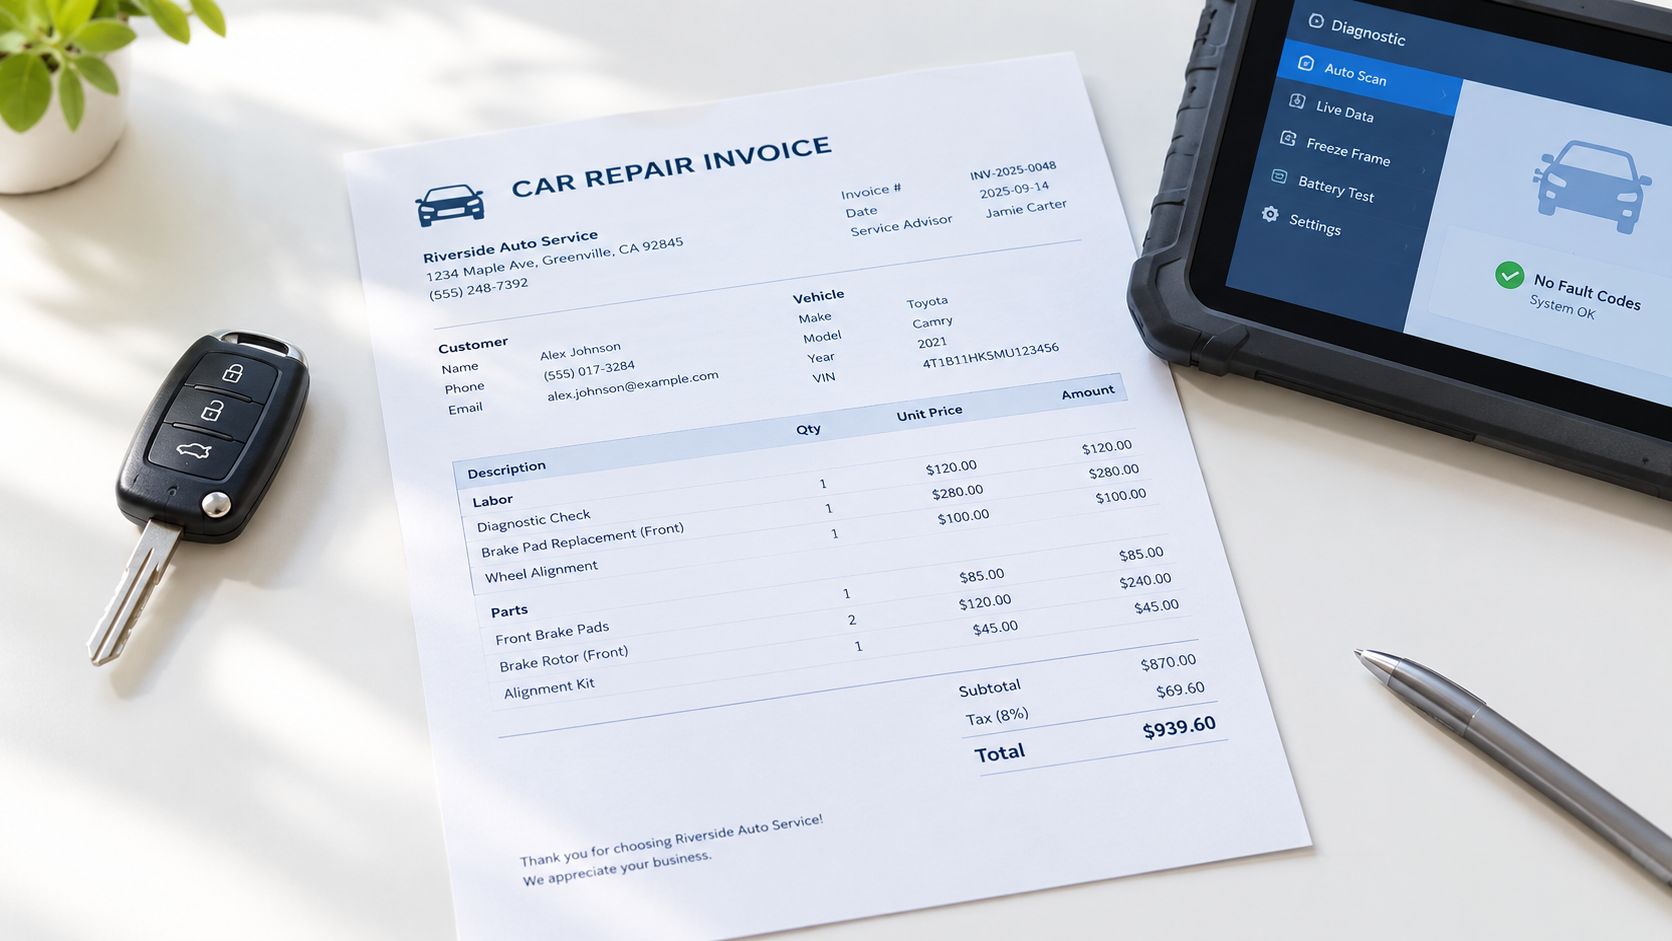
Suppose your vehicle came in for a warning light and the shop found a failed component. A useful invoice won't just say “repair completed” and show one lump sum. It should identify the vehicle, describe the work, show the parts used, explain labour, list applicable fees and taxes, and state the warranty terms. That detail gives you something concrete to compare with the estimate and with the work you approved.
Practical rule: A vague total is difficult to verify. An itemized invoice lets you ask focused questions without turning a routine pickup into an argument.
The document also has value after payment. Keep it with your service records for future maintenance, warranty discussions, insurance matters, resale, or a second-shop assessment. If a later problem appears, the invoice can show whether the original shop identified the part, recorded the odometer, and described the work clearly.
Ontario's consumer guidance explains the rights connected with car repairs, while broader car-repair resources such as Gerald Technologies car repair help can help drivers become more familiar with repair terminology before they approve work. For local service, you can also review the Carmedics Autowerks auto repair service and use the same documentation standards when comparing any shop.
A clear invoice protects the driver and the repairer. The driver can see what was charged, and the shop can show what it was asked to do. That shared record is why reading the page carefully can save stress later.
How to Read Every Line on Your Car Repair Invoice
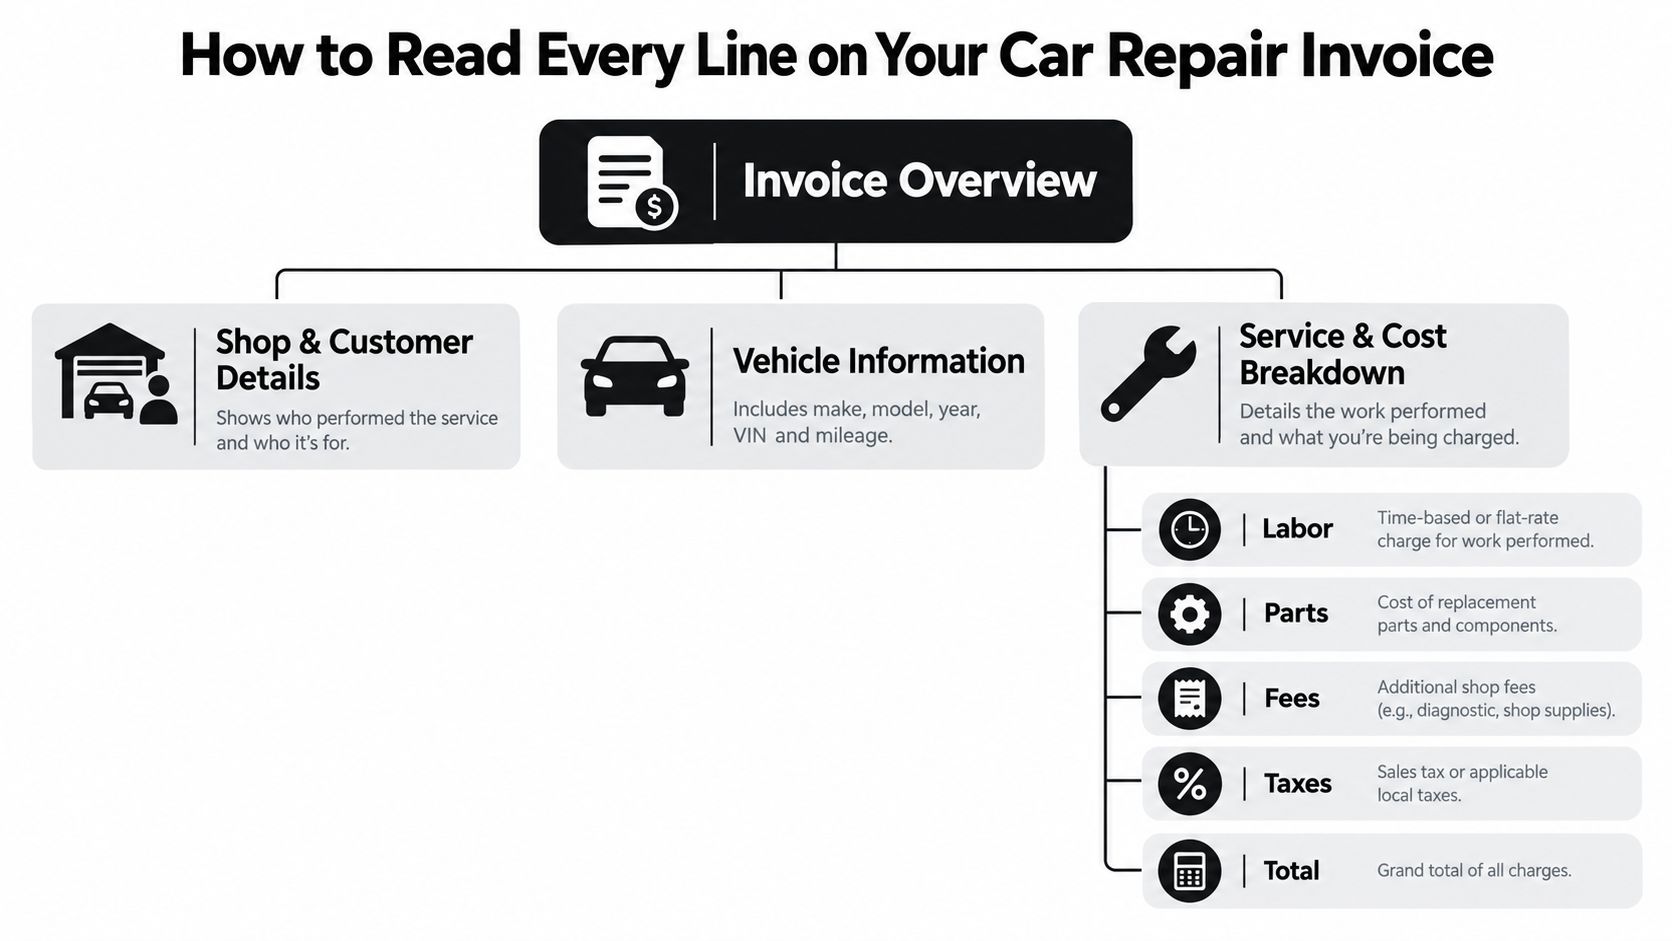
Think of the invoice as a map. The top identifies the people and vehicle involved, the middle describes the route taken, and the bottom shows how the final amount was calculated. Read it from top to bottom instead of jumping straight to the total.
Start with identity and timing
The shop's name and address should appear alongside your name and contact details. Check the vehicle identification information, such as the make, model, licence plate or other identifiers used by the shop, and the vehicle identification number where recorded.
Dates matter because they establish when work was authorized and completed. The invoice should also show the odometer reading, particularly the reading when the vehicle is returned. If your kilometre reading is missing or obviously incorrect, ask for a corrected document before filing it away.
Follow the cost trail
The service description should tell you what the technician inspected, diagnosed, adjusted, repaired, or replaced. Labour needs more than a single unexplained amount. Look for the labour hours or other calculation method and the applicable labour rate.
Parts should be named individually, with the price for each part and whether the part is new, used, or reconditioned. A line such as “engine work, total” gives you no practical way to confirm what was installed. Ontario's guide for auto repair businesses says invoices should list the price of each item individually as well as the total cost.
Fees, shop supplies, disposal charges, and taxes should be separated rather than hidden inside an unexplained package amount. The final section should state the warranty terms for parts and labour. If the invoice says “warranty applies” without explaining the coverage, ask the shop to clarify the wording.
For parts decisions, drivers can also compare the explanation of OEM and aftermarket parts before authorizing a replacement. You don't need to know every technical term. You do need enough information to follow each dollar from the approved work to the final total.
Labour Parts Fees and Taxes Explained in Plain Language
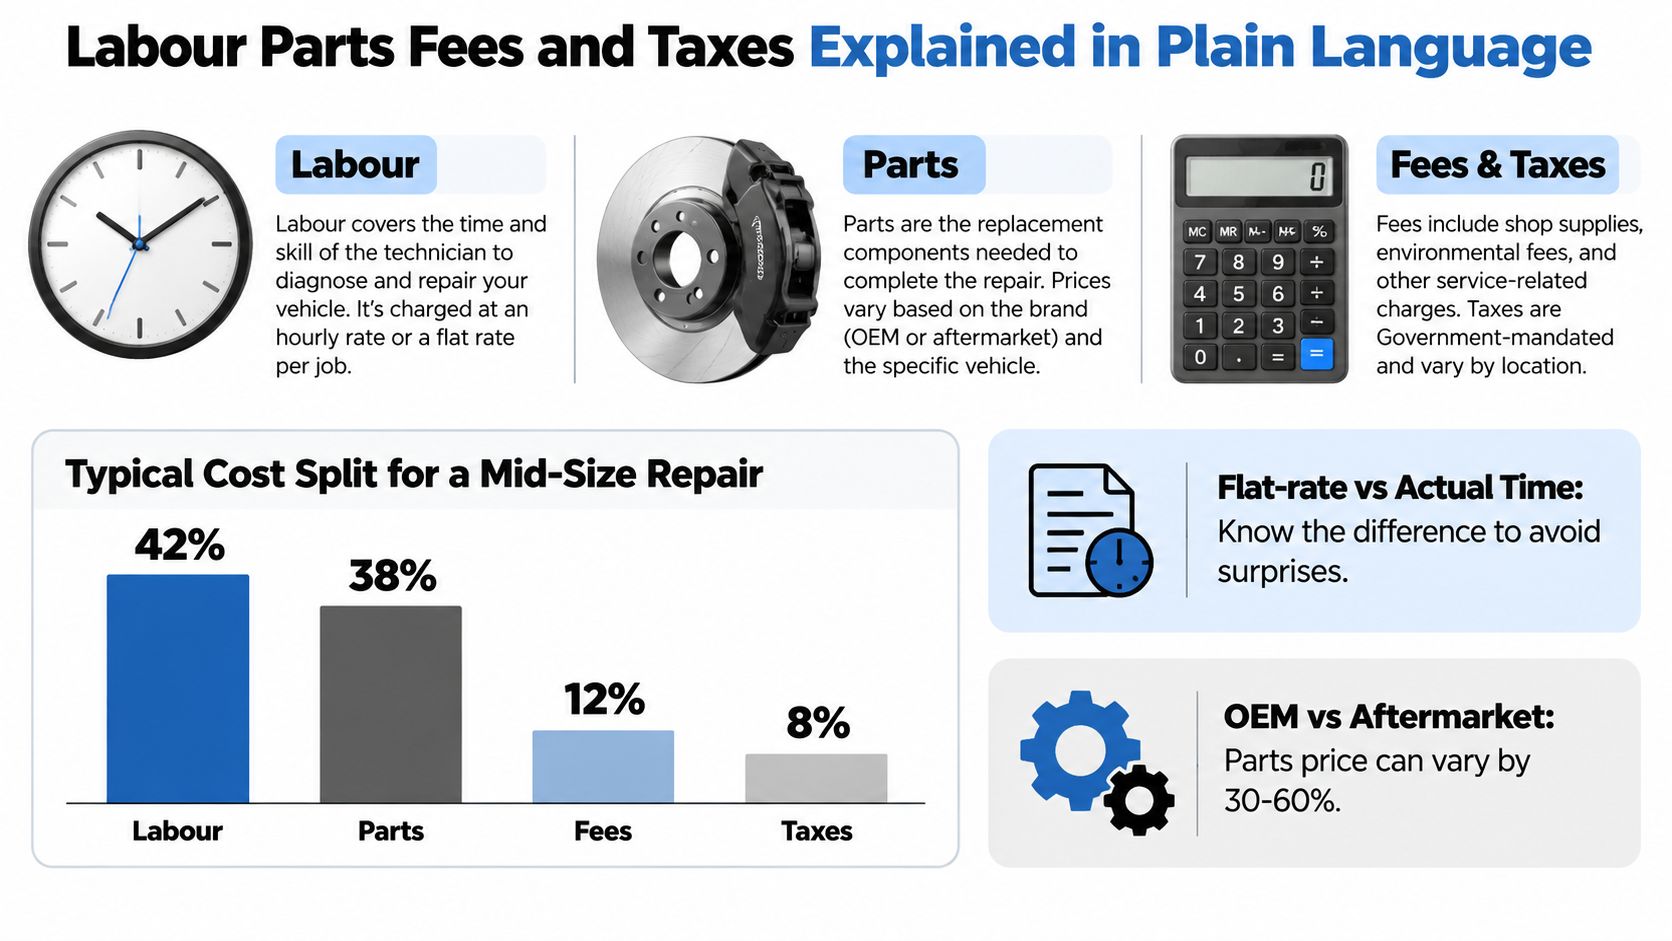
The largest changes on a repair invoice usually come from the interaction between labour, parts, diagnostic work, fees, and tax. One line rarely tells the whole story. A repair that looks small from the outside may require testing before the technician can identify the cause, followed by parts installation and verification.
Labour is a calculation, not just a rate
An invoice may use actual time, a flat-rate or book-time calculation, or another clearly stated method. Actual-time billing reflects the time recorded for the task. Flat-rate billing uses an established time allowance for a repair, so the amount can differ from the clock time the technician spends.
Diagnostic labour deserves its own explanation. A scan or inspection may identify a system that needs attention, but the scan itself isn't always the repair. Ask whether diagnostic time is listed separately, included in the repair labour, or credited toward later work. “Diagnosis and repair” is much less useful than separate descriptions showing what was tested and what was completed.
Ontario shop labour rates reported for 2026 were about $110 to $150 per hour for independent shops in Toronto, Ottawa, and the GTA, while dealership rates were around $150 to $220 per hour. Smaller Ontario towns were typically reported at roughly $95 to $120 per hour. These figures come from Ontario car-repair cost guidance and explain why diagnostic time plus installation can move a bill quickly.
Parts and additional charges need labels
Parts should identify their condition and price. If you're comparing estimates, ask whether the quoted component is OEM, aftermarket, used, or reconditioned, and whether the invoice uses the same category that you approved.
Shop supplies and environmental charges should have a description and amount. Taxes should be shown separately so you can distinguish the repair price from government charges. For drivers looking for a clear discussion of repair pricing, affordable auto repair options can provide a useful comparison point, but every shop should still explain its own invoice.
Ontario Rules That Protect You on Estimates and Invoices
Ontario gives drivers several practical protections before and after repair work. They work best when you ask for the paperwork before authorizing the job and keep every written exchange afterward.
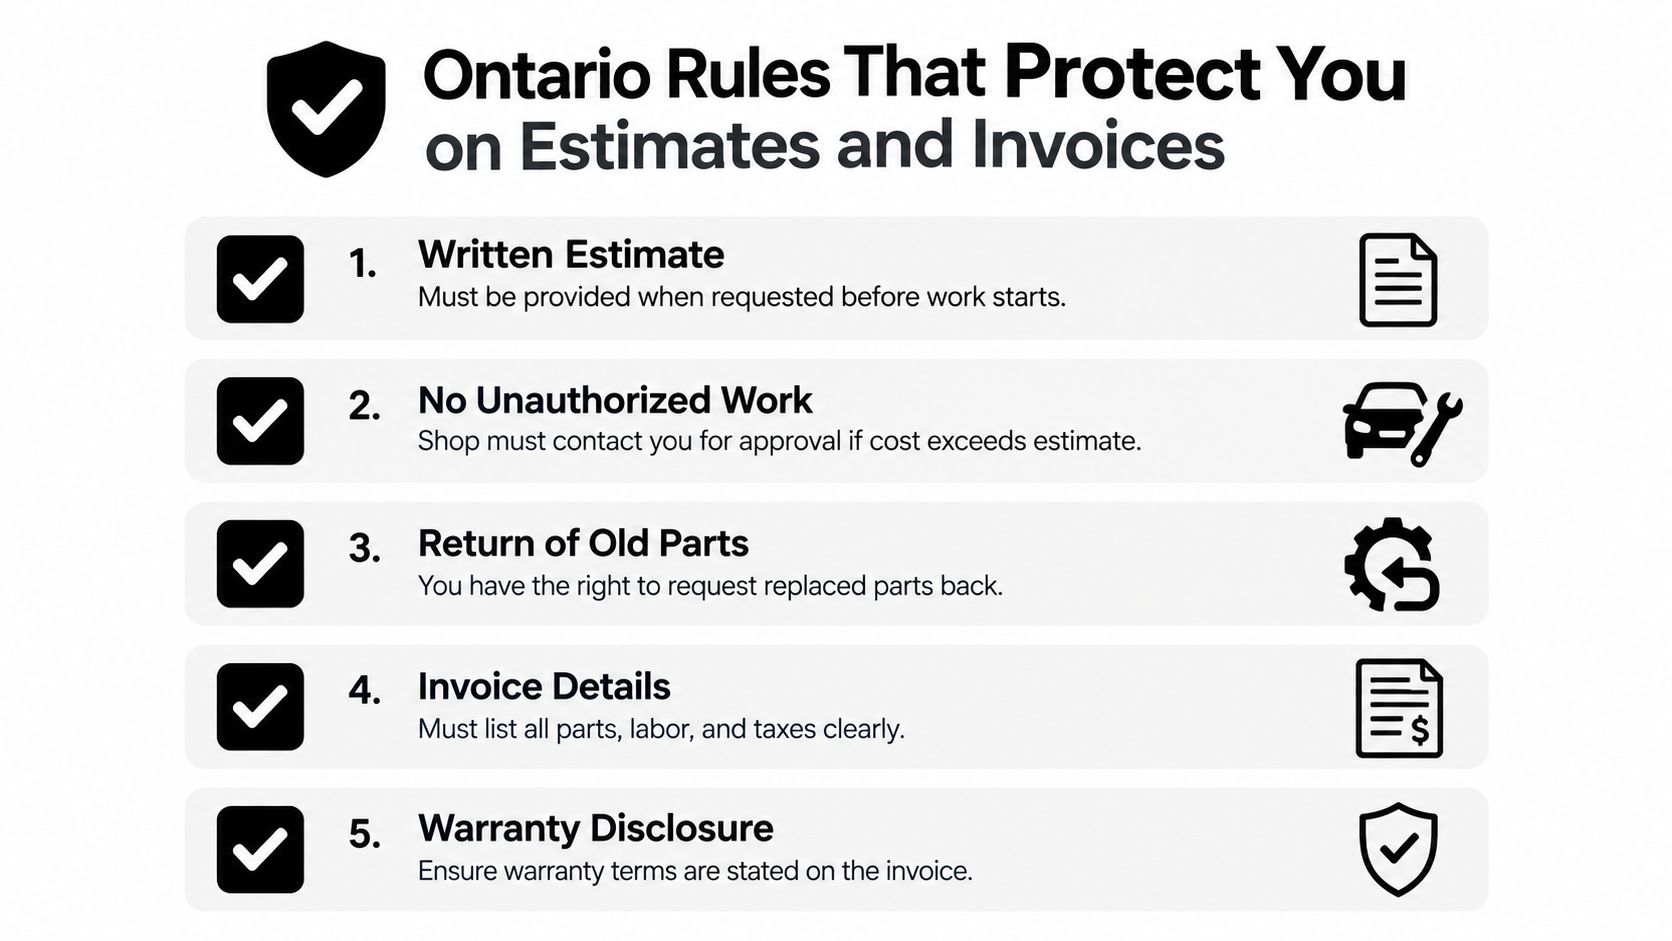
Get the estimate in writing
Under Ontario's Motor Vehicle Repair Act, if you ask for a written estimate, the repairer must provide it in writing before charging for the work. The estimate must identify the customer and repairer, the vehicle, the proposed work, the parts, the condition of those parts, parts prices, labour hours, labour rate, and total estimated amount.
The final bill generally cannot exceed the written estimate by more than 10%, under the Consumer Protection Act rule described in Ontario repair guidance. Disputes often turn on whether the shop documented the estimate clearly and whether the final amount stayed within that cap.
If the shop discovers additional work, ask for the new amount and your approval in writing before proceeding. A text message or email can help establish what you agreed to, but save the full exchange rather than only the final “yes.”
Check the invoice and warranty
Ontario requirements also cover the final invoice. It should include consumer and repairer details, vehicle identifiers, authorization and completion dates, odometer readings, installed parts and their condition, parts prices, labour cost and calculation, and warranty terms, as explained in the province's car repair rights guidance.
The parts-and-labour warranty is 90 days or 5,000 kilometres, according to the Ontario safeguard described in that guidance. Ask how the shop applies the warranty and keep the invoice because the dates, kilometres, and repair description may determine whether a later concern relates to the original work.
Annotated Sample Car Repair Invoice and Common Billing Mistakes
A useful sample doesn't need complicated terminology. It needs enough detail for another person to understand the transaction without calling the shop.
A clean sample
Customer: Jordan Lee, Whitby, Ontario
Repairer: Shop name and address
Vehicle: 2021 Honda Civic, vehicle identifier recorded
Date authorized: Recorded on the invoice
Date completed: Recorded on the invoice
Odometer at return: Recorded on the invoice
Concern: Engine warning light illuminated.
Diagnostic work: Electronic system scan and testing identified a failed ignition component.
Labour: Labour hours or stated calculation method, with the shop's labour rate.
Part: Ignition coil, new aftermarket part, individual price shown.
Additional charge: Shop supplies, individually described and priced.
Taxes: Listed separately.
Total: Final amount calculated from the listed entries.
Warranty: Parts and labour terms stated in plain language.
That format gives the driver a trail from concern to diagnosis, repair, price, and protection. Ontario's rights guidance requires the final invoice to include the core identity, vehicle, timing, parts, labour, and warranty information, so a bill that omits those details deserves a question rather than a silent filing cabinet.
Compare the wording
| Line Item | Good Example | Vague or Risky Example |
|---|---|---|
| Labour | “1.5 hours diagnosis at stated labour rate” | “Labour, total” |
| Parts | “New aftermarket ignition coil, individual price” | “Part” |
| Diagnostic work | “Scan and testing for engine warning light” | “Checked vehicle” |
| Fees | “Shop supplies, described and priced” | “Miscellaneous” |
| Warranty | “Parts and labour warranty terms stated” | “Warranty applies” |
Common warning signs include diagnostic time blended into repair labour, a parts line with no condition, shop supplies without an explanation, and a warranty reference that doesn't say what is covered. If you need to challenge the document, write down the exact line, the question you asked, and the answer you received.
Keep a digital copy of the estimate, invoice, and related messages in one vehicle folder. A simple filename with the vehicle and service date makes the record easier to find when you need it.
How to Verify Dispute and Keep Digital Records Without Stress
Audit the invoice while the details are still fresh. You don't need to accuse anyone. You need to compare documents and ask for missing information calmly.
Use a repeatable audit
Start with the estimate. Compare the approved work, parts category, labour method, and total with the final invoice. Then check the vehicle identifier, authorization date, completion date, and odometer reading.
Next, inspect the cost lines. Confirm that every installed part has a name, condition, and price. Check that labour shows its calculation, diagnostic work isn't added as an unexplained repair amount, and fees are identified rather than bundled into “miscellaneous.”
Finish with warranty terms and taxes. If something is unclear, ask the advisor to correct the invoice or explain the entry in writing. A properly documented invoice should make the conversation easier because both sides can refer to the same line.
Preserve the digital trail
If approval happens by text, save the complete conversation, including the shop's description of the extra work and the amount you approved. For email approvals, retain the original message, attachments, estimate revisions, and timestamps. Don't rely on a screenshot alone if the email thread contains the surrounding context.
Save electronic invoices in their original format when possible, then keep a backup. Ontario's regulation on motor vehicle repairers sets out required invoice information, including authorization and completion dates and the odometer reading at return. Digital delivery doesn't remove the need to check those fields.
A duplicate-looking charge also deserves a separate check against your payment record. General guidance about handling a duplicate charge on a statement can help you separate a payment-processing issue from a genuine duplicate repair line.
Escalate with records
If the shop won't clarify or correct the invoice, make the complaint in writing and keep the response. Ontario guidance indicates that complaints can escalate to the ministry or court, and your invoice, estimate, approvals, photographs, and second-shop assessment may support your position.
For a clearer visual record of vehicle condition, ask about a digital vehicle inspection when that service is available. Photos and inspection notes won't replace an invoice, but they can add useful context to the repair record.
Canadian repair invoices have also become more consequential as repair costs rise. The average repairable auto-insurance claim cost reached $5,044 in the first half of 2023, up 12% from the prior year, according to Statistics Canada-linked repair-cost data. The same source reports average 2023 repair costs of $6,795 for battery-electric vehicles and $5,122 for internal-combustion vehicles, a difference of $1,673, or roughly 32.6% higher for EVs. Clear records matter when a repair carries a substantial financial consequence.
Avoid Surprises Next Time and Get Help in Whitby
Invoice problems are easier to prevent before the vehicle enters the bay. Ask for the written estimate, confirm what the diagnostic stage includes, and make sure the shop knows how you want additional work approved. A short written message can prevent a long disagreement later.
Before signing or approving, confirm:
- Work scope: What concern is being investigated, and what repair is currently proposed?
- Labour method: Is labour based on actual time, flat-rate time, or another calculation?
- Parts condition: Are the proposed parts new, used, reconditioned, OEM, or aftermarket?
- Extra work: How will the shop contact you if the diagnosis changes?
- Invoice content: Will the final document list parts, labour calculation, fees, taxes, odometer, and warranty terms?
- Records: Will you receive the estimate, approvals, inspection notes, and final invoice electronically?
Those questions don't signal distrust. They establish a shared plan. They also help you compare shops fairly, since a low initial total may not be comparable if one estimate includes diagnostic work and another does not.
A dealership visit and an independent-shop visit may also produce different totals. A 2024 J.D. Power study cited in the Canadian repair-cost material found average dealership service visits of $465 and independent-shop visits of $273, a difference of $192 per visit. Those figures are context, not a substitute for reviewing the actual work, parts, labour, and warranty on your vehicle's invoice.
If you're comparing local providers, use a practical checklist for finding the best car repair shop near you. Look for a shop that will explain the estimate, document approvals, answer questions about parts, and provide an itemized final invoice.
Carmedics Autowerks Inc offers general auto repairs, diagnostics, fleet maintenance, collision repair, window tinting, and paint protection film services in Whitby. For a repair estimate or a second opinion, bring your current invoice and approval messages so the team can review the paperwork alongside the vehicle.
Carmedics Autowerks Inc can help Whitby drivers with diagnostics, general repairs, collision work, and clear service documentation. Visit Carmedics Autowerks Inc to request service, discuss an estimate, or arrange a second look at an invoice that doesn't make sense.
A 50% windshield tint is not legal on the main windshield area in Ontario. The 50% refers to visible light transmission, or VLT, meaning the film allows half of visible light through and blocks the other half.
A Whitby driver often asks about it after seeing a lightly shaded windshield on another car, or after finding a roll of “50 tint” online. The attraction makes sense. A darker windshield can soften glare and change the car's appearance, but Ontario rules and real-world visibility make this a poor choice for the forward-facing glass.
The better question isn't whether 50% looks good. It's whether the film, the factory glass, the vehicle's sensors and Ontario's rules all work together.
What 50 Percent Tint Actually Means
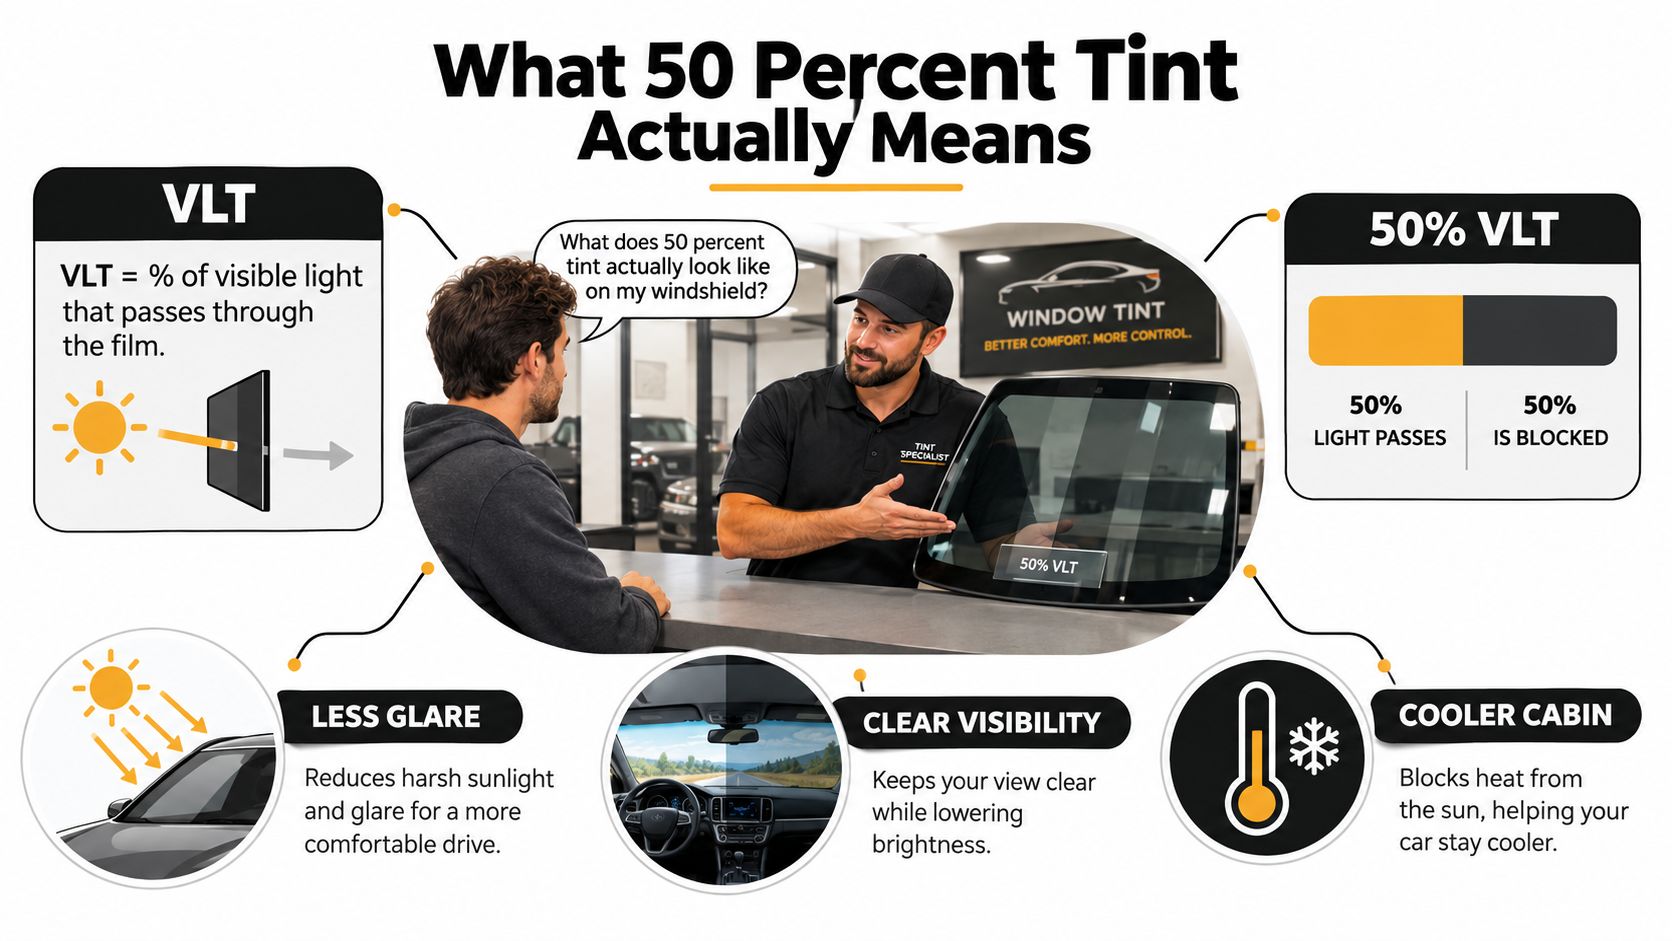
At a Whitby tint counter, the question usually sounds simple: “What does 50 percent tint look like on my windshield?” The answer starts with VLT, or Visible Light Transmission. VLT describes the percentage of visible light that passes through the glass and film together.
A 50% VLT film allows half the visible light through and blocks the other half. It isn't the same as a film that blocks 50% of heat, and it doesn't tell you how much infrared or ultraviolet energy the product rejects. Lower VLT numbers mean darker film. A 20% film is darker than 50%, while a 70% film looks much closer to clear glass.
Factory glass already has its own light transmission. That matters because the final result comes from the glass and film as a combined stack, not from the film label alone. A film advertised as 50% may therefore produce a darker finished reading when installed over tinted or shaded factory glass.
Windshield film isn't the same as side-window film
Windshield applications usually call for a very light ceramic or nano-ceramic film. Side and rear windows can use dyed, carbon or other darker films, depending on the vehicle and the legal position of the glass.
A 50% film can look subtle from outside in bright daylight, but subtle appearance doesn't make it optically clear or legal on an Ontario windshield. The driver still receives less light through the forward view, especially at dusk, in rain or on an unlit road.
Practical rule: Choose windshield film for visibility first, then evaluate heat control and appearance.
VLT is only one specification. You should also ask about infrared rejection, UV blocking and TSER, or Total Solar Energy Rejection. Those measures affect cabin comfort and solar protection independently of how dark the film looks. Carmedics Autowerks' guide to automotive window tint percentages is useful when comparing the visual difference between lighter and darker films.
How 50 Percent VLT Affects Visibility and Heat
A 50% film changes the optical balance of a windshield in a way drivers notice most when the available light is already limited. During a bright summer afternoon in Whitby, the reduction can soften harsh sunlight, dashboard reflections and some headlight glare. On Highway 401, that may make a low afternoon sun feel less aggressive through the glass.
The same reduction becomes a disadvantage after sunset. A darker windshield dims the road scene, and low-contrast objects become harder to distinguish in rain, shadow or poor lighting. Dark clothing, cyclists and pedestrians can blend more easily into the background. The issue isn't only whether you can see a road sign. It's whether you can identify a developing hazard early enough to respond smoothly.
Daylight comfort versus night-time clarity
The practical trade-off looks like this:
| Metric | Clear Glass (100% VLT) | 50% VLT Film |
|---|---|---|
| Visible light | Passes through at the highest level | Transmitted light is reduced by half |
| Daytime glare | More direct sunlight and reflections | Softer glare and a dimmer view |
| Dusk and night | Preserves more scene brightness | Reduces luminance and can lower contrast |
| Rain and low contrast | Gives the eyes more available light | Makes dark objects more difficult to separate |
| Heat strategy | Relies on the glass and any factory treatment | Can improve comfort without relying only on darkness |
The heat benefit depends on the film construction, not just the VLT rating. A darker film may reduce some solar load, but a quality clear ceramic product can target infrared energy while keeping the windshield visually light. That's why the benefits of automotive window tinting should be assessed separately from the darkness percentage.
A 50% windshield film can offer meaningful glare and thermal comfort in daylight, but it also reduces transmitted visible light in conditions where your eyes need every available detail. For an Ontario daily driver, that combination rarely justifies using 50% across the main windshield.
Ontario Windshield and Front Window Rules
Ontario customers should separate the glass into three areas: the main windshield, the front side windows and the rear glass. The rules aren't based on how light or tasteful the film appears from outside.
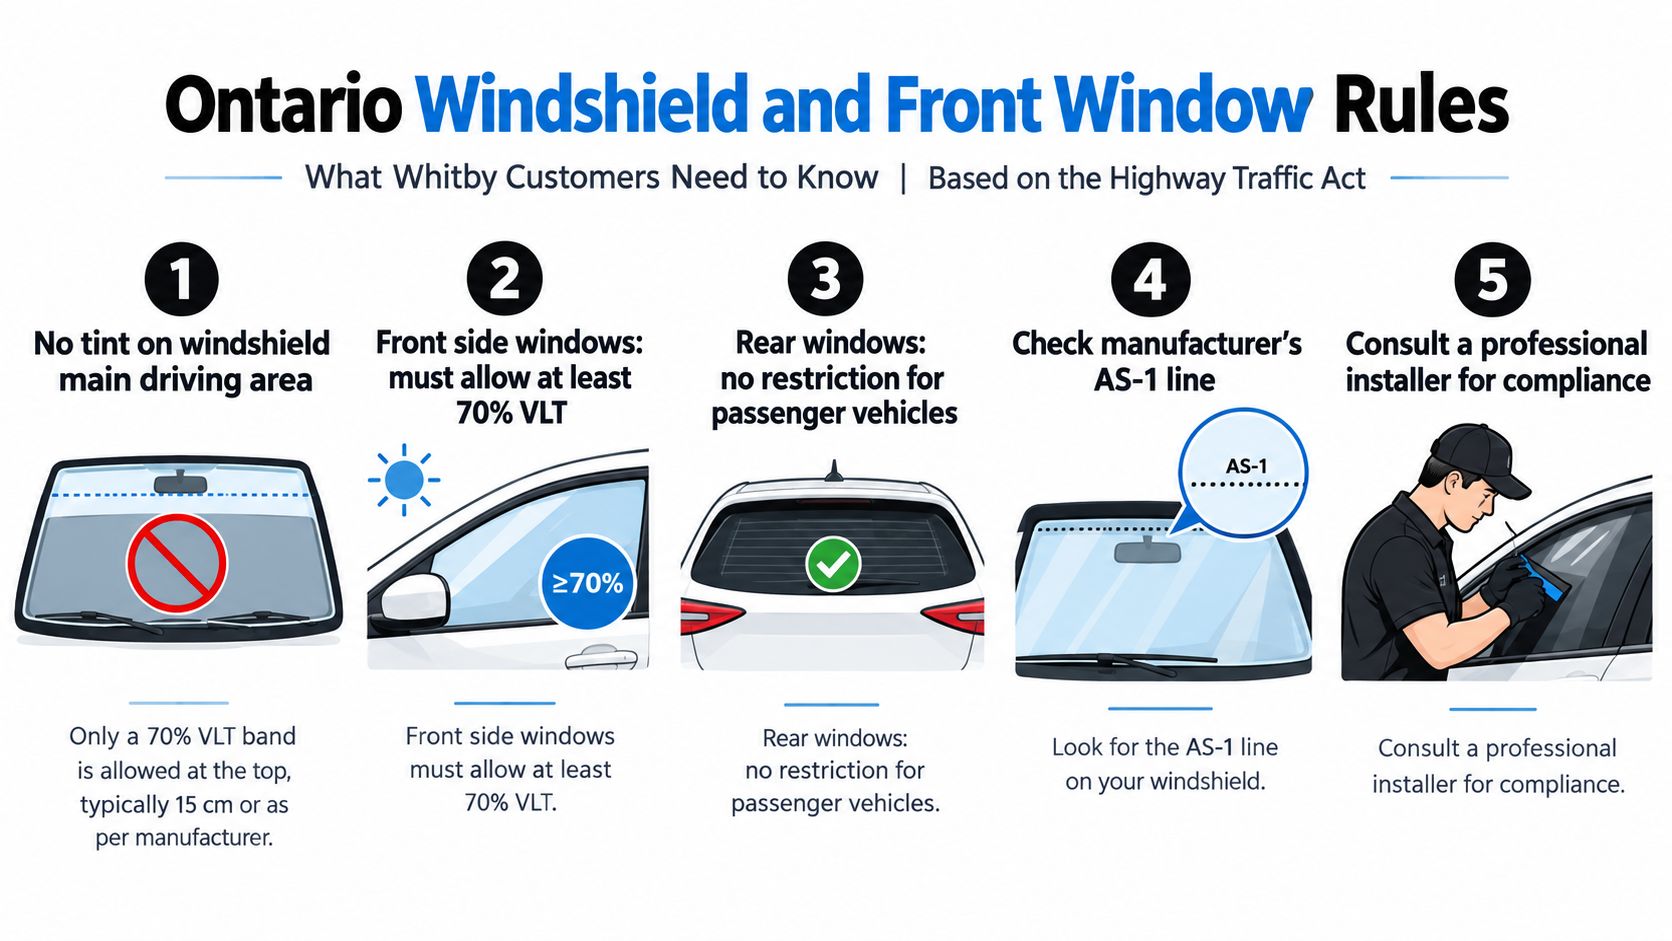
The main driving area of the windshield cannot receive aftermarket darkening film. Ontario summaries identify a narrow top sun strip as the common exception, limited to the upper 75 mm, or about 3 inches, measured from the top edge or the AS-1 line. That strip must stay out of the driver's forward sightline.
Check each window position separately
For the driver and front passenger windows, Ontario's commonly cited threshold is at least 70% VLT, measured with the factory glass and film together. That means a film labelled 70% may not automatically produce a compliant finished reading if the original glass already reduces light. An installer may recommend a very light film, sometimes in the 80% to 90% range, after considering the existing glass.
Ontario gives passenger vehicles more flexibility at the back. Rear side windows, back windows and the rear windshield can generally be tinted to any darkness, subject to the vehicle's equipment and safe operation. That flexibility does not extend forward to the main windshield or front side glass.
Whitby and Durham Region drivers follow provincial requirements, not a separate municipal tint standard. Non-compliant film can create enforcement problems, lead to a failed safety certification inspection, and require removal before the vehicle can be brought into compliance. The exact outcome depends on the circumstances, but removing an unsuitable film is always more expensive and inconvenient than selecting the correct glass position at the start.
Use Ontario's legal window tint percentage guide as a starting point, then have the finished glass checked rather than relying only on the roll label.
Comparing 50 Percent Tint to Other VLT Levels
VLT becomes easier to understand when you place common options beside one another. The lower the number, the less visible light reaches the cabin. That doesn't automatically make a film better or worse, because the correct level depends on the glass position and the driver's priorities.
| VLT Level | Light Transmitted | Typical Use | Ontario Legal on Windshield? | Ontario Legal on Front Side Windows? |
|---|---|---|---|---|
| 35% | Just over one-third of visible light | Darker rear side glass and rear glass | No on the main windshield | Generally too dark |
| 50% | Half of visible light | Light rear glass or applications permitted by local rules elsewhere | No on the main windshield | Generally below the required threshold |
| 70% | Seven-tenths of visible light | Light front side-window film, subject to combined-glass measurement | Not for the main windshield | Common legal target when the finished glass meets the rule |
| 80% | Four-fifths of visible light | Near-clear front glass or heat-control applications | Darkening film still isn't permitted on the main windshield | May suit some front windows, subject to final measurement |
The 35% option is popular with drivers who want a darker appearance on rear doors and back glass, where Ontario allows greater flexibility. 70% is the practical reference point for front side windows, but the final result must account for the factory glass. An 80% product looks close to clear and can suit drivers who want light transmission with modest visual change.
A 50% film sits in the middle of the darkness spectrum, but that doesn't give it a legal path on the Ontario windshield. A film can look lighter than a privacy tint and still reduce forward visibility enough to be unsuitable for the main driving area.
For a Whitby vehicle, the sensible layout is usually a legal sun strip at the top, a clear heat-control solution where permitted, and carefully measured light film on the front side windows.
Installation Considerations on Modern Vehicles
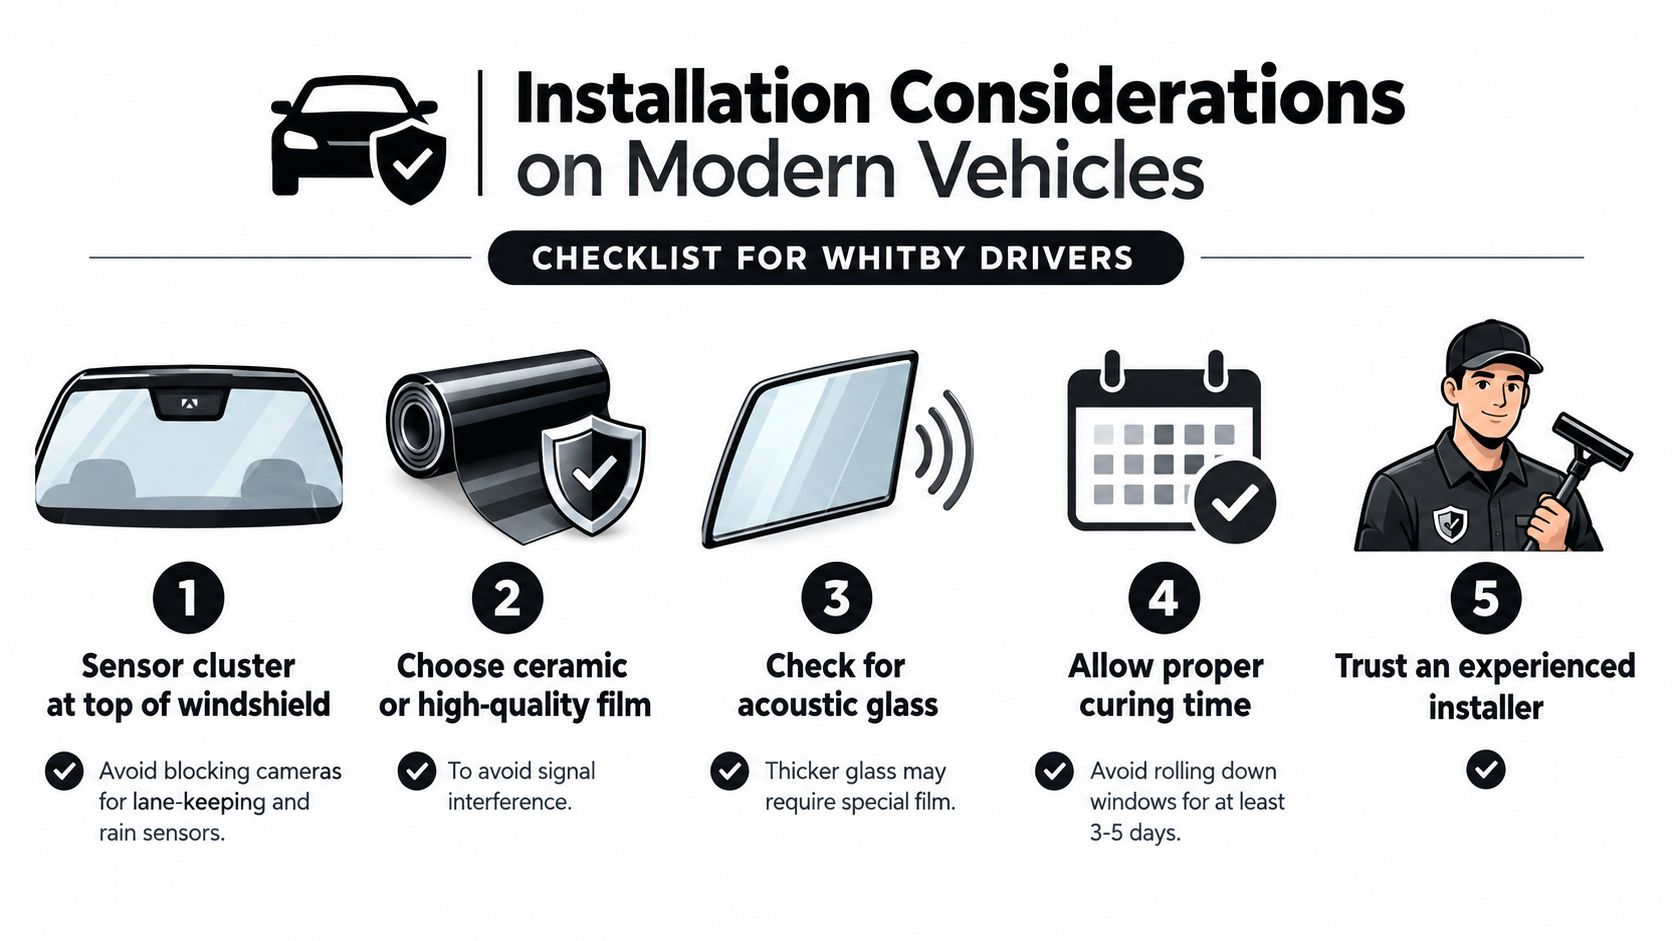
Modern windshields are more than curved panes of glass. Many have a sensor cluster near the top that houses rain sensors, light sensors and forward-facing cameras for driver-assistance systems. A film installer must identify those areas before cutting, then keep the material from covering a camera or sensor zone in a way that changes its view.
Lane-keeping and forward-collision systems depend on a clear, predictable image. A poor cut, a visible edge across the camera's field of view or adhesive distortion near the sensor can create concerns that have nothing to do with the film's shade.
Five details that deserve attention
Sensor mapping comes first. The installer should identify the camera housing, rain sensor and any head-up display area before preparing the film. The pattern must follow the vehicle's actual glass and equipment.
Defroster elements need room to work. Heated windshield areas and delicate grid lines require controlled application. Film should not be forced across components in a way that creates trapped moisture, lifting or visible distortion.
Glass construction affects product selection. Acoustic laminates and heated glass can call for a low-metal or ceramic film. The aim is to avoid unwanted interference while keeping the optical finish clean.
PPF needs a compatibility check. Ceramic window tint can sometimes sit over paint protection film near adjacent trim or glass edges, but the PPF manufacturer's guidance should be confirmed before combining products.
A plotter-cut pattern is preferable. A current vehicle database helps the installer produce a pattern for the exact make, model and glass shape. Hand-cutting directly on the vehicle can introduce avoidable risks to seals, trim and the glass surface.
Glass preparation matters just as much as film selection. Clean tools, controlled moisture and careful edge work help prevent contamination under the film. For broader expert glass maintenance advice, it's useful to review guidance on keeping glass clean without scratching or leaving residue.
If the vehicle has cameras or radar-linked driver assistance, tint work should be planned alongside ADAS calibration information. The installer should never assume that every windshield has the same sensor layout.
Cost Expectations for Window Tinting in Whitby
A reputable Whitby quote should be based on the vehicle, the glass positions and the film specification, not only on the phrase “50% tint.” Pricing in Whitby and Durham Region generally follows the Ontario market, but the final amount can vary considerably between a basic two-door car and a larger vehicle with more glass.
A full-vehicle installation on a typical sedan usually costs more than a basic coupe because the shop handles more windows and more door glass. A panoramic roof, strongly curved rear glass, quarter windows or frameless doors can add preparation and installation time.
What changes the quote
Film construction: Dyed film is usually the entry-level choice, while carbon, ceramic and nano-ceramic products sit at higher price points because of their construction and heat-control performance.
Vehicle shape: Large SUVs, panoramic roofs and difficult curves require more material handling and careful shrinking. Frameless doors also need precise edge placement so the film doesn't catch when the glass moves.
Scope of work: Tinting only the rear doors and back glass costs less than a full package. A legal sun strip or a clear windshield film is a separate glass application and should appear clearly on the quote.
Existing film: Old tint may need removal before new film is installed. Stacking fresh film over deteriorated material can create bubbling, optical distortion and edge problems.
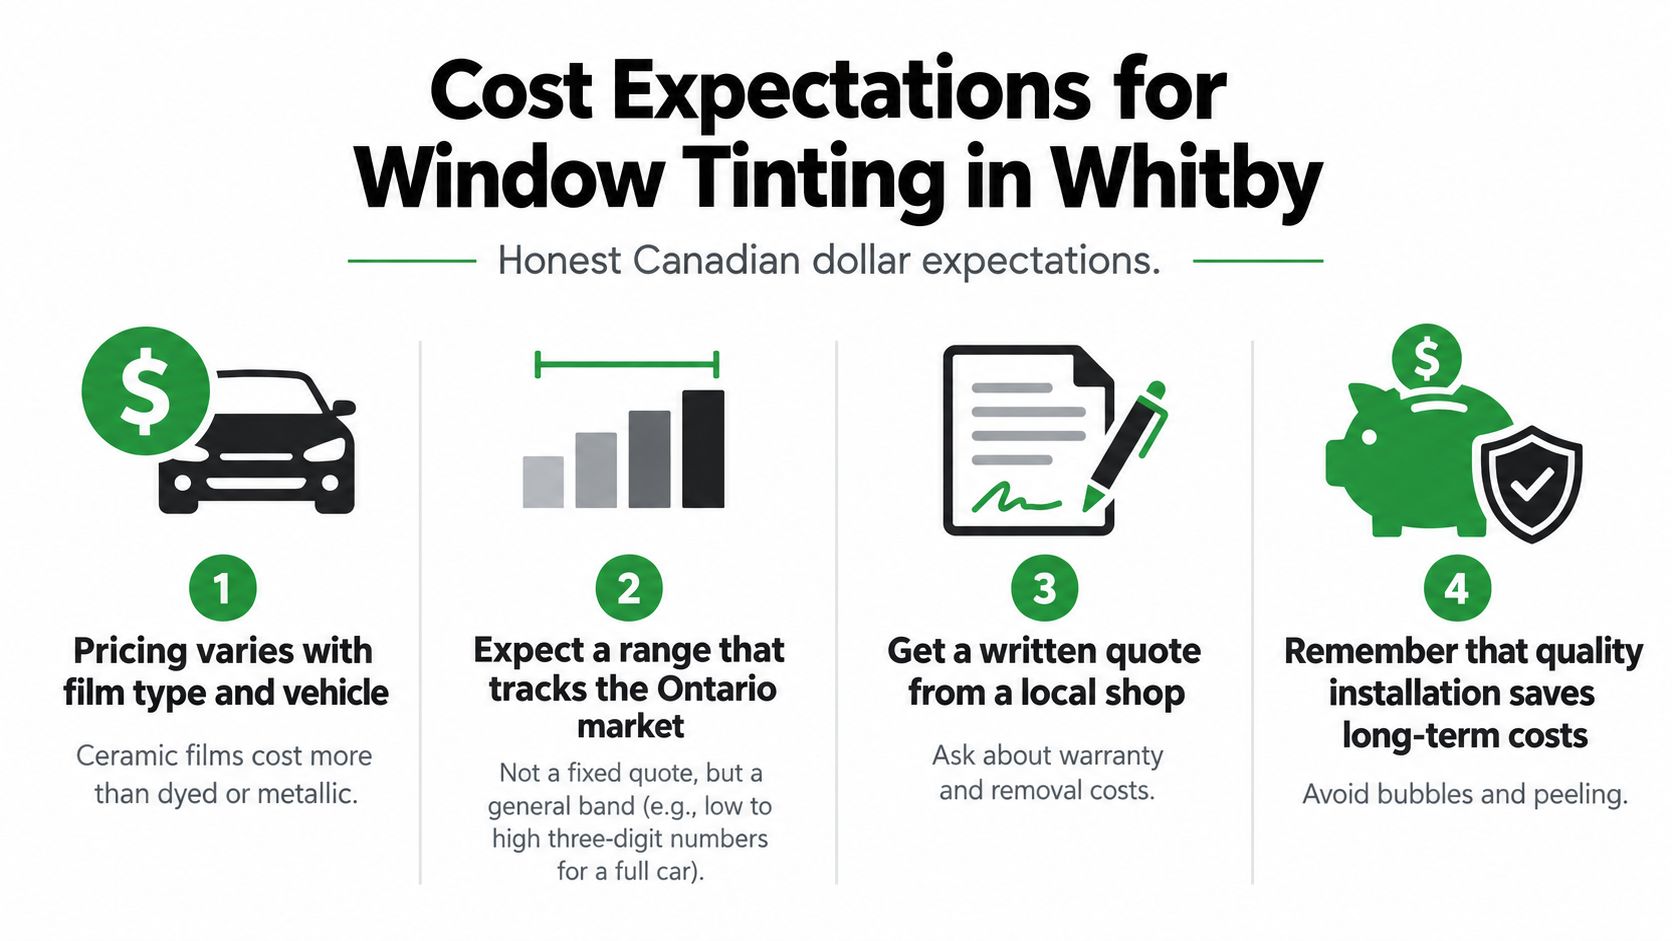
Ceramic film costs more than basic dyed film, but it can provide stronger heat control without making the glass noticeably darker. That can be a better fit for an Ontario commuter who wants a comfortable cabin without sacrificing forward visibility.
Ask for the film's exact name, the VLT intended for each window, the labour coverage and the warranty terms. Carmedics Autowerks' window tinting cost guide can help you prepare questions before requesting a written quote. The cheapest estimate may reflect economy film, hand-cutting or limited labour coverage, so compare the installation method and warranty rather than the headline price alone.
Common Scenarios and Mistakes Whitby Drivers Make
A customer once arrives with a roll of 50% film purchased online and expects a quick windshield installation. The label sounds light, but the main windshield area still isn't an approved place for darkening film in Ontario. The practical alternative is a properly measured top sun strip, or a clear film selected for heat management where the application is permitted.
Another driver uses a vehicle for ride-share work and assumes that any film is acceptable because the car still feels easy to drive in daylight. During a Ministry inspection, the glass is assessed as part of the vehicle's overall condition, and the driver discovers that appearance isn't the same as compliance. The safer approach is to confirm the finished VLT on the front side windows and keep dark film to rear positions where Ontario permits it.
Three checks that prevent expensive corrections
An SUV owner may tint only the upper windshield strip, then match the look with a dark film on the front doors. The result appears uniform from outside, but the front side windows still need to meet the 70% VLT requirement, measured with the factory glass and film together. A very light front-door film, checked after installation, avoids that mismatch between appearance and legality.
Drivers also underestimate how conditions change around Whitby. Bright winter sun can sit low over the road, while rain, spray and darkness on the 401 reduce contrast. Lakeshore traffic adds reflections from surrounding vehicles and wet pavement, so a darker forward glass can feel acceptable in one drive and tiring on the next.
Installer's advice: Put darkness on the glass that doesn't control your primary forward view. Use optical clarity and heat rejection for the windshield.
A compliant plan might include a measured sun strip above the AS-1 line, light front side-window film that satisfies the combined-glass requirement, and darker rear glass for privacy or appearance. It also leaves the driver with a clear view through intersections, ramps and unlit stretches of road.
The main mistake is treating a VLT number as a universal product recommendation. 50% isn't “almost clear” for every application, and it doesn't become acceptable on the windshield because the film looks mild beside a darker rear tint. Position, finished glass measurement, sensor layout and driving conditions all matter.
Carmedics Autowerks Inc offers automotive window tint installation, legal sun strip applications, paint protection film and related vehicle services for Whitby drivers. Visit Carmedics Autowerks Inc to discuss a measured, Ontario-appropriate tint plan for your windshield, front side windows and rear glass.
You've just picked up a newer vehicle in Whitby, and the next upgrade seems obvious. A darker tint would sharpen the look, reduce glare, and give the cabin more privacy. Before booking the darkest film available, check which windows you're tinting and how the finished glass will be judged. Ontario's rules don't treat every pane equally, and a tint that looks fine during a casual drive can create trouble during a roadside stop or safety inspection.
The practical approach is simple. Keep the forward glass clear enough for visibility, choose rear tint according to your needs, and have the finished installation measured rather than trusting the film label alone. That's how you get legal window tint without sacrificing the appearance and comfort you want.
Understanding Ontario Window Tint Laws
Ontario's starting point is Highway Traffic Act section 73. For the windshield and the windows directly left and right of the driver, the rule focuses on whether coloured spray, coloured coating, or reflective material substantially obscures the vehicle's interior when viewed from outside. The legislation is therefore built around visibility and obstruction, not just a single darkness percentage. You can review the practical framework in this Ontario window tint law guide.
That distinction matters in Whitby and across Durham Region. A police officer looking at a car on the road is concerned with what the tint does to the forward glass in real conditions. A very dark or reflective film can make it difficult to see the driver, passenger area, or traffic conditions inside the vehicle. Even if the film packaging uses a percentage that sounds acceptable, the finished result may still attract attention if it substantially limits outside-to-inside visibility.
The forward glass deserves priority
Treat the windshield and front side windows as the compliance-sensitive part of the vehicle. These are the panes that support the driver's view, allow other road users to see the vehicle's occupants, and receive the most scrutiny during a stop or inspection.
Ontario's rule also explains why generic advice from another province or country can mislead you. Window tint laws differ by jurisdiction, and a film that's routine elsewhere may not be suitable for Ontario's forward glass. The safest choice is to assess the vehicle as a complete system, including the original glass, the new film, the viewing angle, and the intended use.
Practical rule: If a tint installer can't explain how the finished front glass will be checked, don't choose the film based on appearance alone.
Visibility is a safety issue, not just a legal one
A dark front window can make it harder to read a driver's movements, assess an approaching vehicle, or see clearly in poor light. The same problem affects the person behind the wheel, especially at night or in rain. Legal window tint should improve comfort without compromising the sightlines that let you react early.
For a Whitby driver, the sensible baseline is conservative: leave the main windshield alone unless the proposed treatment is specifically designed and permitted for that location, use only a very light solution on forward side glass, and reserve darker shades for the rear areas where Ontario's rules are more accommodating.
How Visible Light Transmission Affects Your Tint
Visible Light Transmission, or VLT, measures the percentage of visible light that passes through a glazing system. A higher VLT means a lighter window, while a lower VLT means a darker appearance. The important detail is that the meter evaluates the finished combination of factory glass and aftermarket film, not the film in isolation.
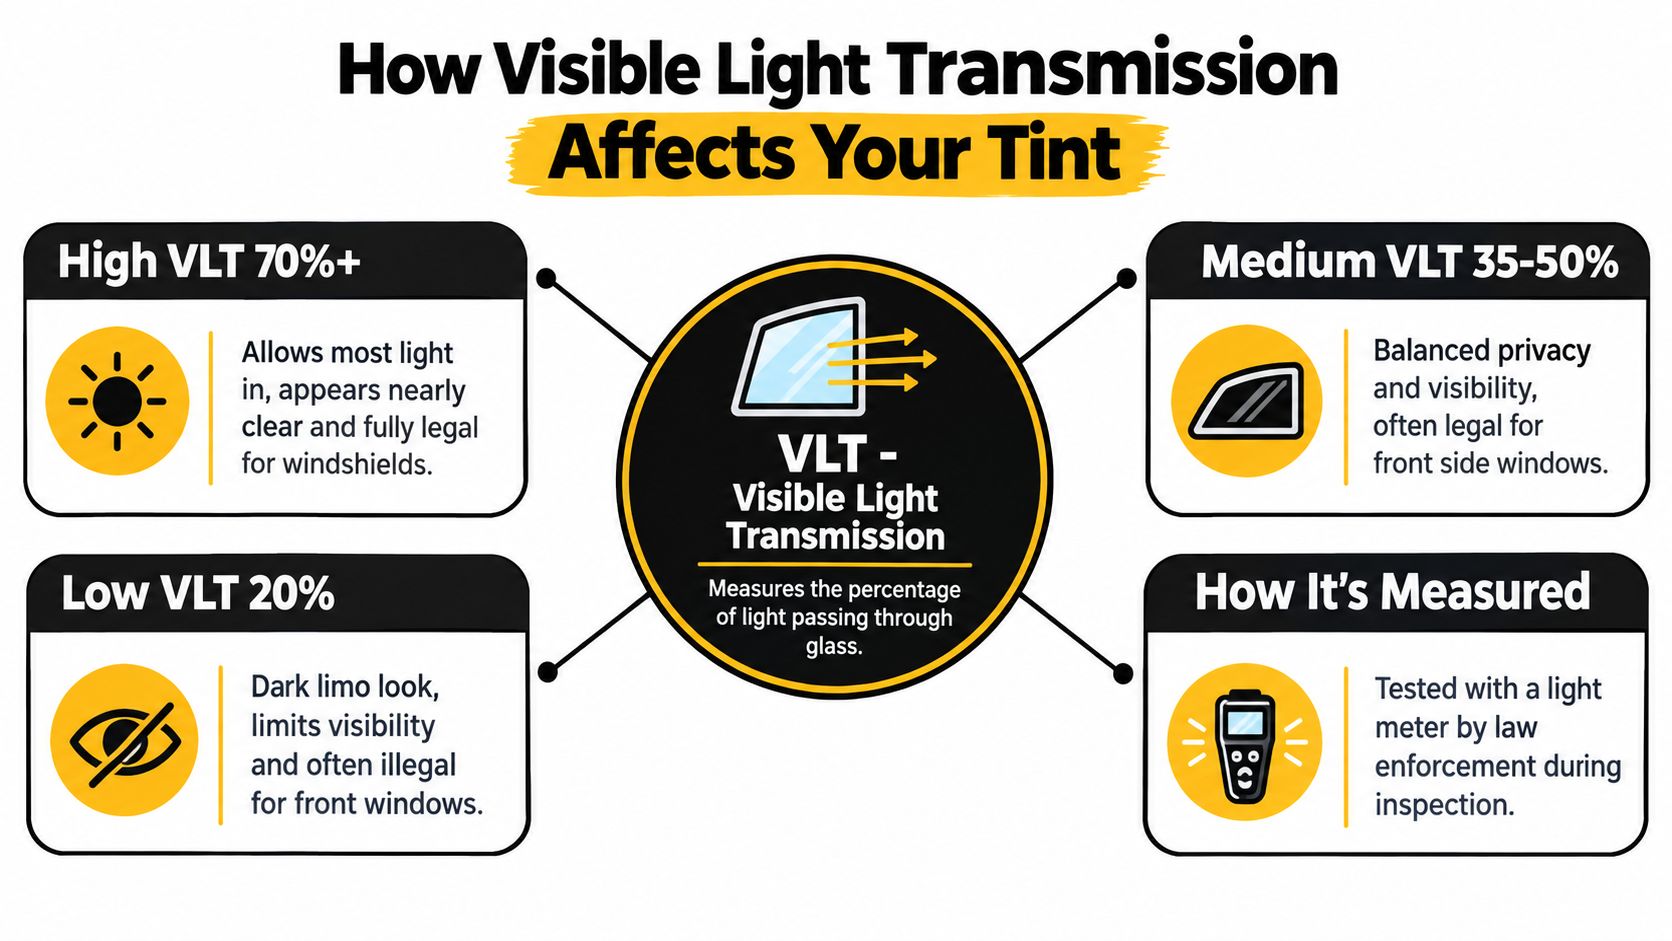
Think of the glass and film as two filters placed over the same opening. Factory side glass may already reduce the amount of light entering the cabin. Adding a film labelled 70% VLT doesn't guarantee that the completed window will still transmit 70% of visible light, because the original glass has already changed the result.
The combined reading is the number that matters
California provides a useful example of why this distinction gets missed. Its front side window standard is at least 70% VLT for the complete glass-plus-film system, as stated in the California Vehicle Code. California guidance also explains that factory side windows can already measure roughly 70% to 85% VLT, which is why installers commonly target film around 88% VLT or higher on front side glass to preserve a compliance margin, as outlined by the California Highway Patrol FAQ.
That California example isn't Ontario's complete legal framework, but it demonstrates the measurement problem clearly. A film's printed label describes the film. The meter reads the finished window. Those are different things.
A simple way to think about the result is:
- Factory glass: already filters some visible light.
- Aftermarket film: filters more light.
- Finished glazing: determines the actual VLT reading.
Don't shop by the roll label
Ask an installer what the original glass measures before film is applied and what the finished window is expected to measure afterward. The answer should account for the specific vehicle, because a new SUV, an older sedan, and a replacement window may not have identical factory glass.
The Carmedics Autowerks tint level guide can help you compare shade choices, but the right legal decision still depends on the completed installation. A light-looking film can fail a meter reading if the base glass is already tinted. Conversely, a premium film may provide heat management and glare control without requiring an aggressively dark shade.
If you're comparing products, separate appearance from performance. Darkness controls privacy and the visual effect. Film construction, optical clarity, and heat-management properties influence comfort. Choosing a lighter, higher-quality film is often smarter than choosing a cheap dark film and hoping the final reading works out.
Front Windshield and Side Window Restrictions
The front half of the vehicle is where tint decisions need the most discipline. Ontario's forward-glass rule is visibility-based, while the Ontario Association of Chiefs of Police has adopted a meter approach that uses 70% light transmission for the front windshield and the windows directly left or right of the driver's seat. That means a film can create two separate questions: does it substantially obscure the interior, and will the measured glass meet the applicable inspection or enforcement standard?
The windshield is not a canvas for dark film
The main windshield should remain clear. Drivers often refer to a “brow” or visor strip at the top, but that term doesn't turn the entire upper windshield into an unrestricted tint area. Ontario drivers should treat any windshield strip as a narrow, visibility-sensitive application rather than a workaround for darkening the full pane.
The safest installation leaves the driver's primary sightline unobstructed and avoids reflective or heavy material. A strip that sits too low, changes the driver's view, or creates a sharp contrast can become a practical problem even if it appears modest from outside. Review the options for a legal front windshield tint installation before approving any windshield work.
Front side glass requires a measured approach
Driver and passenger windows need enough transparency for outside-to-inside visibility and the driver's own peripheral view. Because the original glass already affects transmission, don't assume a film marketed as “light” will automatically be acceptable. Have the installer measure the glass before and after installation, and keep the result documented with the vehicle's work records.
A medical need doesn't automatically make dark forward glass acceptable. An exemption or supporting documentation may affect how a particular situation is handled, but it doesn't erase the basic need for safe visibility or make every dark film legal. Drivers should confirm the applicable requirements before installation instead of relying on a note or verbal assurance.
Older vehicles need a separate inspection check
Ontario's vehicle inspection regulation states that the windshield tint requirements in that inspection standard don't apply to vehicles manufactured before July 1, 2011, as set out in the Ontario safety inspection regulation. That is important for owners of older cars, collector vehicles, and used vehicles being certified for sale.
The pre-2011 inspection treatment doesn't mean visibility stops matter on the road. Highway Traffic Act rules still apply to driving conditions, and an obstructed forward view remains a safety concern. Think of the exemption as an inspection-specific detail, not permission to install any shade you want.
Rear Window Tint Rules and Mirror Requirements
Ontario gives drivers more freedom with rear passenger windows and the rear window than with the forward glass. Neutral legal summaries commonly describe no VLT restriction on the rear side windows and rear window, while the front side windows remain the compliance-sensitive area. That makes the rear cabin the logical place to pursue privacy and a darker appearance.
This flexibility suits SUVs, crossovers, trucks, and family vehicles. You can use a deeper shade behind the driver without putting the same visual load on the forward glass. Rear tint can also make the cabin feel more private and reduce the amount of direct sunlight entering the passenger area.
Dark rear glass still has conditions
The common mistake is treating unrestricted rear darkness as a complete exemption from visibility and equipment requirements. If the rear tint obstructs the driver's view behind the vehicle, the vehicle needs appropriate outside mirrors, commonly understood as dual side mirrors, so the driver can maintain rearward awareness.
This is especially important on vehicles with a dark rear windshield, cargo-area glass, or a factory privacy package combined with aftermarket film. Before choosing the darkest available shade, check the mirror setup and confirm that the driver can still use the mirrors effectively. The Ontario tint film options can be discussed according to the vehicle's glass layout rather than as a one-size-fits-all package.
A police stop isn't the same as a certification
A vehicle may pass an ordinary drive through town without attracting attention and still fail a later safety inspection. Roadside enforcement considers obstruction and visibility in the circumstances of the stop. A licensed inspection facility may use a meter and apply the stricter forward-glass transmission standard.
A quiet roadside experience doesn't certify the vehicle for sale, transfer, or inspection.
For rear tint, the practical recommendation is straightforward. Pick the shade you want for the rear passenger and cargo areas, verify the mirror requirement, and don't use the rear rules as an excuse to darken the windshield or front side windows. A balanced installation gives you the privacy benefit without turning the whole vehicle into a visibility problem.
Enforcement Mechanics and Safety Inspections
Ontario drivers need to separate roadside enforcement from provincial safety inspection. They overlap, but they aren't identical tests. A roadside officer may assess whether forward tint substantially obscures the vehicle interior, while the Ontario Association of Chiefs of Police resolution recognises the use of a tint meter on the front windshield and the windows directly beside the driver, with a minimum reading of 70% light transmission. The resolution is available in the OACP tint-meter document.
That gives enforcement a practical tool. An officer doesn't have to judge darkness only by eye. A meter can quantify the amount of visible light passing through the forward glass, which is why a film that looks almost clear in a driveway can become a problem when measured against the original glass.
Two contexts, two practical risks
| Evaluation Context | Primary Metric | Legal Threshold | Consequence of Failure |
|---|---|---|---|
| Roadside police enforcement | Obstruction and outside-to-inside visibility, with meter use recognised for forward glass | The forward glass must not substantially obscure the vehicle interior, and the OACP resolution identifies 70% light transmission for the tested areas | The driver may face enforcement action and may need to correct the tint |
| Ontario safety inspection | Meter reading on the applicable forward glass | The cited inspection threshold is 70% light transmission | The vehicle can fail certification until the tint is removed or corrected |
A warning, ticket, or order to correct the vehicle is a roadside concern. A failed safety certificate is a transaction problem. If you're selling a car, transferring ownership, or certifying a vehicle, the inspection result can delay the process even if you've driven the vehicle for a long time without being stopped.
Product choice affects compliance
The strongest legal-window-tint strategy is usually a high-clarity film with useful heat and UV-management properties at a light enough shade for the forward glass. Ceramic film is often considered for that role because it can provide performance without requiring the darkest appearance, but the product name alone doesn't guarantee compliance. The installer still needs to evaluate the glass and the finished measurement.
Ask for three things before work begins:
- A glass reading: Measure the factory pane before applying film.
- A finished target: Confirm the expected combined VLT after installation.
- A written record: Keep the product and measurement details with the vehicle paperwork.
That process removes guesswork. It also makes it easier to choose a darker rear shade while keeping the front within a sensible margin.
Choosing Compliant Tint at Carmedics Autowerks
The right tint decision starts with your use of the vehicle, not the darkest sample on the display rack. A daily-driven SUV in Whitby may need rear privacy and cabin comfort, while a weekend sports car may need a subtle appearance that preserves outward visibility. Both vehicles can benefit from professional film, but they don't need the same layout or shade.
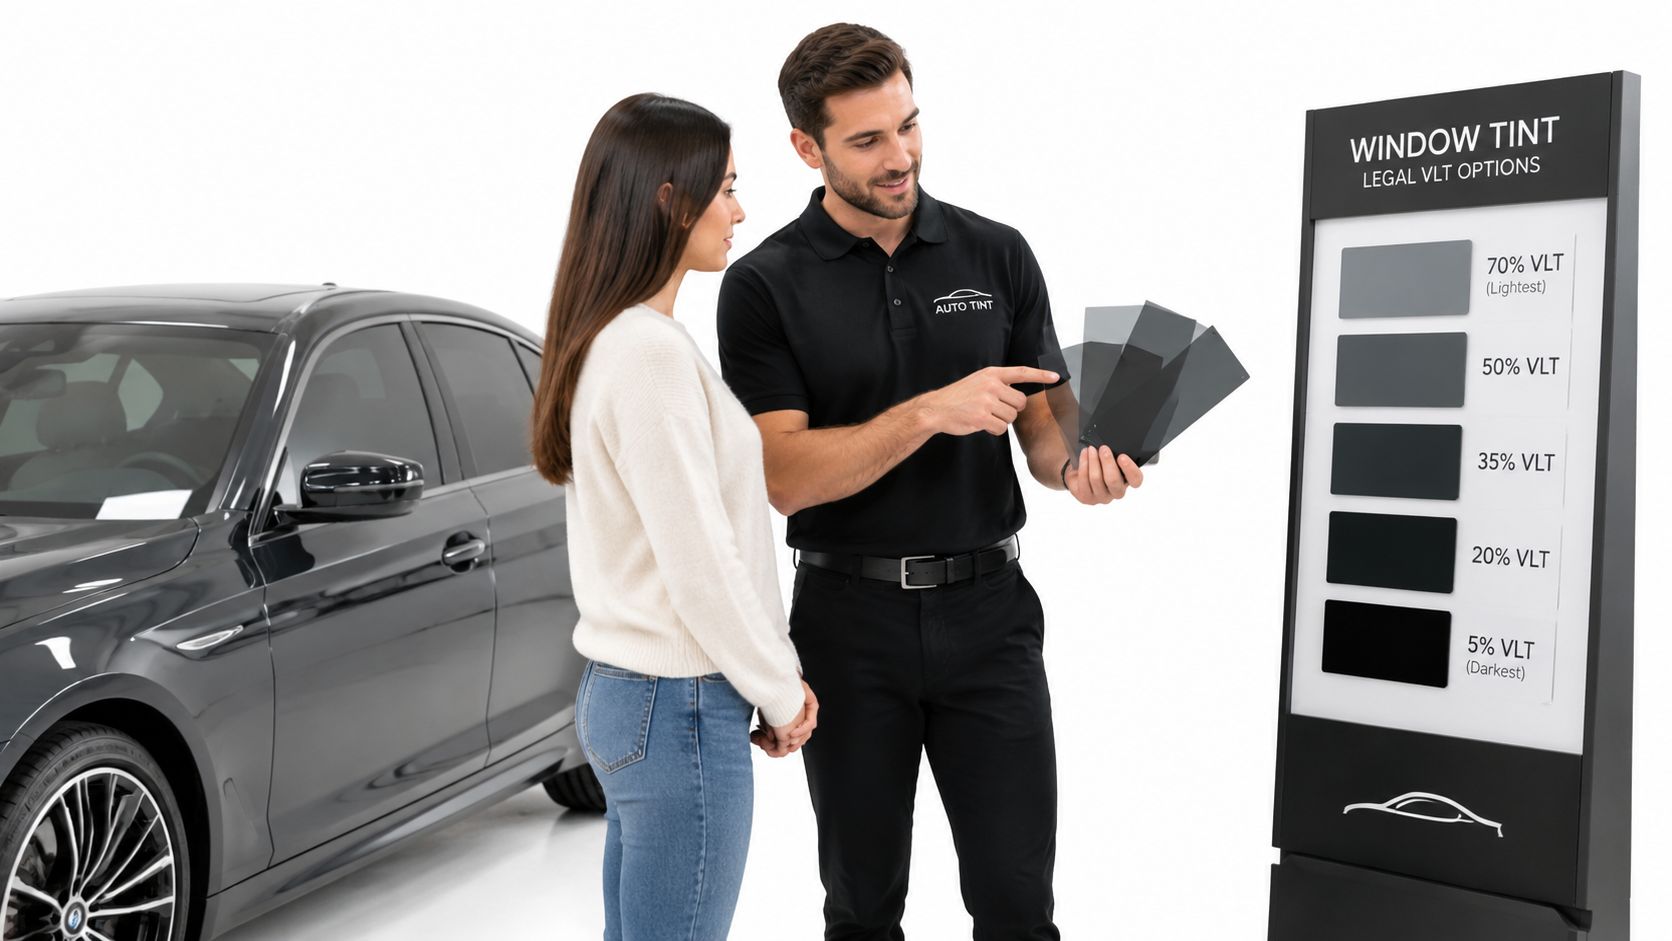
Choose performance before darkness
A quality ceramic film can be a sensible choice when you want heat control and optical clarity without pushing the shade too dark. For the windshield and front side windows, the goal should be a light, unobtrusive finish that preserves the required visibility. For the rear glass, you can choose a deeper appearance if the vehicle's mirrors and layout support it.
The main mistake is buying a film by shade alone. A dark dyed film may deliver the look but create poor night visibility or a difficult inspection result. A well-selected lighter film can give the vehicle a cleaner appearance and better comfort without placing the forward glass near the line.
Installation quality matters
Poor application creates its own problems. Bubbling, peeling, hazy adhesive, uneven edges, and contamination can distract the driver or make the glass look suspicious during a stop. Precision cutting and careful edge sealing help the film follow the glass properly, especially around curved windows, door frames, and defroster-equipped rear glass.
Professional installation also gives you a chance to confirm the plan before the film goes on. A technician should identify which panes are factory privacy glass, explain how the combined reading works, and separate the front-window recommendation from the rear-window recommendation. Carmedics Autowerks window tinting in Whitby is one local option for discussing those choices and arranging vehicle-specific installation.
Use a written plan
Before approving the job, confirm:
- Which windows receive film: Windshield, front side glass, rear side glass, and rear window should be listed separately.
- Which shade goes where: Don't let a rear-window package accidentally become a front-window recommendation.
- How the forward glass will be checked: The completed system matters, not just the film's advertised VLT.
- What care the film needs: Follow the installer's curing and cleaning instructions to protect the finish.
Carmedics Autowerks Inc offers automotive window tinting alongside auto repair, paint protection film, and collision repair services in Whitby. For a legal-window-tint upgrade, bring the vehicle in with a clear goal: preserve forward visibility, choose the rear shade deliberately, and have the finished work assessed as a complete glass-and-film system.
Carmedics Autowerks Inc can help Whitby drivers select and install vehicle-specific window tint with forward-glass compliance and rear-window privacy in mind. Visit Carmedics Autowerks Inc to discuss your vehicle, tint layout, and the right next step before committing to a film.
You park your car on the Whitby driveway before heading to work, then leave it exposed through the brightest part of the day. By late summer, the hood looks less lively than the doors, the roof feels rough after washing, and the deep colour that once looked sharp has started to lose its gloss. Ontario doesn't have a desert climate, but the sun can still age a vehicle steadily when outdoor parking becomes the routine.
The practical answer to how to protect car paint from sun isn't one miracle bottle. It's a layered plan built around parking habits, careful washing, seasonal protection, and professional options such as ceramic coating, paint protection film, or tinting. The right level depends on whether your vehicle sleeps in a garage, sits outside at a GO station, or spends most of its week on exposed streets across Durham Region.
Why Ontario Sun Is Harder on Paint Than Most Drivers Expect
A commuter in Whitby may park outside from May through September and assume the paint is safe because the weather doesn't feel as severe as Southern California. That assumption can be expensive. Federal guidance places a UV Index of 6 to 7 in the High band, 8 to 10 in the Very High band, and 11 or more in the Extreme band, with the greatest exposure risk between 11 a.m. and 3 p.m. from April through September. Environment and Climate Change Canada's UV Index guidance gives a better picture of the risk than temperature alone.
Whitby and the wider Durham Region create several ordinary exposure patterns:
- Suburban driveways: A vehicle may remain in the same position for hours, leaving the hood and roof repeatedly exposed.
- GO station parking: Large open lots at Whitby, Ajax, or Oshawa offer little shade during the workday.
- Lakeshore glare: Reflected light around Lake Ontario can add to the exposure on already bright surfaces.
- Winter reflection: Snow and pale surfaces can reflect sunlight toward the lower body and glass, even when temperatures are low.
Cloud cover doesn't eliminate the problem. UV can still reach the vehicle through intermittent cloud, so a partly cloudy day shouldn't be treated as a complete break from exposure.
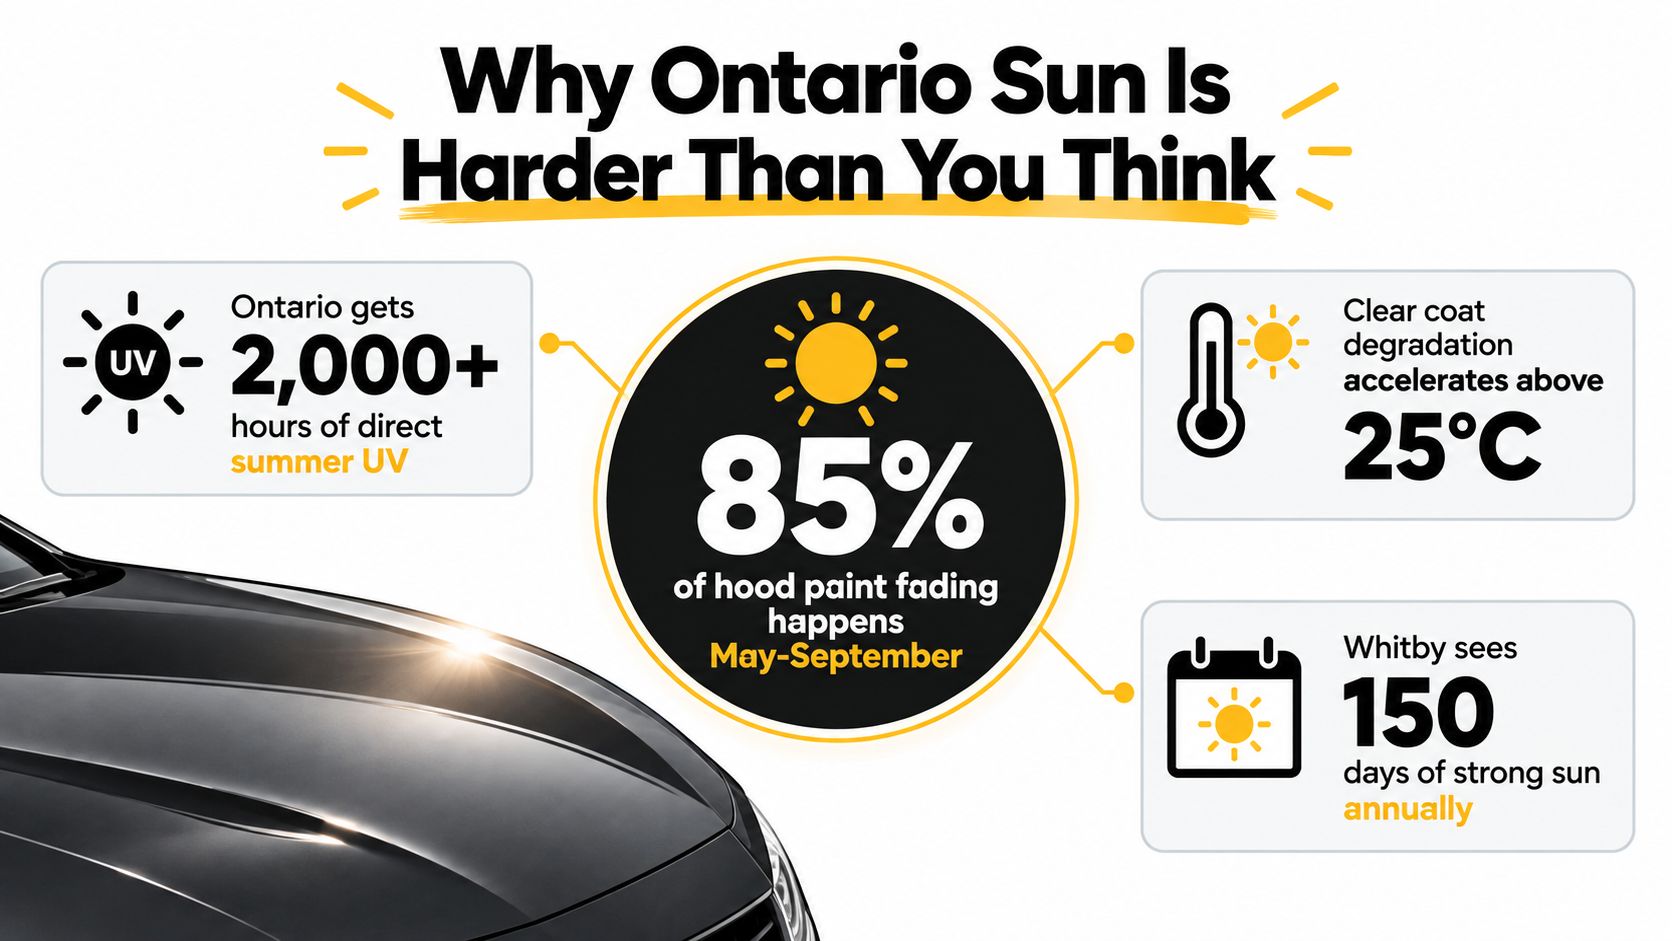
Exposure matters more than a single hot day
UV intensity drives the chemical side of oxidation, while heat makes the paint film work harder. The hood, roof, and trunk lid usually show changes first because they face the sky directly for most of the day. Darker colours make fading easier to notice, but lighter finishes can become dull or chalky too.
Practical rule: Judge your protection plan by where the car sits for most of the week, not by how hot the forecast feels.
A garage is the strongest everyday habit because it removes direct exposure while the vehicle is stationary. If that isn't possible, shade, a clean sunshade, regular surface protection, and consistent washing form a sensible layered approach. A printable seasonal maintenance checklist can help turn those habits into a repeatable routine rather than an occasional spring project.
How Sun Actually Damages Car Paint
Modern automotive paint relies on a clear coat above the colour layer. UV radiation gradually weakens the clear coat's protective chemistry, while oxygen and heat continue the oxidation process. The first signs aren't always dramatic. You may notice reduced gloss, a slightly dry texture, cloudy areas, or a colour difference between horizontal panels and protected sections.
Infrared heat adds another stress. The hood, roof, and trunk lid heat and cool repeatedly, causing the paint film to expand and contract. Over time, that movement can contribute to fine cracking and make the surface more vulnerable to contaminants. Automotive coatings literature also shows that clear-coat UV absorbers can degrade with exposure, and one tested clearcoat system limited transmission of 340 nm UV radiation to the basecoat to less than 10 percent for less than one year in that test system. The peer-reviewed coatings paper illustrates why factory protection isn't infinite.
Contaminants turn exposure into surface damage
Tree sap, bird droppings, road salt residue, and industrial fallout from the 401 corridor can bond to the surface. When the paint is warm, these materials can etch more readily, leaving marks that washing alone won't remove. A vehicle parked beneath maple or oak trees may receive shade, but it also receives more organic contamination.
Colour changes vary by finish:
| Paint Colour | Primary Symptom | Time to First Signs | Repair Cost Range |
|---|---|---|---|
| Red | Fading and loss of colour richness | Varies with exposure and maintenance | Panel respray is roughly $800 to $1,500 CAD |
| Black | Dullness, visible haze, and reduced gloss | Varies with exposure and maintenance | Panel respray is roughly $800 to $1,500 CAD |
| Dark blue | Colour fading and uneven appearance | Varies with exposure and maintenance | Panel respray is roughly $800 to $1,500 CAD |
| White and silver | Chalking, dryness, and loss of clarity | Varies with exposure and maintenance | Panel respray is roughly $800 to $1,500 CAD |
The repair range is an editorial market estimate, not a universal quote, and it can change with the panel, colour match, preparation, and shop. Once the clear coat has oxidized severely or begun peeling, polishing can't recreate missing material. Read more about the warning signs in what causes car paint to fade, then act before a cosmetic issue becomes a repainting job.
Simple Habits That Cut Daily UV Exposure
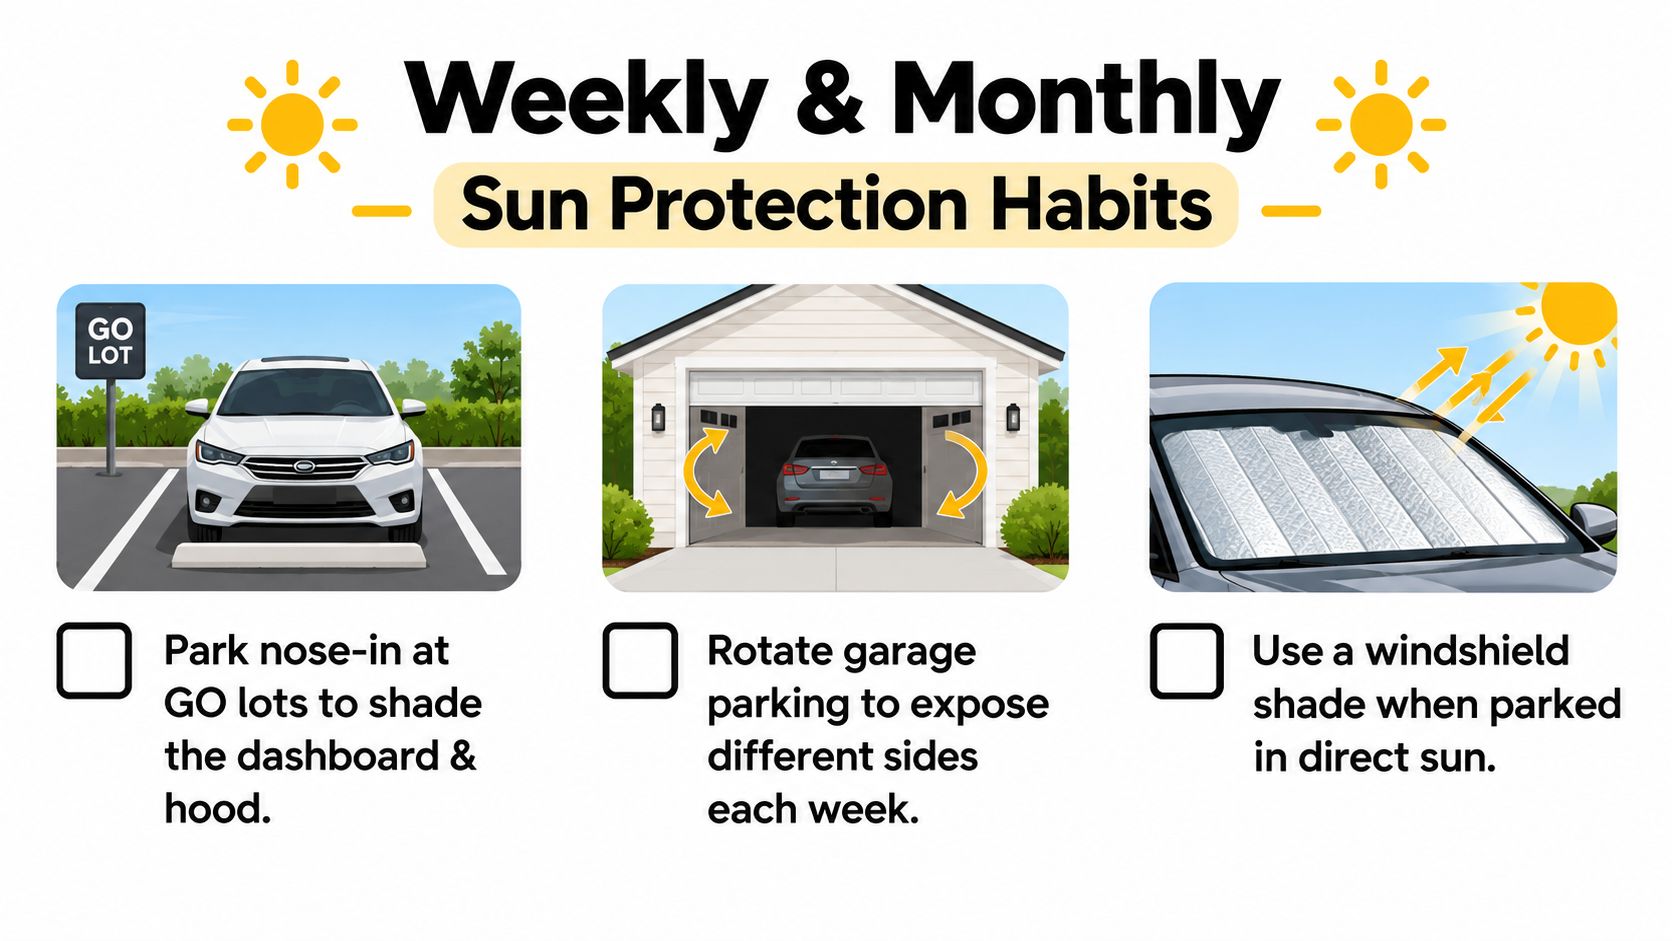
The cheapest protection is usually a change in where and how you park. At a GO station, choose a spot that leaves the hood less exposed when practical, and rotate your position rather than giving the same panel the same afternoon exposure every day. At home, pulling farther forward in the driveway may place the hood under the garage's shadow during part of the afternoon.
A windshield sunshade is worth keeping in the car. It protects the dashboard and reduces the heat entering the cabin, and a custom-cut roof shade can help when the vehicle sits outside all day at work. Use the shade only when the inside of the vehicle is clean enough that trapped grit won't rub against the glass or dash.
Keep the surface clean without creating new marks
For a Whitby commuter, a two-week wash rhythm during the brighter months is a practical starting point. Use a pH-neutral automotive soap, a clean microfibre mitt, and a separate method for wheels and lower panels. Dry with a waffle-weave towel instead of letting mineral-rich water evaporate on the paint.
Handle aggressive contamination quickly:
- Bird droppings: Rinse and soften them as soon as you can, ideally within 24 hours, because dried deposits can etch the surface.
- Tree sap: Dab and lift with a suitable automotive-safe cleaner rather than scraping it with a card or fingernail.
- Salt residue: Rinse thoroughly after winter roads have been treated, including the lower doors and rocker panels.
- Water spots: Wash in shade and dry promptly so minerals don't bake onto a warm panel.
Exterior plastic and rubber trim need attention too. Apply a UV-resistant dressing after washing, using a product that leaves the surface natural rather than greasy. Grey, brittle trim makes an otherwise well-kept vehicle look older and can crack when neglected.
Consistency matters more than an elaborate product shelf. A careful wash, dry, shade strategy, and quick response to contamination will do more for a daily-driven car than applying an expensive product once and ignoring it afterward.
DIY Protection Options Worth Your Weekend
DIY protection works when expectations stay realistic. A careful two-bucket hand wash protects the finish by reducing grit-related marring, while wax and sealants add a temporary sacrificial layer above the clear coat. Neither option replaces professional correction when the paint already has oxidation, deep swirls, or peeling clear coat.
A quality paste wax commonly costs about $20 to $40 and lasts roughly six to 10 weeks. A spray sealant typically costs $15 to $25 and lasts about four to six weeks. Those figures are product-use estimates, so weather, washing technique, storage, and exposure will affect the result.
Choose the tier that matches your parking
| Method | Product Cost | Lifespan | Time Per Application | UV Protection Level |
|---|---|---|---|---|
| Two-bucket hand wash and microfibre dry | Varies by supplies already owned | Maintained by each wash | About 45 to 90 minutes | Foundational, no sacrificial coating |
| Carnauba paste or liquid wax | About $20 to $40 | Roughly six to 10 weeks | About two to three hours including wash | Moderate, short-term surface barrier |
| Synthetic spray sealant | About $15 to $25 | Roughly four to six weeks | About 15 minutes after washing | Light to moderate, convenient maintenance |
A vehicle outside every weekday in Durham Region needs more frequent upkeep than a weekend car stored indoors. For the former, spray sealant is useful as a topper between more thorough wax applications. For the latter, a careful wash and seasonal wax may be enough if the paint remains healthy.
Understand the limits before you start
DIY products sit on top of the clear coat. They don't stop 401 stone chips, and they won't repair oxidation that has already removed or damaged the clear coat. Washing can also create swirl marks if the mitt is dirty, the towel is overloaded, or the vehicle is wiped while gritty.
Take your time with panel preparation, work in shade, and use separate towels for paint, glass, wheels, and door jambs. If you want to compare a surface film approach with temporary products, review paint protection film and spray options before choosing based only on bottle claims.
Professional Sun Protection Ceramic Coating PPF and Tinting
Professional protection makes sense when the car's exposure, value, or ownership plans justify a more controlled installation. The three options Whitby drivers usually compare are ceramic coating, paint protection film, and window tinting. They solve different problems, so buying one as a substitute for another often leads to disappointment.
Ceramic coating is a liquid product that bonds to prepared clear coat. It adds water repellency, chemical resistance, easier washing, and a sacrificial layer against UV exposure. It doesn't stop rock chips, and it won't hide deep scratches or correct poor preparation. Ontario-focused guidance places ceramic coating service life at two to five years, while wax lasts six to eight weeks and sealants about four to six months, depending on product and maintenance. California car-care guidance on protection lifespan provides those product comparisons, although Ontario exposure and maintenance still differ.
PPF is a clear urethane film applied to selected panels or the whole vehicle. It is the better choice for stone impact on the hood, bumper, mirrors, and front fenders, and it also reduces direct UV contact with the covered paint. It won't protect uncovered roof or trunk panels, and damaged or lifting film needs inspection rather than being ignored. California guidance commonly places PPF service life at six to 10 years, with some recommendations for replacement every five to seven years as film properties change. The California PPF discussion gives that context, not a guarantee for every brand or installation.
Window tinting protects the interior rather than the exterior paint. It can reduce glare and solar load through the glass, but tint shade and legal compliance must be considered separately. Ontario requires at least 70 percent visible light transmission on the front side windows, so check the applicable rules before selecting film.
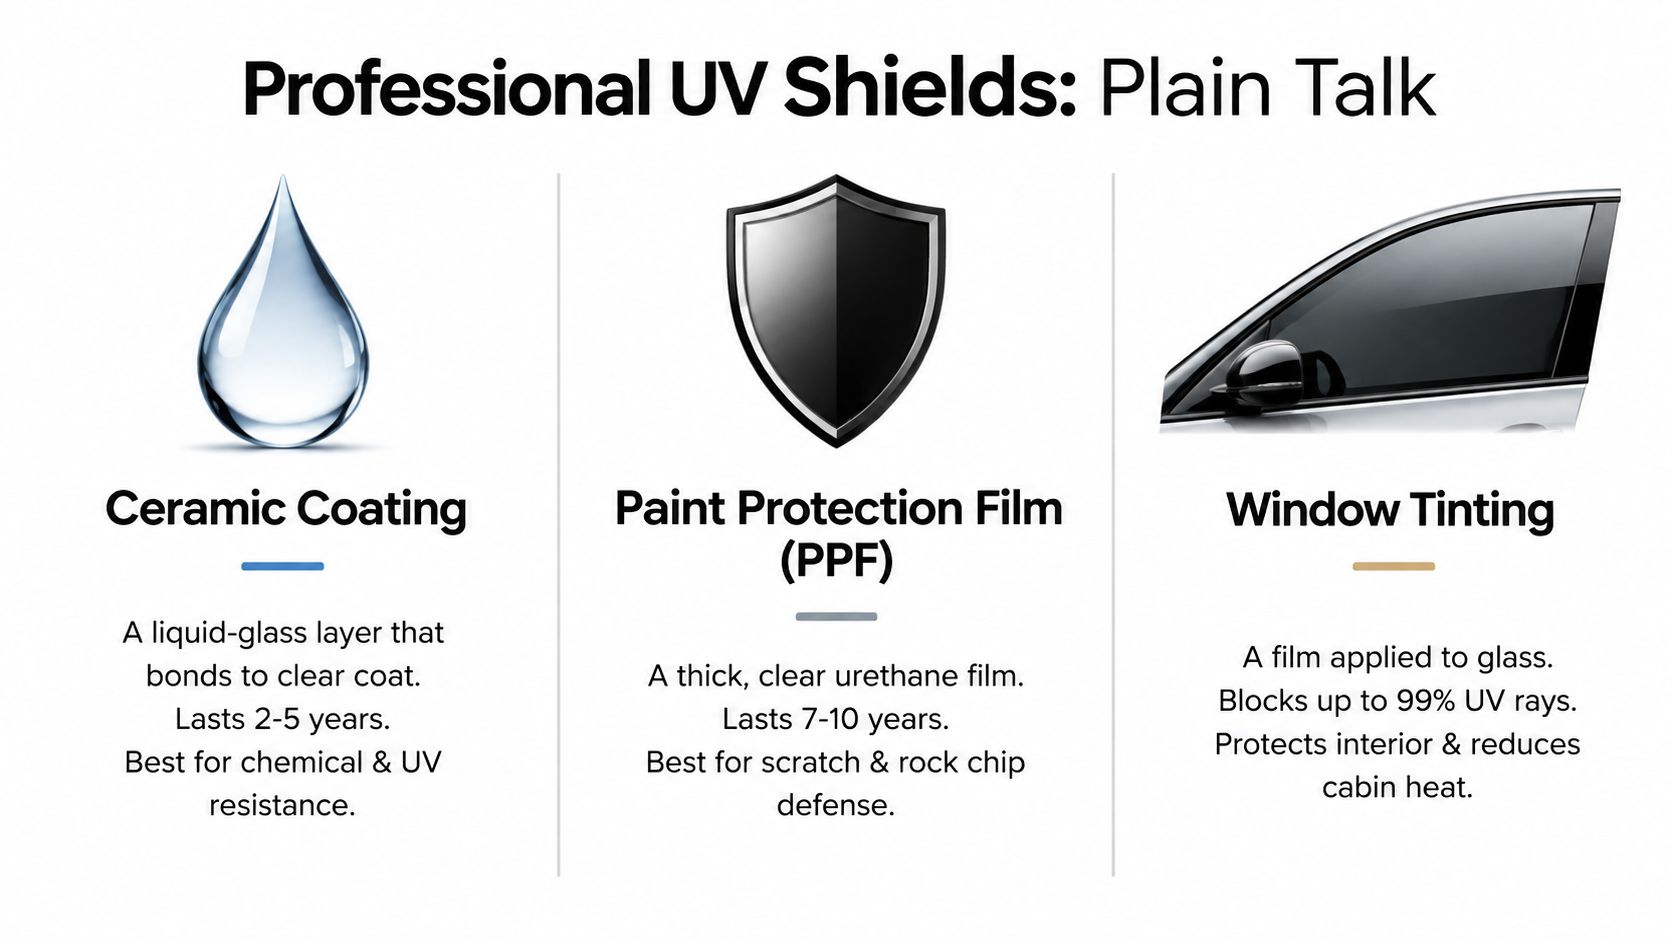
Match the service to the actual complaint
| Option | Typical Whitby Market Range | Best Use | Main Limitation |
|---|---|---|---|
| Consumer ceramic coating | About $600 to $900 | Owners who want a maintained, easier-to-clean surface | Requires preparation and careful washing |
| Professional multi-year coating | About $1,200 to $2,000 | Newer vehicles and outdoor parking | Doesn't prevent impact chips |
| Partial-front PPF | Roughly $1,500 to $2,500 | 401 commuters and high-impact areas | Leaves uncovered panels exposed |
| Full-body PPF | $4,000 and up | High-value or aggressively preserved vehicles | Highest initial investment and still needs maintenance |
| Quality sedan tint | About $300 to $700 | Interior UV and cabin comfort | Doesn't protect painted exterior panels |
For a new vehicle driven daily on the 401, partial-front PPF plus coating on the remaining painted panels is a logical compromise. A vehicle that rarely sees highway debris may get more value from coating and disciplined maintenance. See PPF or ceramic coating for a side-by-side decision before booking.
A Realistic Ontario Maintenance Schedule
Ontario care should follow the season, not a southern-climate template. The brighter stretch from April through September deserves more frequent washing and replenishment, while the colder months shift the priority toward salt removal, safe rinsing, and inspection after winter.
Use this calendar as a garage-door checklist:
- April: Remove winter contamination with a thorough wash and decontamination. Inspect the hood, roof, and trim before the strongest UV season.
- May: Apply a fresh wax in late May, especially after the first warm stretch. Set a recurring two-week hand-wash reminder.
- June: Wash every two weeks and apply a spray sealant topper monthly. Check whether water behaviour remains consistent on coated or waxed panels.
- July: Keep the same wash rhythm through peak summer exposure. Use a windshield shade whenever the vehicle sits in an exposed lot.
- August: Refresh paste wax in late August, then look closely at horizontal panels after any prolonged hot spell.
- September: Continue the two-week wash routine and remove bonded contaminants before autumn debris settles.
- October: Book a professional decontamination wash, inspect PPF edges, and check coating behaviour before road salt returns.
- November through March: Wash monthly when conditions allow, rinse salt from lower panels, and use quick detailer only for light, clean dust. Avoid rubbing heavily contaminated paint.
Build inspection into the routine
Check PPF edges monthly for lifting, contamination, or damage. On coated paint, look at water behaviour after a clean wash, but don't treat beading alone as proof that the coating is healthy. A full paint correction or coating inspection every two to three years can identify whether the surface needs correction, decontamination, or just better maintenance.
The schedule works because it uses familiar triggers. The first warm day in May signals the initial protection, the August heat wave prompts a surface check, and the first salt application in November signals the winter routine. Keep the list short enough to follow and specific enough that you won't need to remember what comes next.
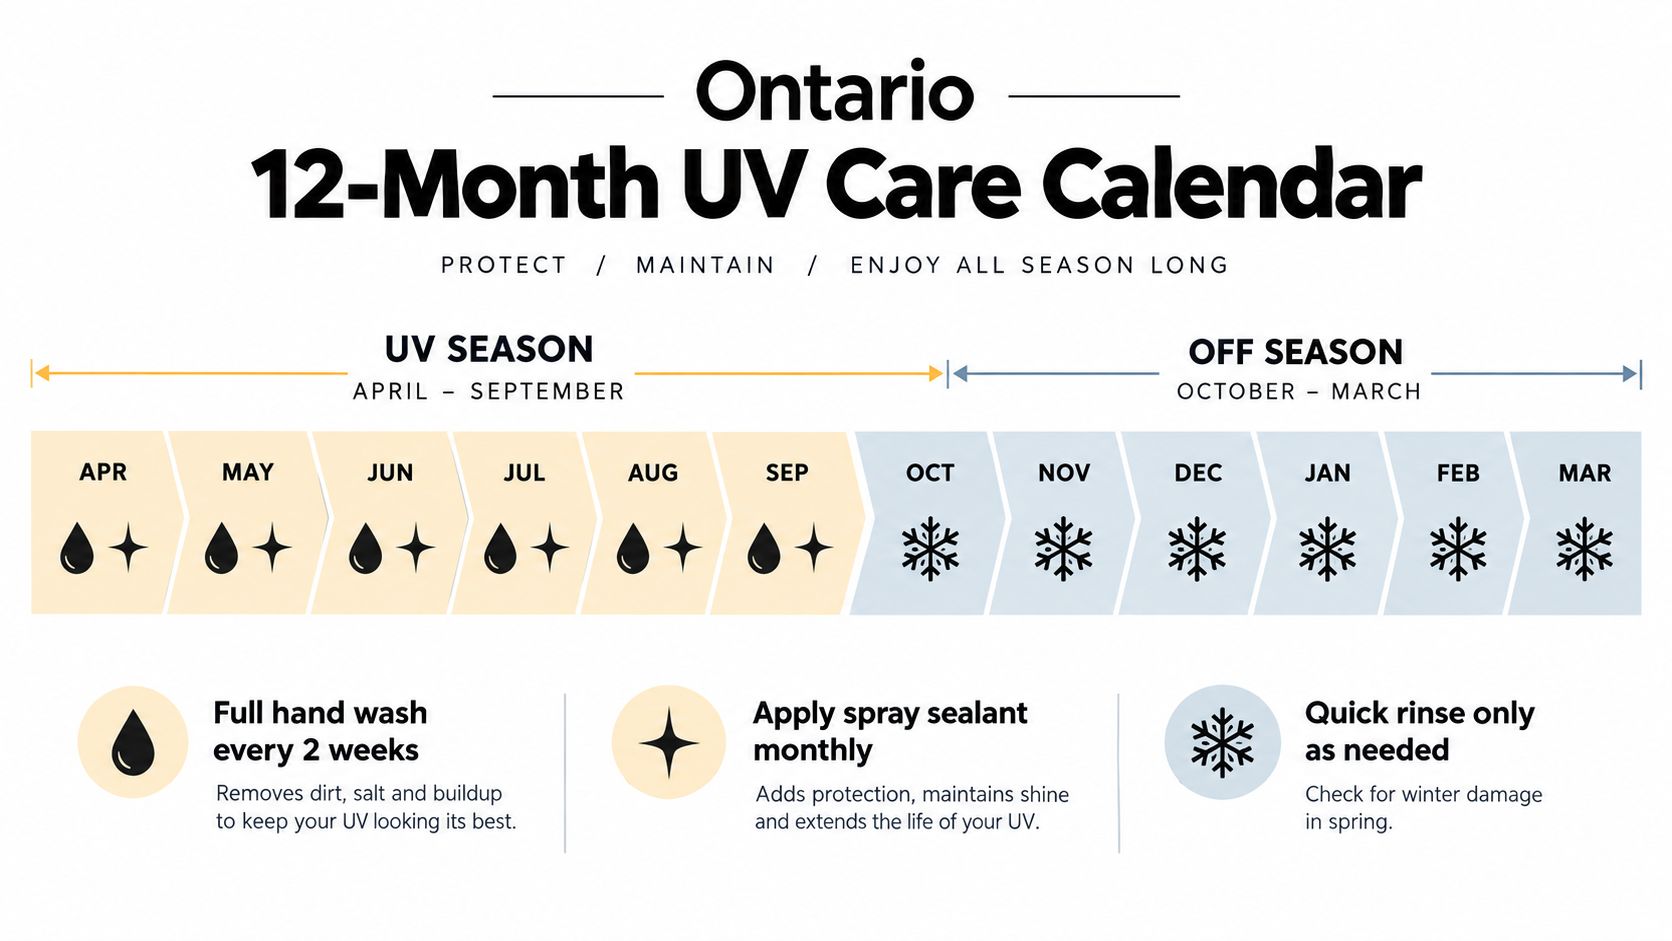
When to Bring It to Carmedics Autowerks in Whitby
DIY care has reached its limit when the paint looks dull immediately after washing, fading is obvious on the hood or roof, or the clear coat is peeling. Recurring water spots that no longer polish away can indicate etching rather than surface dirt. A newer or leased vehicle also deserves an earlier decision because preserving the factory finish may matter more than correcting neglected damage later.
Book the service around the symptom:
- Visible oxidation or swirls: Start with paint correction before applying a coating. A coating protects prepared paint, but it doesn't turn damaged paint into new paint.
- 401 commuting and stone exposure: Choose PPF for the bumper, hood, mirrors, and other high-impact areas. Consider coating the uncovered panels if sun exposure is also a concern.
- Low-maintenance exterior care: Ceramic coating can make routine washing easier and provide a durable sacrificial layer, provided you continue using safe wash methods.
- Cabin heat and interior exposure: Window tinting addresses the glass and interior, not paint chips. Confirm the film selection meets Ontario requirements before installation.
An inspection-first appointment is more useful than choosing a package from a photo or a broad product description. The team can assess paint condition, identify whether correction is needed, discuss film coverage, and provide a written quote. Ask about available warranty options and the maintenance expected after installation.
Carmedics Autowerks is located in Whitby and offers PPF, tinting, and coating-related solutions alongside broader vehicle care. For Durham Region drivers, the Whitby PPF and tint shop is a practical place to compare options with the vehicle in front of the installer, rather than juggling products and weekend labour without knowing the starting condition.
Prevention remains more predictable than repainting. If you're unsure whether your car needs a careful maintenance plan, paint correction, PPF, ceramic coating, or tint, an inspection can remove the guesswork before you commit.
Carmedics Autowerks Inc offers professional paint protection film, ceramic coating solutions, and window tinting for Whitby and Durham Region drivers dealing with sun, road debris, and daily outdoor parking. Visit Carmedics Autowerks Inc to discuss your vehicle's paint condition, exposure habits, and the most suitable protection plan.
You've just picked up a new vehicle in Whitby. The paint is flawless, the dealer plates are still on, and the first serious drive may be a daily run along the 401 or QEW through winter road spray. By spring, the front bumper, hood, mirrors, and lower fenders may be facing stone chips, gravel, salt abrasion, bug residue, and road grime.
That's why Canadian owners ask, is full PPF worth it? The answer isn't about shine. It's about how much highway exposure the vehicle gets, how long you'll keep it, how much you value factory paint, and whether you'd rather prevent damage than repair it later.
| Protection choice | Best fit | Main strength | Main limitation |
|---|---|---|---|
| Full PPF | New vehicles driven year-round and kept for years | Broad paint protection across painted surfaces | Highest installation cost |
| Partial PPF | Daily drivers focused on front-end impact areas | Protects the most exposed panels | Unprotected panels remain vulnerable |
| Ceramic coating | Owners prioritising gloss and easier washing | Helps with surface appearance and maintenance | Doesn't provide impact protection |
| No protection | Low-mileage or short-term ownership | Lowest upfront cost | Paint faces every road hazard directly |
A practical overview of the benefits of paint protection film can help, but the decision should come down to your ownership pattern, not a sales pitch. For most Whitby and Durham Region drivers, winter exposure and highway kilometres matter more than the vehicle's badge.
Introduction Why Ontario Drivers Ask Is Full PPF Worth It
A new vehicle can lose its factory-fresh appearance during an ordinary Ontario commute. A daily run from Whitby, Ajax, Oshawa, or Bowmanville along the 401 or QEW puts the front end behind trucks, traffic, gravel, and winter road spray. Salt, bugs, repeated washing, and road debris then work against the paint through the season.
The ownership question is practical: how much highway exposure will the vehicle receive, how long will you keep it, and what will a clean factory finish be worth at trade-in? Ontario-focused service information identifies PPF as a barrier against stone chips, road debris, gravel, winter salt abrasion, bug etching, and micro-scratches. The Ontario-focused PPF service information also states that quality films are commonly warranted for 5 to 10 years. That warranty range matters only if it matches your keep-time.
Practical rule: Full PPF makes the most sense when the vehicle is new, the routes are exposed, and you plan to keep it through repeated Ontario seasons.
The four choices serve different ownership patterns. Full PPF covers every painted surface. Partial PPF focuses on the front or other high-impact areas. Ceramic coating can improve gloss and make washing easier, but it does not shield paint from stones. No protection has the lowest upfront cost, while every chip, stain, and scratch reaches the finish directly.
Full PPF is not an automatic choice for a mainstream vehicle under about C$40,000, especially when the planned ownership period is only 3 to 5 years. Those owners may spend more on film than they recover through avoided chip repairs, repainting, or a stronger trade-in appraisal. The benefits of paint protection film provide useful context, but the break-even point depends on the vehicle, routes, condition, and keep-time.
The decision becomes easier when the math is specific. Choose full coverage when protecting original paint through winter and highway use matters enough to justify the installation cost. Choose partial coverage or no film when exposure, vehicle value, or ownership time is limited.
What Full PPF Actually Protects and How It Works
Paint protection film is a clear urethane barrier installed over painted panels. It's designed to take the abuse that would otherwise reach the vehicle's paint. When a stone hits the film, the film absorbs and distributes part of that impact instead of leaving the paint exposed.
Full coverage means the installer protects all painted exterior surfaces, not only the bumper and hood. Depending on the vehicle and package, that can include the doors, rear quarters, roof, trunk or liftgate, fenders, mirrors, and other painted sections. The important distinction is scope. A partial installation protects selected impact zones, while a full installation protects the vehicle's painted finish as a complete system.
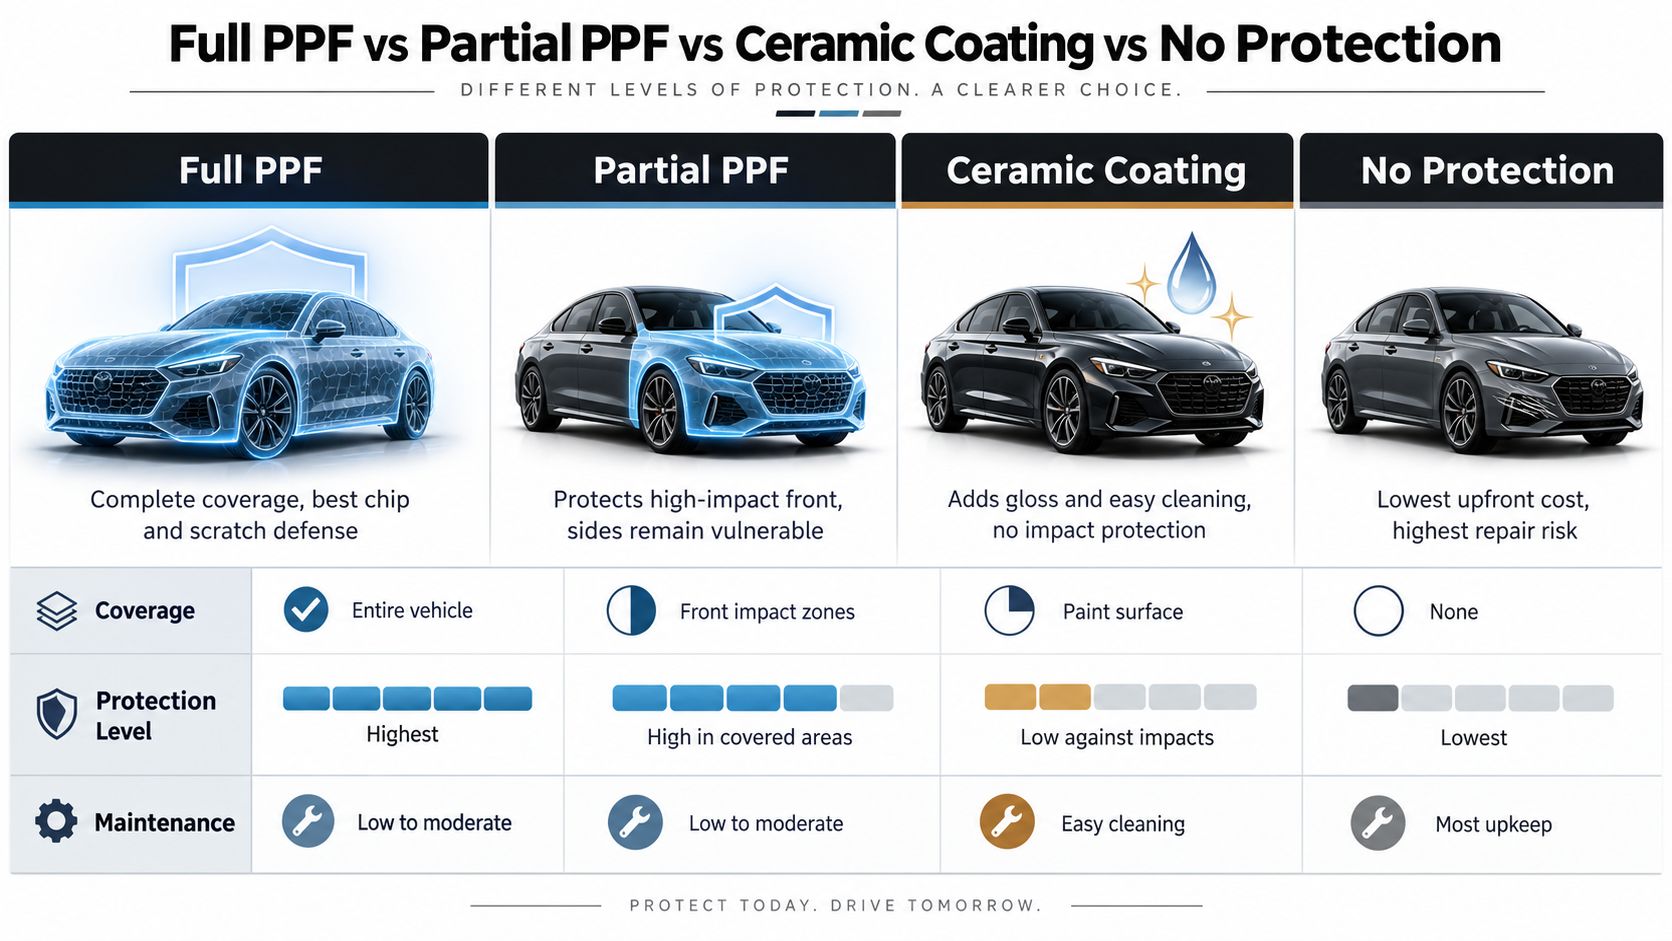
The hazards PPF is built to handle
3M Canada describes Scotchgard Pro Series 4.0 as protection against stone chips, scratches, bug damage, road tar stains, automotive fluid stains, and outdoor weathering, including harsh UV radiation. The product information for Scotchgard Pro Series 4.0 also describes durability and resistance to yellowing and cracking.
That list fits Ontario ownership. Highway debris attacks the front and side surfaces. Gravel and salt create abrasion. Bugs and road tar leave contaminants that can stain or etch exposed paint. UV exposure can affect long-term finish appearance, although PPF shouldn't be presented as a cure for every kind of vehicle damage.
The film is sacrificial. It isn't indestructible, and it doesn't eliminate the need for careful washing. It gives the paint a replaceable protective layer, which is very different from applying a product that only changes surface behaviour.
For readers also preparing for Ontario driving, G1 practice exam support is a useful resource for reviewing licensing questions before spending more time on the road.
Why material construction matters
3M Canada lists its heavy-duty Scotchgard PPF SGH12 as a 12-mil clear film designed to protect against stone chips, abrasion, and weathering, and says it meets automotive OEM specifications. The Canadian SGH12 product information gives buyers a tangible way to distinguish a purpose-built automotive film from a thin decorative covering.
Full PPF is therefore a physical protection decision. If you want to understand the specific relationship between film and stone damage, review how PPF protects against rock chips. The useful question isn't whether film makes a vehicle invulnerable. It's whether the areas you care about face enough exposure to justify putting a barrier over them.
Full PPF Versus Partial PPF Versus Ceramic Coating Versus No Protection
The cleanest comparison uses the same criteria for every option. Ask what each choice protects against, what it leaves exposed, and how closely it matches your driving.
| Criteria | Full PPF | Partial PPF | Ceramic Coating | No Protection |
|---|---|---|---|---|
| Stone-chip defence | Broad protection across painted surfaces | Stronger protection in selected areas | No impact barrier | None |
| Salt and gravel abrasion | Protects covered paint from direct exposure | Covered panels only | Doesn't stop physical impact | Paint takes the exposure |
| Bug and tar staining | Film is engineered to resist listed stains | Same benefit where installed | Can help cleaning, but isn't a physical shield | Contaminants contact paint |
| UV and weathering | Adds a protective layer against listed weathering | Limited to covered areas | Primarily an appearance and maintenance treatment | Finish faces weather directly |
| Gloss retention | Preserves the covered finish beneath the film | Preserves selected panels | Enhances gloss and surface slickness | Depends on paint condition and care |
| Maintenance | Requires proper washing and inspection | Similar care on covered areas | Usually chosen for easier cleaning | Regular cleaning still matters |
| Coverage gap | Minimal when installed over all painted surfaces | Unprotected panels remain visible and exposed | Entire exterior may be treated, but without impact protection | No coverage |
| Ownership fit | Long-term, high-exposure ownership | Focused protection with a lower commitment | Appearance-focused ownership | Short-term or low-exposure use |
Full PPF
Full PPF is the strongest choice when your priority is keeping factory paint intact across the whole vehicle. It's especially defensible for a new SUV, EV, performance car, or daily commuter that sees highways and winter roads.
The drawback is straightforward. You're paying to cover panels that may not receive the same impact as the front end. If your vehicle rarely leaves town, spends most of its time in a garage, or will be sold quickly, the extra coverage may not return enough practical value.
Partial PPF
Partial PPF is the sensible middle ground for many drivers. It targets the front end and other areas most likely to meet stones and road debris, while avoiding the cost of full-body coverage.
The trade-off is permanent exposure elsewhere. Doors, rear quarters, roof sections, and other painted panels can still collect scratches, stains, and environmental wear. Partial coverage works best when you want to reduce front-end damage rather than preserve the entire finish.
Ceramic coating
Ceramic coating belongs in a different category. It can improve gloss, help water and dirt release from the surface, and make routine cleaning more convenient. It doesn't provide the urethane impact barrier that PPF provides.
That makes coating a strong appearance and maintenance choice, but a weak substitute for film on a highway-driven vehicle. You can also choose coating for areas that don't need stone-chip protection, but that decision should be made with a clear understanding of what the product can and can't do. The PPF versus ceramic coating comparison is useful when your priority sits between finish appearance and physical protection.
No protection
No protection is rational when the vehicle is low-mileage, lightly exposed, or owned for a short period. It's also reasonable if you accept that the finish will show use and don't plan to spend money preventing every mark.
It's not the lowest-risk choice. It's the lowest upfront commitment. In Ontario, that means salt, gravel, bugs, road tar, and UV exposure reach the paint without a sacrificial layer.
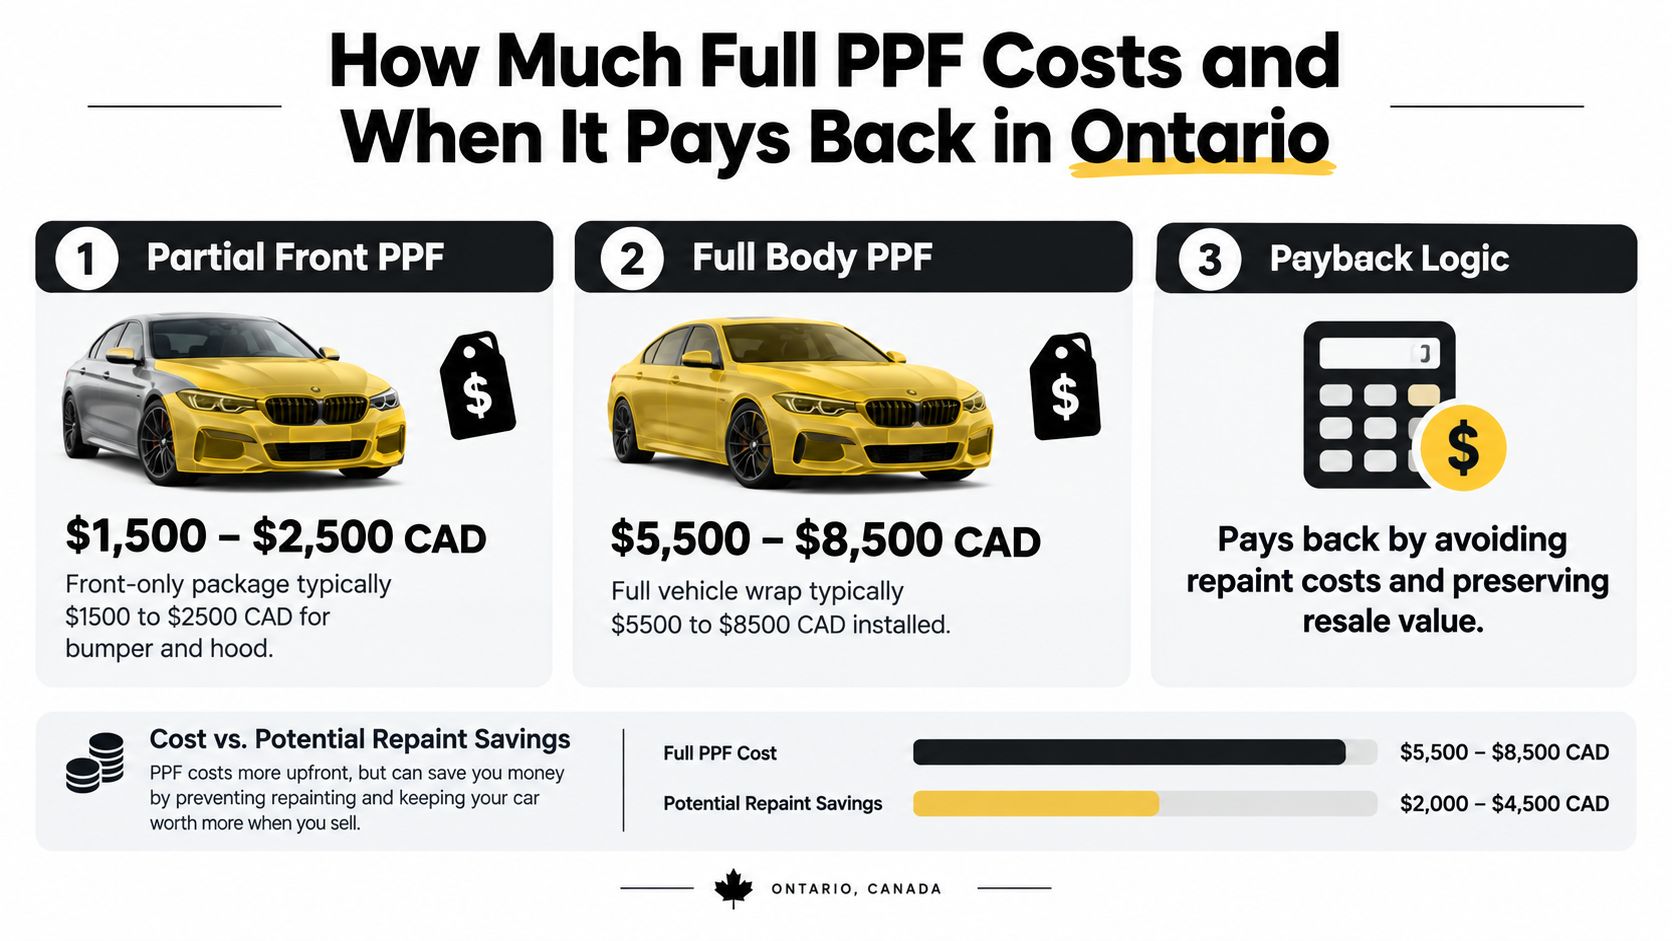
How Much Full PPF Costs and When It Pays Back in Ontario
Full PPF only makes financial sense when the protection matches how you drive and how long you will keep the vehicle. Installation cost is the starting point, not the payback calculation. Canadian pricing guidance places partial packages around C$300 to C$2,500 and full-front protection around C$1,500 to C$2,500, but an Ontario quote depends on the vehicle and the scope of work. Carmedics Autowerks' explanation of how much PPF costs is a useful pricing reference before requesting a vehicle-specific assessment.
Panel size, paint condition, film specification, coverage, installation complexity, and preparation all change the final figure. Full-body film costs more because the installer must prepare and cover substantially more painted area. A clean, well-prepared installation also matters at trade-in time, since poor edges or existing paint defects can reduce the visual benefit.
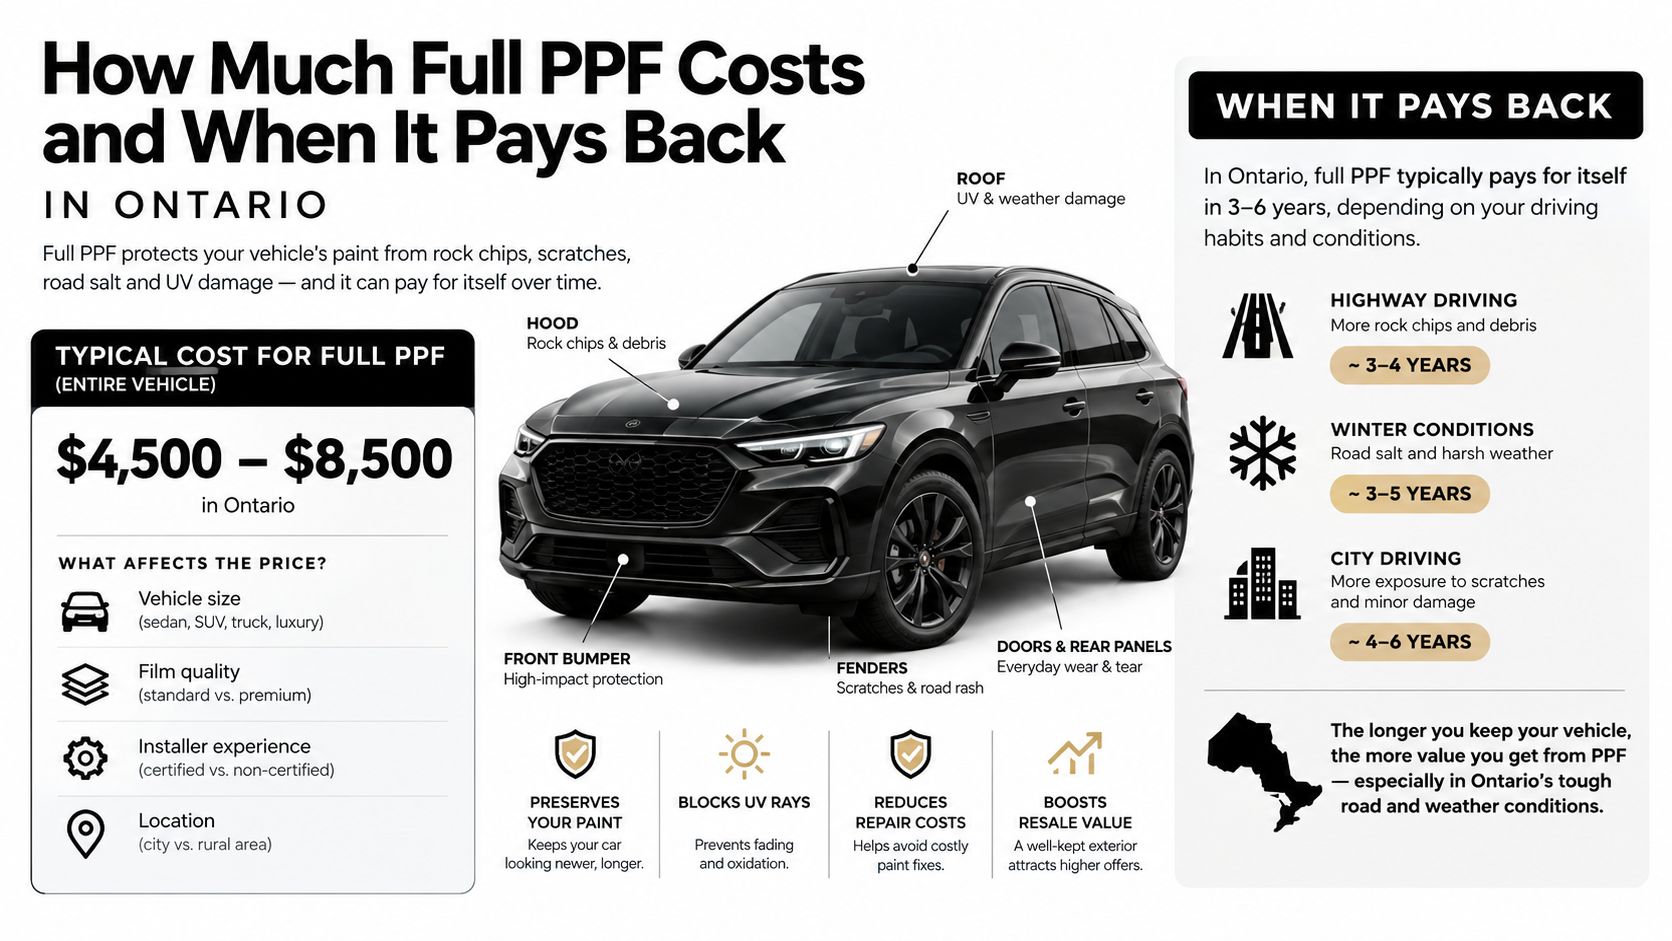
Match the warranty to your keep-time
3M Canada lists a 10-year warranty for Scotchgard Paint Protection Film Pro Series, a 7-year warranty for standard Scotchgard Paint Protection Film, and a 5-year warranty for Surface Protection Film. 3M Canada's Scotchgard warranty programme identifies those coverage periods for material and manufacturing defects, including yellowing, bubbling, and cracking.
Use the warranty as a planning reference, not a promise that every road mark or installation problem will be covered. Compare that support window with the period you expect to own the vehicle. If you plan to sell before the film's value has had time to offset repeated highway exposure, full coverage is harder to justify.
For a mainstream vehicle under about C$40,000, calculate the decision against your actual Ontario use:
- Highway exposure: Frequent 401, QEW, or gravel-route driving raises the chance of front-end chips.
- Repair threshold: Decide whether you would repaint a chipped hood or bumper before selling.
- Trade-in condition: Ask whether visible chips and cosmetic wear could affect the appraisal.
- Keep-time: A longer ownership period gives the film more winters and highway kilometres to protect.
- Coverage scope: Partial front protection may address the highest-risk panels at a lower commitment.
Do not treat resale value as guaranteed repayment. Preserved paint can support a cleaner presentation and reduce the temptation to pay for cosmetic repairs, but any appraisal benefit depends on the vehicle, buyer, and condition.
Include PPF in the wider ownership budget, especially when comparing an EV with a conventional vehicle. The Solana EV cost breakdown provides a broader way to review ownership costs. For a Whitby driver, full PPF pays back most clearly when winter salt, 401 debris, and a planned long keep-time make avoided repainting and preserved appearance more valuable than the upfront installation cost.
Durability Maintenance and Appearance Over Ontario Winters
Full PPF earns its cost only when it stays properly installed and maintained. Ontario winter raises the maintenance requirement. Salt, gravel, road spray, bugs, and fine scratches will test the film every day, especially on a vehicle that sees the 401 through Whitby and Durham Region.
Wash the vehicle with suitable automotive products, use gentle contact, and remove salt and road film before they remain on the surface for extended periods. PPF is designed to resist common surface hazards, but it is not maintenance-free. Good washing protects the film's appearance and makes its barrier easier to assess over time.
Warranty is part of the durability decision
Quality films are commonly warranted for 5 to 10 years, based on Ontario-market industry information. 3M's Canadian warranty benchmarks list Pro Series at 10 years, standard Scotchgard PPF at 7 years, and Surface Protection Film at 5 years. Match the warranty period to your ownership plan. A Whitby owner keeping a new vehicle through several winters gets more opportunity to recover the installation cost than someone selling soon after purchase.
Warranty coverage for yellowing, bubbling, and cracking applies to material and manufacturing defects under the manufacturer's conditions. It does not cover every impact, installation problem, visible mark, or maintenance mistake. Keep the purchase records and follow the installer's care instructions.
Appearance preservation is more than shine
PPF protects the paint beneath it from chips and staining, while its weathering resistance helps the finish stay consistent. Canadian market summaries claim quality films can block up to 99% of UV rays, but that figure is product-specific and should not be treated as a promise for every film or installation. The Canadian market summary discussing UV performance and market context also estimates the Canadian PPF market at $35.6 million in 2025, projecting $45.0 million by 2030 with a 4.8% CAGR.
The ownership test is straightforward. If winter salt and highway grit would lead you to repaint damaged panels before a trade-in, full PPF has a clearer break-even case. If you want to plan film life against your keep-time, see how long paint protection film lasts.
Real World Scenarios When Full PPF Makes Sense in Whitby and Durham Region
A Whitby commuter who drives the 401 every weekday should seriously consider full PPF on a new vehicle kept for several years. The combination of repeated highway exposure and Ontario winter road conditions affects more than the bumper. Full coverage makes sense when preserving the entire painted finish matters, not only the front impact zone.
A driver who uses the vehicle mainly around town has a different calculation. If most trips stay within Whitby, Brooklin, Oshawa, or Ajax and highway use is occasional, partial-front PPF is often the more rational choice. It addresses the panels that concern you most without asking you to cover every painted surface.
For most ordinary new-car owners, full front coverage is the first serious protection tier. Full-body coverage is a separate decision about whole-vehicle appearance.
Leased vehicles require a close look at the return condition you want, but don't assume film will automatically create a financial return. If you're leasing for a short period and your driving is light, ceramic coating or partial PPF may offer a better balance. If the lease sees heavy highway use and you want to avoid obvious chips at return, partial front protection deserves priority.
High-value and enthusiast vehicles are easier to justify. Owners often care about factory paint, consistent colour across panels, and avoiding visible repair history. Matte or unusual finishes can also make the appearance decision more sensitive, but the right product and warranty still need to be confirmed for the specific paint system.
Family SUVs kept for the long term are strong candidates when they travel highways, carry children, and face year-round use. Full PPF protects more of the visible exterior from the gradual accumulation of road wear. It's particularly sensible when the owner wants the vehicle to look cared for at trade-in rather than accept years of cosmetic deterioration.
Low-mileage city drivers don't need to follow the same recommendation. If the vehicle is stored indoors, rarely sees highways, and will be replaced soon, ceramic coating or no protection may be entirely reasonable. Spend the money where the vehicle faces risk.
Final Recommendation and Next Steps With Carmedics Autowerks
So, is full PPF worth it for Canadian drivers today? For a new vehicle driven regularly on Ontario highways through winter and kept for several years, my recommendation is yes. The film protects every painted surface, and that broader coverage matches the exposure better than a front-only solution.
Choose partial PPF when your budget is limited, your driving is mixed, or your main concern is chips on the front end. Choose ceramic coating when gloss, easier cleaning, and surface presentation matter more than impact protection. Choose no protection when you accept normal wear, drive lightly, or won't keep the vehicle long enough to benefit from a multi-season barrier.
Before committing to full coverage, inspect the paint, confirm exactly which panels are included, review the film warranty, and compare the quote with your ownership plan. A new vehicle with clean paint is the best starting point. Once chips and corrosion begin, PPF becomes prevention after the fact rather than protection from day one.
Carmedics Autowerks Inc offers PPF installation for Whitby drivers, including a Full Vehicle package covering painted surfaces and a Full Front package covering the hood, fenders, bumper, and mirrors. Ask for a recommendation based on your route, winter use, vehicle value, and expected keep-time, not the largest package.
If you're driving a new vehicle through Whitby, Durham Region, or Ontario highways, contact Carmedics Autowerks Inc for a vehicle-specific PPF assessment and coverage recommendation. Visit Carmedics Autowerks Inc to discuss full vehicle, full front, or complementary protection options before winter road damage starts.