

To keep your car rust-free, you need a game plan. It’s all about a combination of regular cleaning, applying protective coatings, and dealing with repairs the moment they’re needed. The goal is simple: create a solid barrier between your car’s metal and the things that want to destroy it—especially moisture and road salt.
Understanding How Rust Forms on Your Vehicle
Before you can win the war on rust, you have to know the enemy. Rust, technically iron oxide, is just the result of a chemical reaction called oxidation. It’s what happens naturally when iron or steel meets oxygen and moisture. Since your car’s body is mostly steel, it’s a prime target for this quiet, relentless process.
Think of your car’s paint as its armour. It’s not just for show; it’s a critical shield sealing the metal from the elements. But the second that armour is breached—even by a tiny stone chip—the steel underneath is exposed and vulnerable. That’s when the trouble starts.
The whole process gets thrown into overdrive when you add a catalyst like road salt. Here in Canada, salt is a non-negotiable part of winter road safety, but it’s absolutely brutal on our vehicles. Saltwater is a far better electrolyte than regular water, meaning it supercharges the electrochemical reaction that causes rust.
The Real-World Scenario: How a Tiny Chip Becomes a Big Problem
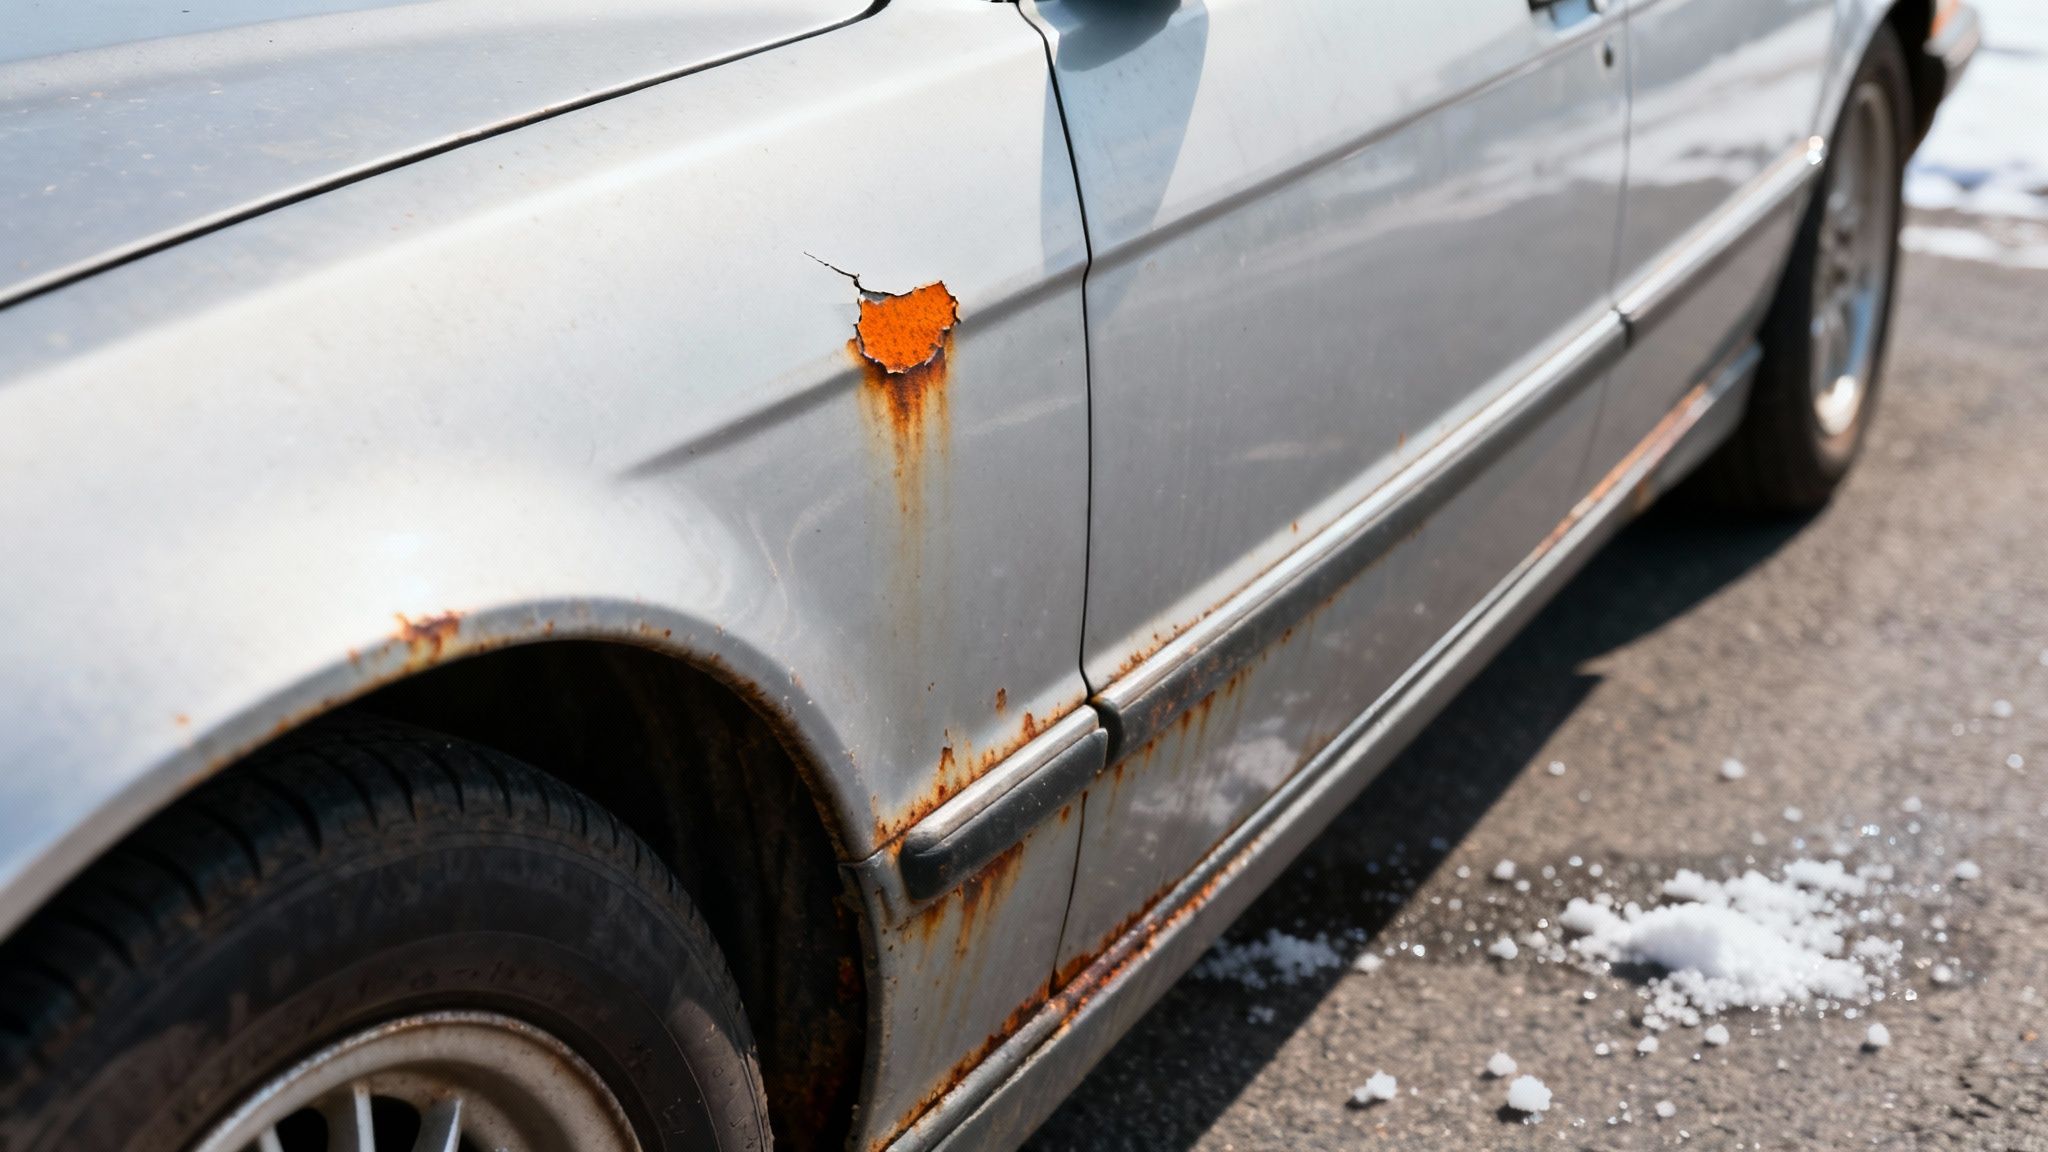
Picture this: you’re driving down the 401 on a slushy winter day. A transport truck ahead kicks up some gravel, and you hear that faint “tink” on your hood. It leaves a minuscule chip, so small you don’t even think about it.
Over the next few weeks, that tiny wound becomes a trap for snow, slush, and salt. The exposed metal starts to oxidise, forming a small brown freckle you can barely see. As the temperature bounces above and below freezing, moisture in the chip expands and contracts, slowly prying the surrounding paint up and letting more corrosive gunk seep underneath. By the time the spring thaw arrives, that little chip has bubbled into a proper rust spot, compromising the integrity of the whole panel.
This is the classic story of how rust takes hold. It almost never starts as a huge, dramatic failure. It begins with small, neglected bits of damage that fester over time, especially during our harsh Canadian winters.
Identifying Your Car’s Rust Hotspots
While rust can pop up anywhere the paint is broken, some parts of your car are way more vulnerable because of how they’re designed and where they’re located. Knowing where to look is half the battle. If you can spot trouble early, you can stop it in its tracks.
Get into the habit of checking these key areas at least once a month, and even more often in the winter:
- Wheel Wells and Fender Lips: These spots are constantly getting blasted with water, salt, and whatever else your tires kick up. That inner lip of the fender is a notorious trap for muck and moisture.
- Rocker Panels: Sitting right under your doors, rocker panels are low to the ground and take a beating from road spray. Worse, their internal structures can trap water if the drain holes get clogged.
- Subframe and Undercarriage: The entire belly of your car is the most exposed area. Frame rails, suspension parts, and floor pans are in the direct line of fire.
- Behind Bumpers and Body Moulding: The small gaps where bumpers and trim meet the body are perfect for trapping wet leaves, dirt, and salt. Rust loves to brew in these hidden spots.
- Door Bottoms and Tailgates: Water gets past window seals and naturally runs down to the bottom of doors and hatches. If the little drain holes at the bottom are plugged, you’re creating a bathtub that will rust your doors from the inside out.
By understanding the science and knowing exactly where to hunt for trouble, you can switch from reacting to rust to proactively preventing it. It’s not about finding one magic bullet; it’s about building the simple, ongoing habit of paying attention to your vehicle.
Your First Line of Defence: A Proper Wash and Wax Routine
Think of your car’s paint job as its armour. A consistent wash and wax routine isn’t just about looking good; it’s your single most effective strategy for stopping rust before it ever starts. This simple habit physically removes the salt and grime that eat away at your car’s finish and attack the metal underneath.
A quick drive-through wash or a rinse with the garden hose won’t cut it, especially during a harsh Canadian winter. A proper wash means getting into all the hidden spots where salt, dirt, and moisture love to collect. You’ll need to get down there with a high-pressure nozzle and blast the grime off the entire undercarriage.
I always tell people to pay extra attention to the wheel wells, the pinch welds along the rocker panels, and the areas behind the bumpers. These are notorious rust traps. Slush and road salt get packed in there, creating the perfect damp, corrosive environment for rust to bloom completely out of sight. A thorough cleaning is your chance to evict these destructive squatters.
Building a Practical Washing Schedule
So, how often do you really need to wash your car to keep rust at bay? It depends entirely on the season and where you’re driving. In the warmer, drier months, a good wash every couple of weeks is usually plenty.
But once the salt trucks hit the roads, you have to get serious. In the winter, aim to wash your car at least once a week, especially right after a snowstorm or when you can see the roads are white with salt. This frequency is critical. It neutralizes the highly corrosive salt before it has a chance to do any real damage.
If you do nothing else, give your car a deep, thorough wash at the first sign of spring. This is your chance to flush out every last bit of winter’s salt from every nook and cranny, giving your car a clean slate for the warmer months.
The Protective Power of Wax and Sealants
Washing removes the enemy; waxing is like building a fortress. A quality car wax or a modern paint sealant does a lot more than just add shine. It creates a hydrophobic barrier on top of your car’s clear coat. You’ll see water bead up and roll right off, taking dirt and other contaminants with it, instead of letting moisture just sit on the paint.
This layer is your shield. It protects against everything from acid rain and bird droppings to the sun’s UV rays, all of which can weaken your paint over time. A healthy, protected clear coat is the waterproof seal that keeps the metal safe.
As a rule of thumb, apply a fresh coat of wax or sealant every three to four months. You’ll know it’s time when water stops beading up into tight little drops on the surface. The process is simple: wash and dry the car completely, apply a thin, even layer of the product with an applicator pad, let it dry to a haze, and then buff it off with a clean microfibre cloth.
For those looking for an even tougher, longer-lasting shield, it’s worth exploring more advanced options. You can learn more about the benefits of paint protection film in our detailed guide: The Ultimate Guide to Paint Protection Film (PPF): Benefits, Costs, and Why You Need It. This durable film offers superior defence against both physical and chemical threats.
Don’t forget the inside, either. While you’re focused on the exterior, cleaning your car’s interior helps prevent moisture and debris from building up. This holistic approach protects your vehicle from the inside out, managing the dampness from snowy boots that can lead to hidden corrosion in floor pans. A dry, clean cabin is the perfect complement to a protected exterior.
DIY Rust Prevention You Can Do at Home
While professional services offer incredible protection, some of the most effective rust prevention happens right in your own driveway. Taking a hands-on approach means you can catch and fix small problems before they balloon into expensive bodywork. Honestly, getting comfortable with a few key products and skills is the single best way to keep your vehicle’s metal solid for years.
This isn’t just about saving a few bucks; it’s about shifting your mindset. When you regularly inspect your own car, you get to know its every nook and cranny. You become the first line of defence against corrosion. This proactive attitude is a huge part of a smart vehicle care strategy, which we dive into deeper in our guide to preventive maintenance for vehicles.
At its core, at-home rust prevention follows a simple but vital sequence: wash, dry, and protect.
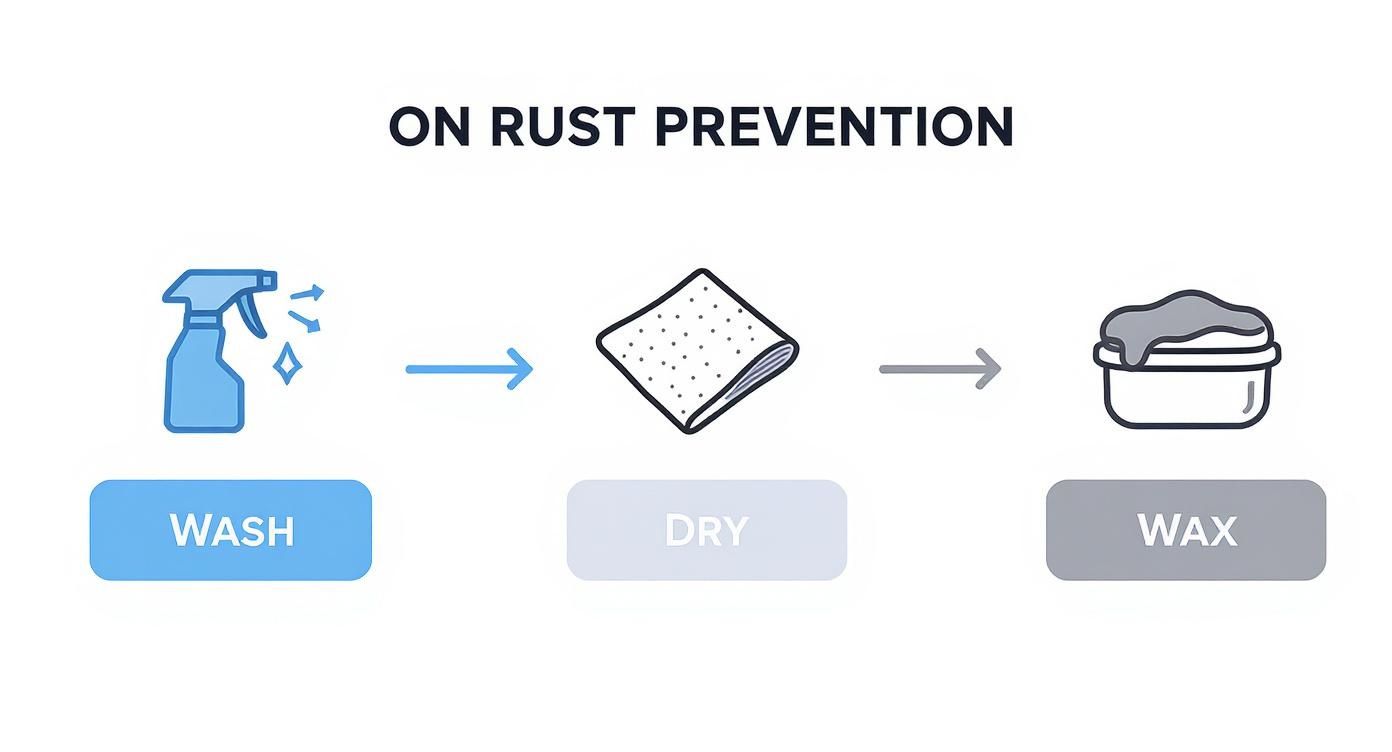
This graphic says it all—no protective product in the world will work if you apply it over dirt and moisture. A clean, dry surface is non-negotiable.
Mastering Touch-Up Paint for Chips and Scratches
Think of every stone chip as a tiny invitation for rust. Repairing these little breaches in your car’s paint is one of the easiest and most important DIY jobs you can do. The real key is to act fast before that ugly orange tinge of surface rust gets a chance to appear.
Touch-up paint pens are your best friend here. They’re cheap, simple to use, and you can get them matched to your vehicle’s exact colour code—just look for the sticker inside the driver’s side door jamb.
The process itself is easy, but patience is what separates a good repair from a sloppy one.
- Clean the Spot: Wash and dry the chip thoroughly. A quick wipe with rubbing alcohol on a cotton swab will get rid of any lingering wax or road grime.
- Prep the Edges: Gently use a toothpick to flick away any loose paint flakes from the edge of the chip. You want a solid surface for the new paint to bond to.
- Prime if Needed: If the chip is deep enough to see bare metal, a tiny dot of automotive primer is a must. It helps the paint stick and adds another layer of anti-corrosion defence.
- Build Thin Coats: Shake the paint pen really well and apply a very thin layer of colour. Let it dry completely, which can take anywhere from 30 minutes to a few hours depending on the weather. Repeat with more thin layers until the chip is filled and level with the paint around it.
- Seal with Clear Coat: After the last colour coat has cured for at least 24 hours, apply a layer of clear coat from the other end of the pen. This seals the repair, protects the colour, and brings back the shine.
Pro Tip: Whatever you do, resist the urge to glob on one thick layer of paint. It will look terrible and won’t last. Building up multiple thin layers creates a much smoother, stronger, and nearly invisible repair. Patience is everything.
Sealing the Seams Against Moisture
Your car is made of many panels joined together, and the seams where they meet are weak spots. Car manufacturers use a flexible seam sealer along these joints, but over the years it can dry out, crack, and fail. When it does, it creates a perfect little channel for water to get in and stay trapped.
Take a close look at the seams in your door jambs, around the trunk lid or tailgate, and under the hood. If you spot cracked or peeling sealer, it’s time for a quick repair. You can buy automotive seam sealer in a tube. Just carefully clean out the old, failed stuff, wipe the area with alcohol, and lay down a clean, new bead to make it waterproof again.
Comparing DIY Rust Treatment Options
For the more ambitious owner, a few other products can offer an added layer of protection. Here’s a quick look at how they stack up.
| Treatment Method | Best For | Average Cost (CAD) | Difficulty Level | Longevity |
|---|---|---|---|---|
| Touch-Up Paint Pen | Fixing small stone chips and minor scratches on painted surfaces. | $20 – $40 | Easy | Permanent if done right |
| Seam Sealer | Re-sealing cracked or failing factory seams in door jambs, trunks, and under the hood. | $25 – $50 | Medium | 5+ years |
| DIY Undercoating Spray | Adding a protective barrier to the undercarriage for vehicles in harsh climates. | $50 – $150 | Hard | 1 – 3 years |
As you can see, the effort and cost vary quite a bit. Touch-up paint is a no-brainer for every car owner, while undercoating is a much more involved project.
The Role of DIY Undercoating
If you’re looking for serious defence, DIY aerosol undercoating products are available everywhere. These are usually rubberized or wax-based sprays meant to shield your car’s underbelly from salt, moisture, and gravel.
But here’s the critical part: Never, ever spray undercoating over existing rust, dirt, or dampness. If you do, you’ll just trap all that corrosive gunk against the metal. You’ll essentially create a hidden rust farm that can do way more damage than having no coating at all.
Getting it right takes serious prep work:
- The entire undercarriage has to be perfectly clean and completely dry.
- Any existing surface rust needs to be removed with a wire brush or sandpaper, then treated with a rust converter.
- You have to be meticulous about masking off exhaust pipes, brake components, and the drive shaft.
Frankly, the amount of prep work involved is why many people opt for a professional application. But for the dedicated DIYer who’s willing to put in the time, a properly applied undercoating provides an excellent shield against the elements.
Choosing a Professional Rustproofing Service
https://www.youtube.com/embed/FlZ7stU7aTw
While the DIY route is great for keeping on top of things, sometimes you just need to call in the professionals. For a new vehicle, or one you really value, a professional rustproofing job offers a level of protection that’s tough to match in your own garage. Think of it as a serious investment in your car’s future.
But once you decide to go pro, you’ll find a few different philosophies on how to get the job done. Each has its own application method, cost, and ideal use case. Knowing the difference is key to picking the right shield for your car, your driving habits, and especially for the kind of weather we get here in Canada.
Annual Oil-Based Sprays
This is the classic, old-school method that many Canadians swear by, and for good reason. Companies like Krown or Corrosion Free are household names in this space. The whole idea is to spray a light, creeping oil into every single nook, cranny, and seam of your vehicle.
We’re talking inside the doors, along the rocker panels, deep into the frame rails, and all over the undercarriage. This oil is designed to push out moisture and soak into any existing surface rust, effectively choking it off and stopping it in its tracks. Because it’s a “drip” formula, it stays active, constantly creeping and re-coating small nicks and scratches that happen over the year.
The biggest plus? It gets everywhere. The downside, of course, is that it can be a bit messy for a few days after it’s applied and it absolutely needs to be done every single year to stay effective. If you live in a salt-heavy region like Ontario or Quebec, this is often the go-to choice. A Canadian study on this type of product confirmed that treated vehicles had way less corrosion, especially on critical frame components. You can dig into the full findings of the corrosion study if you want to see the data for yourself.
Permanent Wax-Based Undercoatings
Another route you can take is a thicker, wax or rubber-based coating. Unlike the dripping oil, this stuff is meant to harden into a tough, durable barrier, sealing the metal off from the outside world. It’s a “dripless” application, so the finish is much cleaner.
This kind of coating gives you fantastic physical protection from stone chips, gravel, and road debris. The catch? Its success is 100% dependent on the prep work. The vehicle’s underside has to be perfectly clean and dry, and any rust that’s already there needs to be treated first. If you trap moisture or rust underneath this barrier, you’ve just made the problem a whole lot worse.
These coatings can last for several years, but they aren’t a one-and-done solution. You still need to get them inspected annually to touch up any spots that have been chipped or damaged. This is a great option if you want a clean, tough barrier and are diligent about those yearly check-ups.
Making the Right Choice for Your Climate
Where you live makes all the difference. A driver on the coast of British Columbia has a totally different enemy than someone battling a Whitby winter.
- Coastal B.C. Scenario: The biggest threat here is the relentless dampness and salty sea air. A creeping oil spray is a fantastic choice because it actively pushes moisture out of all those hidden seams. The high humidity can also make it tricky for a permanent coating to cure properly unless it’s applied under perfect conditions.
- Ontario Winter Scenario: Out here in the salt belt, you’re fighting both moisture and incredibly corrosive road salt. An annual oil spray is a top contender because it neutralizes salt and gives you a fresh coat of protection right before the snow flies. A thick wax coating also works well, but you have to inspect it every spring for damage from ice chunks and whatever else the plows kick up.
Your best defense is a local one. Take a look around your neighbourhood. Ask the owner of that 15-year-old, rust-free truck what service they use. A shop that has proven its worth over many local winters is usually your safest bet.
Finding a good shop is just as crucial as picking the right product. Look for a clean, well-lit garage and don’t be afraid to ask the technicians to explain their process. A good operator will be proud to show you what they do.
If you’re looking for trustworthy pros for all your car’s needs, having a go-to shop is invaluable for long-term care. We’ve put together some tips on finding reliable auto repair services near me that can help you build that relationship.
Seasonal Care and Long-Term Vehicle Storage
Keeping your car rust-free isn’t a one-and-done deal; you have to adapt your game plan with the seasons. From the brutal assault of winter road salt to the thick humidity of a summer heatwave, each time of year brings its own unique threats. A year-round commitment is the only way to keep your vehicle’s metal protected.
This constant cycle of care is especially critical for your daily driver—the car that faces the elements head-on, day in and day out. By creating a simple seasonal checklist, you can get ahead of these threats before they dig in, keeping your car’s defences strong no matter what the weather throws at you.
Your Winter Rust Prevention Checklist
For those of us in Canada, winter is the main event in the war against rust. Getting your car ready before the first snowflake hits the ground is absolutely essential. A bit of proactive work in the autumn can save you a world of hurt—and costly repairs—come spring.
- Pre-Season Armour: Before winter truly sets in, give your car a deep clean and a fresh coat of wax or paint sealant. Think of it as a shield that creates a strong barrier before the salt even has a chance. This is also the perfect time to touch up any paint chips you’ve been meaning to get to.
- Underbelly Inspection: Get under the car yourself (if you can do it safely) or have your mechanic put it on a lift. You’re looking for any spots where the factory undercoating might be peeling or damaged, leaving the bare metal exposed.
- Mid-Winter Washes: Don’t just hibernate and wait for spring. On those milder winter days, find a car wash that has high-pressure undercarriage sprayers. Blasting away all that caked-on salt and slush is one of the most important things you can do to stop corrosion in its tracks.
The timing of professional treatments also makes a huge difference. Experts in Canada often suggest scheduling rustproofing services for the fall or spring. The more moderate humidity helps those protective coatings stick and cure properly, which means they’ll perform better in the long run. You can find more great insights on effective rustproofing strategies over at driving.ca.
The Spring Thaw and Decontamination
Once the snow starts to melt, your job isn’t over. Spring is your moment to wash away the corrosive grime of winter and see if any new damage has surfaced.
And I don’t mean just a quick rinse. You need to get in there and do a deep clean of the entire car, paying special attention to the underbody, inside the wheel wells, and along the rocker panels. This is your best shot at flushing out every last bit of road salt that’s been hiding in all the nooks and crannies. Once it’s spotless, give the vehicle a close inspection for any new chips or scratches and get them fixed right away.
Think of your big spring wash as a decontamination mission. You’re clearing away months of chemical attackers from your car’s most vulnerable spots. It’s arguably the most important car wash of the entire year.
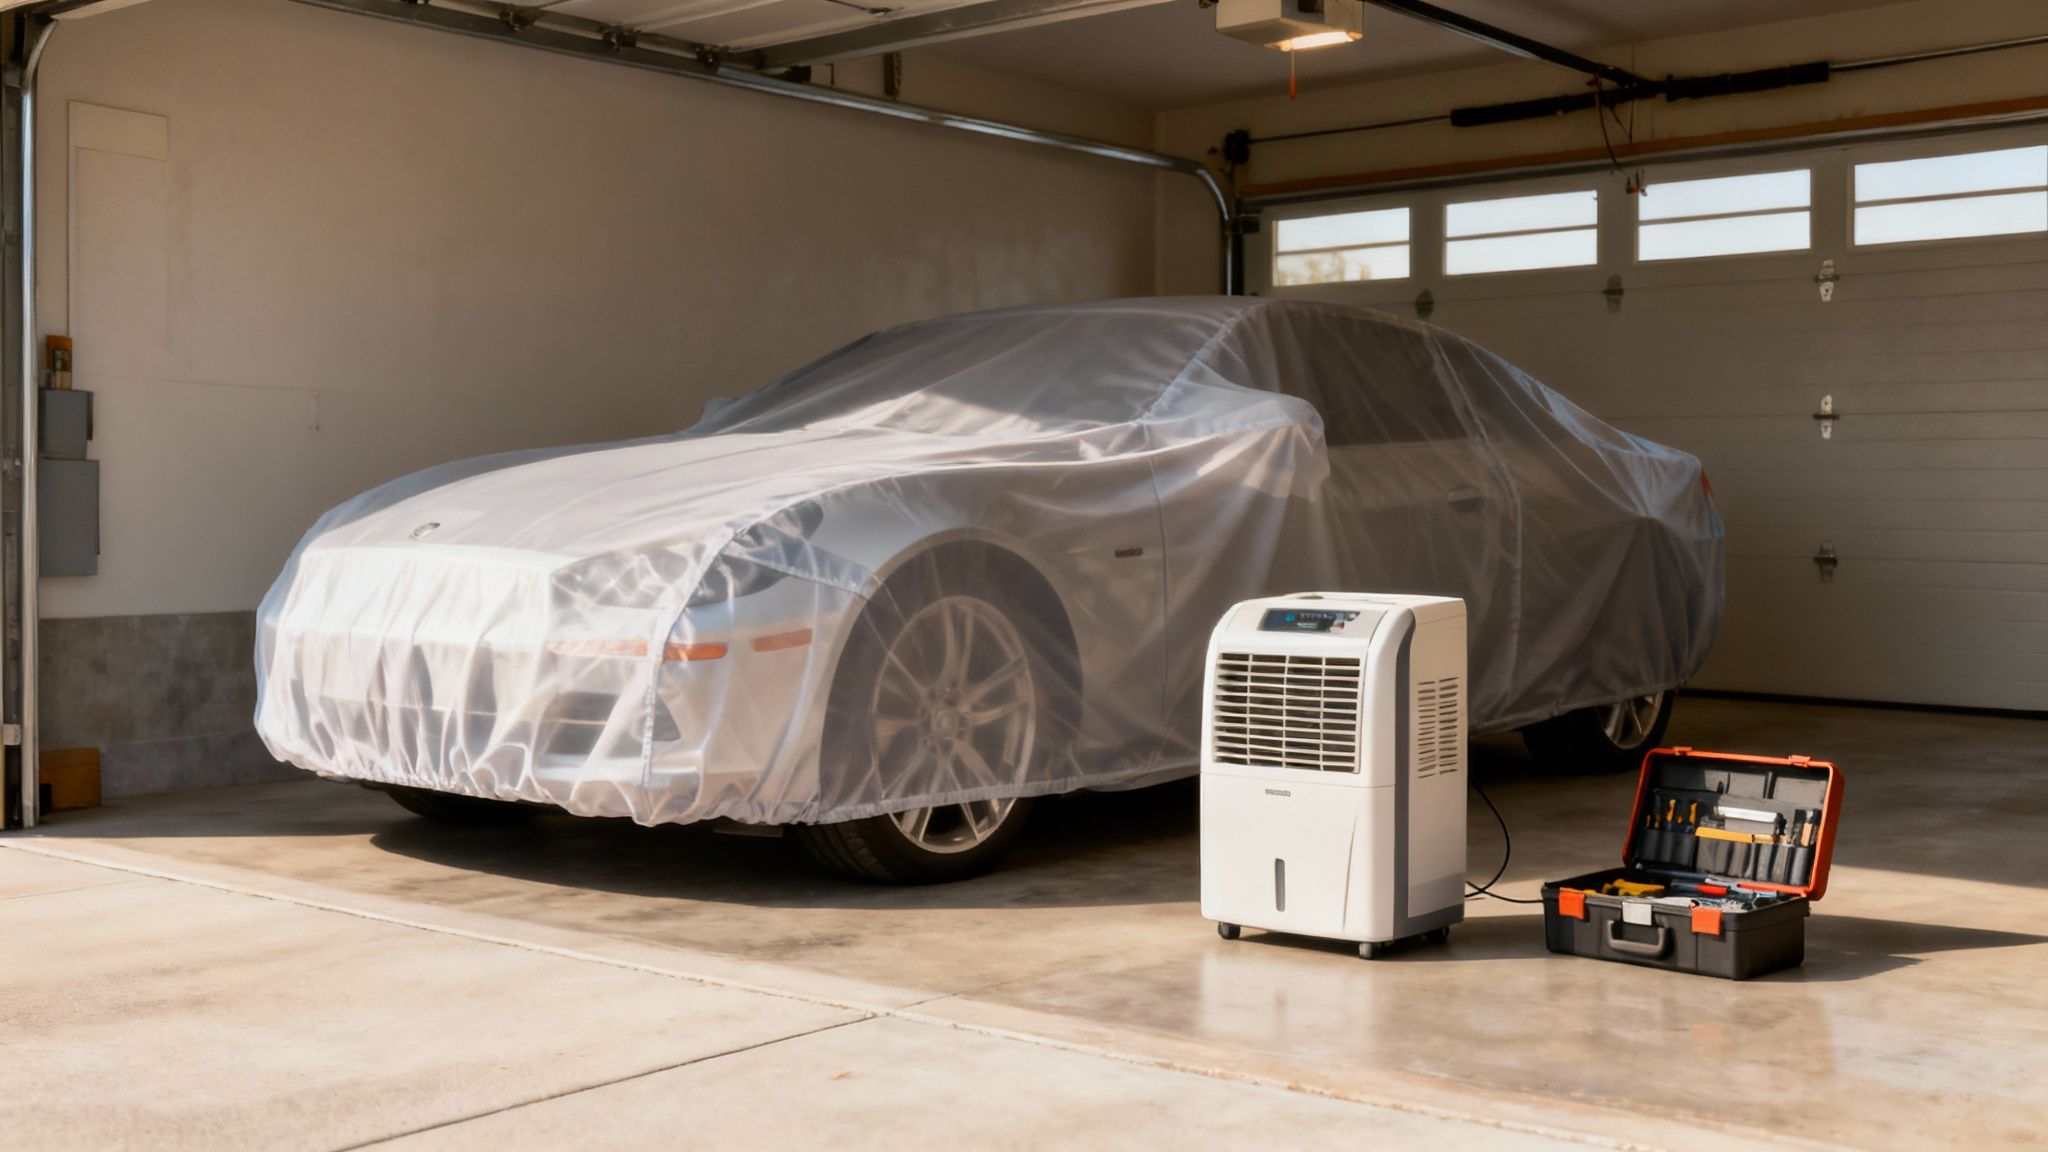
Prepping for Long-Term Vehicle Storage
Putting a vehicle away for a few months—whether it’s a classic car for the winter or your daily driver while you’re away—requires a specific prep routine to stop rust from creeping in. Just parking it in the garage and walking away is a recipe for disaster.
The whole point is to create a stable, dry environment. Moisture is the number one enemy, and a damp, stuffy space is a car’s worst nightmare.
Here’s how to store your car the right way:
- Pick the Right Spot: A climate-controlled storage unit is the gold standard. If that’s not an option, a dry, well-ventilated garage is the next best thing. Whatever you do, avoid parking on a dirt floor or grass; moisture will seep up from the ground and go to work on your undercarriage.
- Wash and Wax: Never, ever store a dirty car. Bird droppings, road grime, and dirt can eat into the paint if left sitting for months. A fresh coat of wax adds a crucial protective layer against any moisture in the air.
- Get a Breathable Car Cover: Do not use a plastic tarp! A tarp will trap moisture against your car’s body, creating a perfect little greenhouse for rust. A quality, breathable fabric cover lets air circulate and stops condensation from forming.
- Fill the Tank and Add Stabilizer: A full tank of gas doesn’t leave any room for air, which means moisture can’t condense inside the tank and cause rust. Adding a fuel stabilizer will also keep the gasoline from going bad over time.
- Think About Pest Control: A few mothballs or rodent repellent pucks placed around and inside the vehicle can deter critters from chewing through wires or building nests that trap dampness.
By following these seasonal and storage tips, you’re building a comprehensive defence system that actively works to keep your car rust-free all year long.
Common Questions About Car Rust Prevention
Even with a solid game plan, you’re going to have some questions. When it comes to stopping rust before it starts, there’s a ton of information floating around—and frankly, a lot of it is wrong. Let’s tackle some of the most common things that trip car owners up.
Is Factory Rust Protection Enough for My New Car?
This is the big one I hear all the time. Yes, modern cars have way better corrosion protection from the factory than they did decades ago, but for a Canadian winter? It’s rarely enough.
Factory coatings are a great start, but they’re applied in perfect conditions and can be surprisingly thin in those nooks and crannies. Worse yet, they get compromised the second you drive off the lot by stone chips and road debris. Think of the factory coat as a good primer. A quality aftermarket rustproofing treatment adds a much tougher second layer of defence, especially for the undercarriage where salt and slush do their worst damage.
Can I Apply Rustproofing Over Existing Surface Rust?
That really depends on what kind of rustproofing you’re using and how bad the rust is.
- Oil-Based Sprays: For light surface rust, absolutely. Products like Krown are actually designed to creep into existing rust. The oil pushes out any trapped moisture and soaks into the metal, effectively hitting the pause button on the oxidation process.
- Wax or Rubberized Coatings: A hard no. If you’ve got any rust that’s flaking or bubbling, you have to get it off first. Sand it, grind it, and treat the metal properly before you even think about applying a hard coating. Spraying a permanent undercoating over rust is one of the worst mistakes you can make—it just traps moisture underneath and speeds up the corrosion, hiding the problem until it’s a massive, expensive fix.
Always follow the product instructions to the letter. If you’re looking at anything more than a faint orange haze of surface rust, proper prep work is the only way to get a result that will actually last.
How Often Should I Get My Car Rustproofed?
There’s no magic number here; it really comes down to the product you’ve chosen. The most important thing is just being consistent.
A traditional drip-oil spray needs to be reapplied every 12 to 18 months. This keeps the protective layer fresh and allows it to continue seeping into all the tight seams. Dripless oil or wax-based coatings might last longer, but don’t fall for the “one-and-done” myth. They still need to be inspected every year and touched up. Road debris and the simple flexing of the car’s body can create small cracks or chips in the coating, leaving a perfect entry point for rust.
Does Rustproofing Void My Car Manufacturer Warranty?
That’s a totally valid concern, and one you should definitely think about. The good news is that reputable rustproofing shops in Canada are well aware of this and have their application process down to a science. They know exactly where not to drill or spray to avoid interfering with structural parts, airbags, or sensitive electronics.
That said, it’s always smart to read your manufacturer’s warranty policy yourself before you get anything done. Some car brands even sell their own branded corrosion packages. Your safest bet is to pick a well-known, professional service that stands behind their work and explicitly guarantees it won’t mess with your factory warranty. That way, you’re covered no matter what.
At Carmedics Autowerks Inc, we’re on the front lines of the battle against rust here in Whitby. From applying state-of-the-art Paint Protection Film to performing expert collision repairs that restore your car’s original defences, we offer the professional services you need to keep your vehicle looking its best. Protect your investment with a team that truly understands Ontario’s tough conditions. Visit us online to see how we can help at https://www.carmedicsautowerks.com
