

You don't really feel the full impact of a collision until the car is on a tow truck or sitting in a shop bay with the keys in someone else's hand. The damage may look like a bumper cover, a cracked lamp, and a bent fender, but the actual job starts after intake, when the shop has to find what got pushed, stretched, broken, or knocked out of calibration.
That's why collision repair and refinishing can look simple from the curb and turn complicated inside the building. Ontario's crash volume makes that plain, with 27,854 fatal and personal-injury collisions in 2024 and 153,751 total collisions in 2021 recorded by the province Ontario collision data, while Canadian repair work itself sits inside a large, fragmented market that depends on steady volume and careful refinishing Canadian collision repair industry report. The visible repair is only one part of the story.
What Happens After You Drop Your Car Off
You hand over the keys, sign the intake paperwork, and wait for the first call. From that point on, the car becomes a job file, a parts list, and a repair plan that still has to match what the insurer will approve.
The first day is about finding the real damage
The first inspection usually starts with photos, then a teardown of the obvious impact area. A bumper cover has to come off before anyone can see whether a reinforcement bar, sensor bracket, absorber, or wiring harness took the hit. A job that looks simple from the outside can change quickly once the hidden layers are exposed.
Practical rule: if the damage is hidden, the estimate is only a starting point, not a promise.
A proper shop documents what it finds and sends that information to the insurer before extra work starts. If teardown reveals more than the first visual estimate showed, the shop should issue a supplement and wait for approval unless the owner has already authorised the next step in writing. That process should leave a trail, a call before additional repair begins, plus photos, line items, and notes that show what changed.
The paperwork should match the metal
The written estimate should separate parts, labour, refinish work, and any calibration or sublet items. It should also list the paint code and note whether panels are repaired, replaced, or blended. If the estimate is vague, the final invoice usually follows that same pattern, and that is where disputes start.
A good intake process also gives you a target completion window, not a vague “we'll see.” Hidden damage pushes the schedule, but you should still get a fresh timing update instead of silence. Ontario's collision volume keeps shops busy, which is one reason estimates, approvals, and repair notes have to stay tight Ontario collision data.
The Repair and Refinish Process From Assessment to Clearcoat
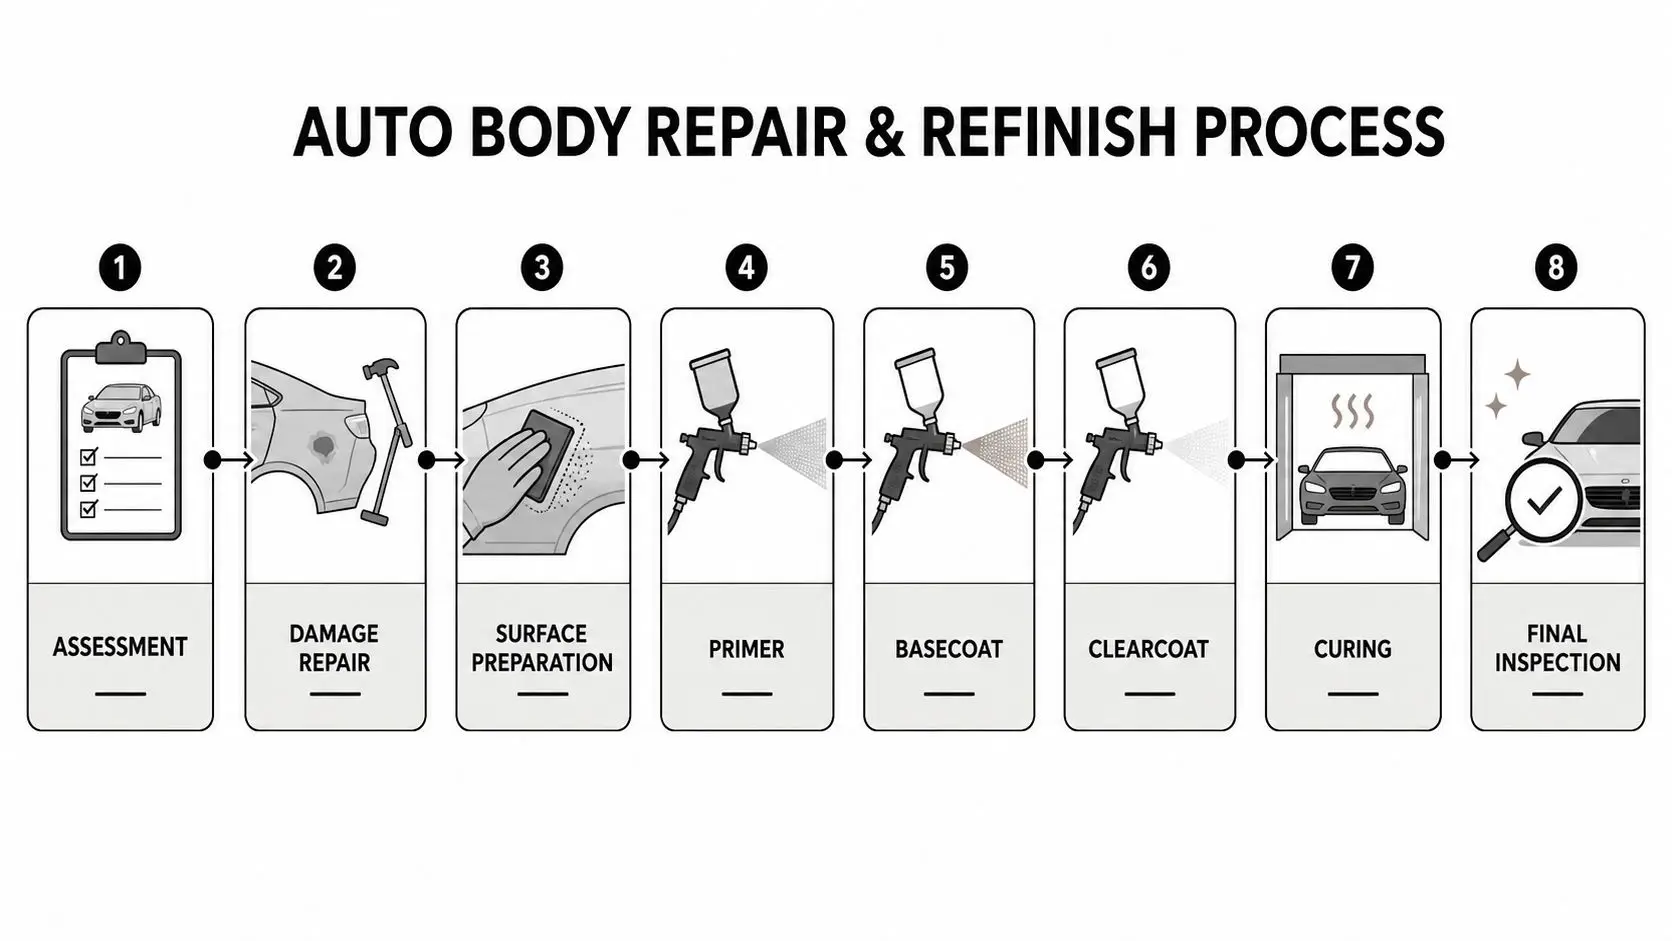
You drop the car off, and the job starts to split into phases. The shop has to straighten the structure, correct the surface, match the paint, then cure and reassemble it in a way that still fits the vehicle's original geometry.
The first day is about finding the hidden damage
A car with structural movement needs measurement before anyone worries about cosmetics. Shops use frame benches, laser measurement, and pulling equipment to bring the body back to spec, then decide whether a panel can be repaired or should be replaced. That choice affects more than appearance. It changes labour time, part cost, panel fit, and whether the finish will hold up once the car is back in service.
Part selection also changes the result. OEM parts usually fit closest to factory geometry, aftermarket parts can lower the bill but may need more adjustment, and recycled parts can be a good option if the donor piece is clean and straight. You see the difference later in the panel gap, the trim fit, and whether the lamp, bumper, and moulding sit square at pickup.
Paint work is controlled, not guessed
Once the metalwork is done, the shop moves into filler, primer surfacer, block sanding, masking, sealer, and basecoat. The colour gets matched under controlled lighting because a shade that looks close in the booth can still read wrong in daylight if the metallic orientation or blend is off. A strong refinish is about more than colour. It depends on surface texture, edge transition, and how the new coating sits against the old one.
Modern refinishing also has to stay inside VOC compliance. Canada's automotive refinishing sector emits over 5 kilotonnes of volatile organic compounds each year from coatings and surface cleaners, and federal rules set concentration limits across 14 product categories Environment and Climate Change Canada VOC rules. Toronto's reporting guidance adds another layer of control, since shops using more than 150 litres of paint products may cross the VOC reporting threshold and must track paint, welding rod, and solvent usage carefully Toronto autobody fact sheet.
The last stage is clearcoat, cure time, polish, and reassembly. If the repair involves safety systems, the car may also need ADAS calibration before it leaves the bay. A quality job does not just look shiny. It is aligned, cured, documented, and ready to drive.
What the pickup should show you
- Even gloss and colour: The repaired area should blend cleanly in daylight, not only under shop lights.
- Clean edges and trim: Rubber, glass, and mouldings should be free of overspray and tape marks.
- No obvious rework: The surface should not show sanding scratches, solvent texture, or soft edges.
Realistic Timelines and What Drives the Cost
Two cars can arrive with similar-looking damage and still land in very different price bands. The reason usually isn't the number of panels, it's what sits behind them, how many parts are needed, and whether the repair touches structure, refinishing, or calibration.
Here's a practical way to think about common jobs in Canada.
| Repair Scenario | Typical Timeline | Approximate Cost Range |
|---|---|---|
| Minor scuffs or bumper cosmetic work | A few days | Low hundreds to low thousands |
| Single-panel refinish | Several days | Mid hundreds to low thousands |
| Multi-panel collision repair with blending | One to several weeks | Low thousands to mid thousands |
| Structural repair with parts delays and calibration | Several weeks | Mid thousands and up |
A bumper cover respray can move quickly if parts are in stock and the damage is purely cosmetic. A unibody hit can take far longer because the shop has to tear down the area, find hidden damage, approve supplements, order parts, repair structure, refinish adjacent panels, and then recalibrate anything tied to cameras or sensors.
The estimate app most insurers use is good at visible damage, but it often misses the hidden pieces uncovered during teardown. That's why supplements are so common in real-world repairs, and why the final invoice often changes after disassembly. The cost driver is not just labour hours, it's the chain reaction caused by one bent bracket or one delayed component.
A repair price usually climbs when the job includes blending, calibration, or a part that's sitting on backorder. The sheet metal is only part of the bill.
For a consumer-facing example of how bumper pricing is often broken down, the bumper repair cost guide gives a useful reference point without pretending every car lands in the same bracket. That's the honest way to shop this work, by asking what has to be repaired, what has to be replaced, and what has to be documented before paint ever starts.
Working With Insurance Without Losing Control
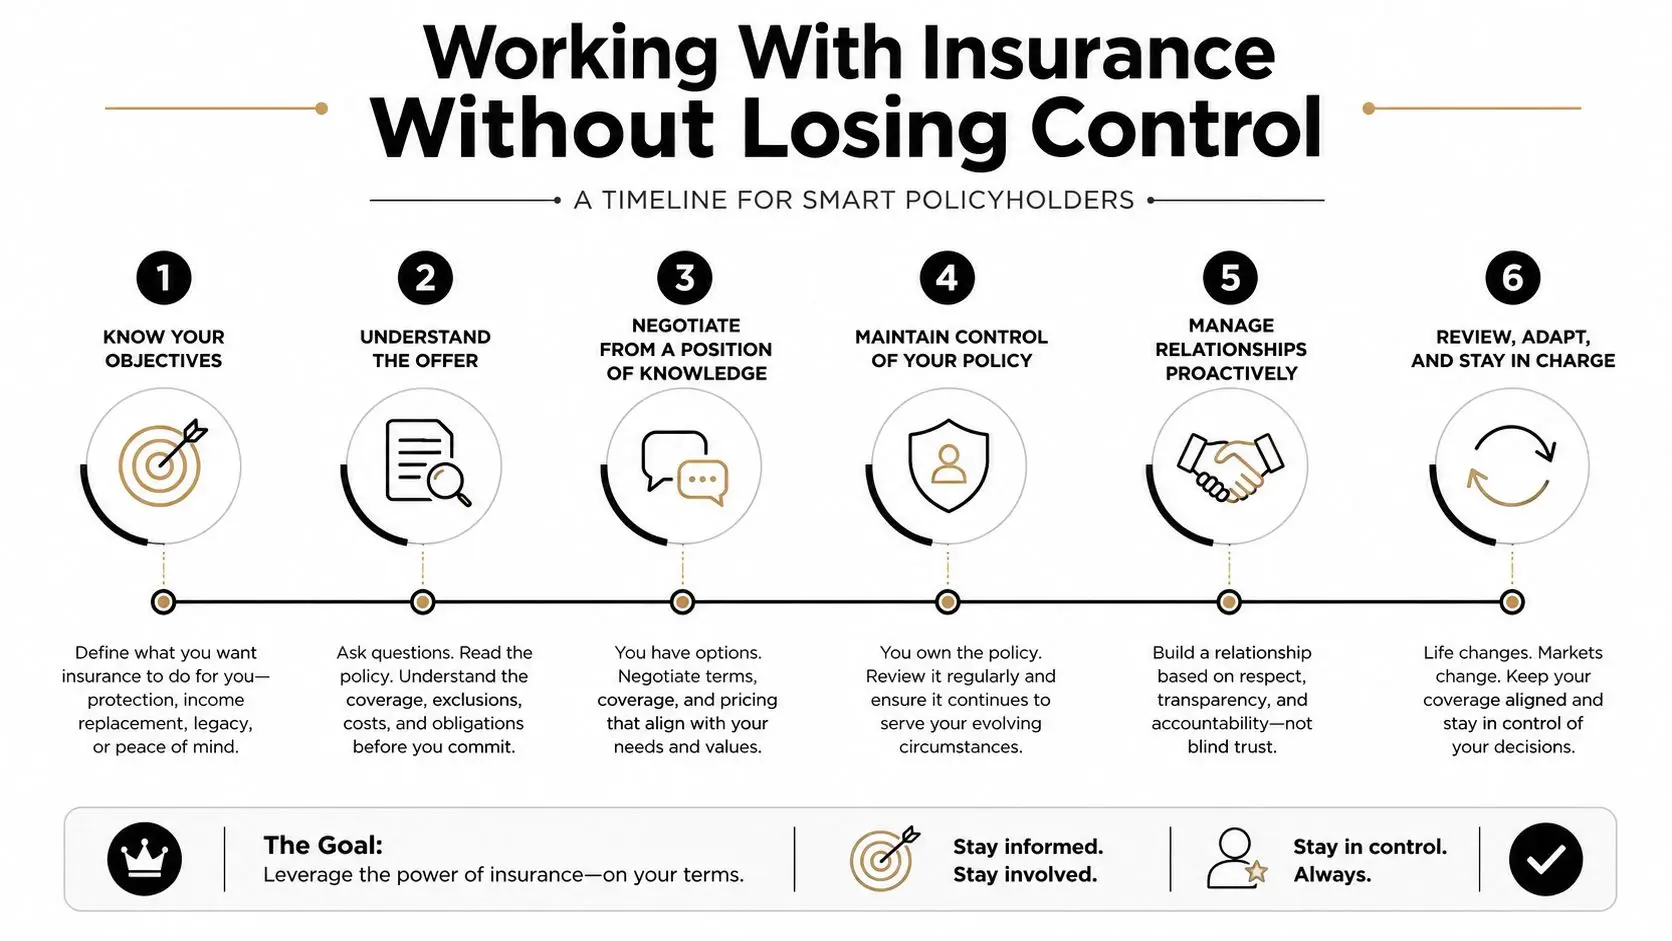
Insurance should help organise the repair, not take control of every decision. You still decide where the car goes, what work gets approved, and whether the estimate reflects the damage that was found.
Start with the claim decision, then keep your records tight
If the damage is close to your deductible, paying out of pocket can make more sense than opening a claim. If another driver is at fault, their liability coverage may change the conversation entirely. Either way, keep the estimate, photos, claim number, rental paperwork, and every supplement notice in one place.
The shop's job is to translate damage into repair language the insurer can review. That means photos, measurements, line-item pricing, and a clear explanation of why a panel is being repaired, replaced, or blended. Ontario drivers dealing with collision repair and refinishing often find that the cleanest approvals come from shops that already work smoothly with insurer workflows, because the paperwork is complete the first time around.
Ask the right questions before anyone starts
- Who is paying for what? Confirm whether the estimate is insurer-approved, customer-paid, or waiting on supplement approval.
- What happens if hidden damage shows up? Ask how supplements are written and when you'll be called.
- Is rental coverage active? Check the policy, not just the verbal promise, and keep the confirmation.
The right facility still matters. If you want a broader explanation of how claims and approvals are usually handled, the car repair insurance overview is a practical place to compare the usual steps. For many drivers, the biggest mistake is approving a repair before the process has been explained in writing.
The communication rule is simple. Use a phone call for quick scheduling or status updates, but put approvals, supplements, part substitutions, and deadline changes in writing.
Quality Indicators That Separate a Lasting Refinish From a Quick One
A good refinish doesn't call attention to itself. It just looks right in sun, shade, rain, and garage light, and it keeps looking right after a few seasons of use.
What to inspect at pickup
The easiest check is colour. Stand back, move from daylight to a different angle, and look for a shift in metallic sparkle, hue, or depth. A proper blend should disappear into the surrounding panel work instead of ending in a hard visual line.
Next, run your eyes along the gaps, trim, and lamp surrounds. A quality repair keeps panel spacing even and the trim seated without gaps that weren't there before. If the bumper sits tight on one side but proud on the other, the finish may look fine while the fit says something else.
Then look for the quieter signs of workmanship. Orange peel should be consistent, not wildly different from panel to panel. Clearcoat should have depth, not a dry or hazy look, and the repair shouldn't show filler telegraphing or sanding marks once the light hits it from across the bay.
| Checkpoint | Lasting Refinish | Quick Cover-Up |
|---|---|---|
| Colour match | Blends in daylight and shade | Looks close only under booth lighting |
| Panel gaps | Even and consistent | One edge tight, another visibly off |
| Surface finish | Smooth, even gloss | Heavy orange peel or flat, dull spots |
| Edges and trims | Clean, no overspray | Tape lines, overspray, rough masking |
| Long-term behaviour | Holds up after curing | Risks peeling, dieback, or delamination |
Failure modes show up later, not always on day one
A rushed job can look fine at pickup and still fail weeks later. Delamination, solvent pop, and dieback usually come from shortcuts in prep, contamination, or curing, not from the colour code itself. That's why a written warranty matters, along with a clear note about what it covers and what it excludes.
For owners who want to understand the calibration side of a modern repair, the ADAS calibration guide is useful context, because sensor work and finish work now overlap more often than they used to. A car with modern electronics is harder to hide shortcuts on, even when the paint looks good in the parking lot.
How PPF and Refinishing Work Together to Protect Value
Paint protection film and refinishing shouldn't be treated like separate upsells. They're part of the same value-protection plan, especially after a repair where the fresh finish has already absorbed the cost and labour of restoration.
PPF belongs after the refinish has fully cured, not immediately over fresh paint. The film is a final layer, added when the surface is ready, so it can help shield the repaired area from rock chips, bug acids, road grime, and UV exposure. If the paint is still soft, film can trap issues instead of protecting the finish.
A useful way to think about it is this. The refinish restores the vehicle's appearance, while PPF helps preserve that result. That matters when a buyer, appraiser, or future buyer's inspector looks at the car later, because a repaired panel that still presents cleanly tends to feel more credible than one that already shows abrasion or edge wear.
For a practical breakdown of film types and use cases, the car paint protection guide is a solid outside reference, and the related PPF against rock chips guide shows why that film choice matters on the most exposed panels. On a new refinish, those decisions work best when they're discussed as part of the repair plan, not at the counter after the paint booth is already booked.
Documentation matters here too. A repair file that records the parts replaced, the refinish steps, and the later protective film gives a future buyer a cleaner story. That doesn't erase diminished value, but it does reduce doubt, and in this market, doubt costs money.
A Driver Checklist Before You Approve the Work
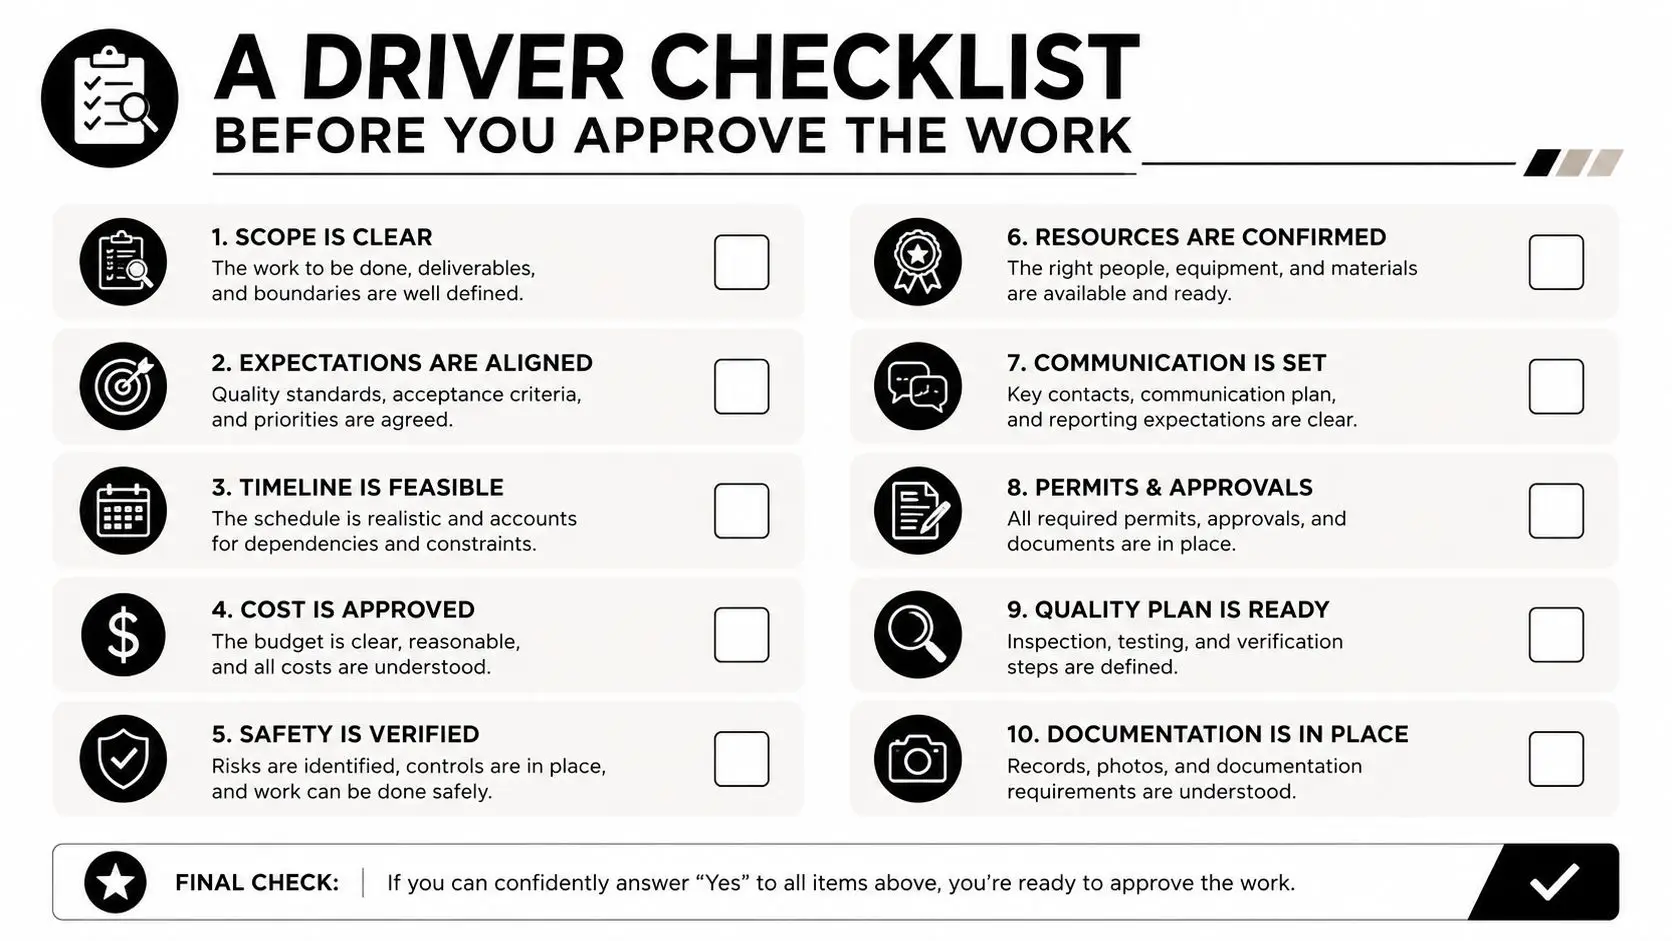
Before you sign off, ask for the repair in writing and read it line by line. A serious shop should be able to show you the intake photos, the estimate, the insurer status, and the repair sequence without hesitation.
Use this as your counter check
- Written line items: Confirm tear-down, structure, panel work, prep, paint, clearcoat, blend areas, and calibration are listed separately.
- Parts clarity: Ask whether the shop plans OEM, aftermarket, or recycled parts, and why.
- Warranty terms: Get the refinish warranty in writing, including what it excludes.
- Insurance status: Make sure the file shows what has been approved and what is still pending.
- Intake evidence: Look for photos taken when the car came in, not just at the estimate stage.
- Completion target: Ask for a realistic pickup window and a named date if parts arrive on time.
- Process discipline: Ask who signs off on colour match, what booth conditions are used, and how final polish is handled.
- Sublet work: Confirm how glass, mechanical, and calibration work will be documented.
- Communication plan: Decide whether updates will come by phone, email, or text, then stick to one channel for approvals.
- Value planning: If you're thinking about film after the repair, ask how that gets scheduled after cure.
A shop that handles refinishing, protection options, and documentation as one conversation is usually easier to work with than one that treats each part of the job like a separate sale. The collision repair shop page gives a sense of how that kind of workflow is usually presented to drivers who want the whole repair organised cleanly.
If your car needs collision repair and refinishing, Carmedics Autowerks Inc can help with body repair, paint matching, refinishing, PPF options, and the documentation that keeps the repair process clear from intake to pickup. Visit Carmedics Autowerks Inc to talk through the damage, the estimate, and the right next step for your vehicle.